Astrill Setup Manual:Change Gateway and DNS on Boxee Box
Jump to navigation
Jump to search
Change Gateway and DNS on Boxee Box
Step 1 - From the Boxee ‘home’ screen, hit the Boxee button on your remote.
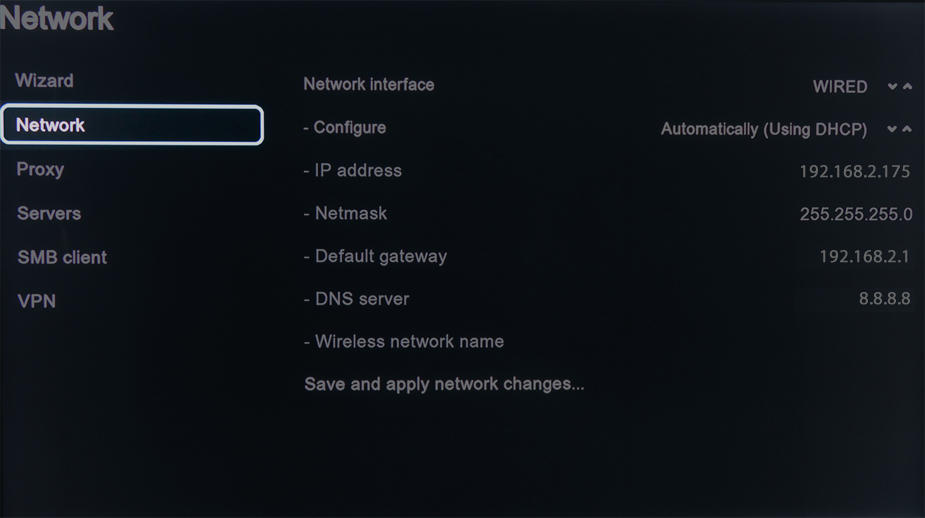
Step 3 - Choose the ‘Network’ icon.
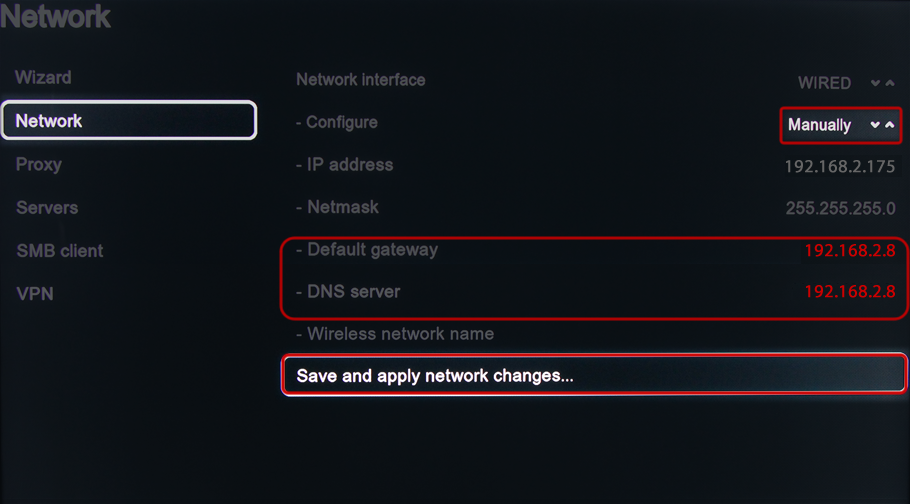
Step 5 - Set VPN Sharing IP address for ‘Default Gateway’ and ‘DNS Server’.
Change the ‘Configure’ setting to ‘Manually’, move down to the ‘Default gateway’ and ‘DNS server’ entries, and type the VPN Sharing IP address you noted down earlier in VPN Sharing prompt here. Your VPN Sharing IP address might be different in most cases. Don't just copy IP address from the example above, but get the correct IP address from VPN Sharing settings in Astrill application.
Choose ‘Save and apply network changes…’.
That’s all! You should now be able to browse the Boxee App repository freely.
Note : Make sure the computer (sharing OpenVPN/StealthVPN connection) and the other device are connected to the same Wifi network/router. You can share with ANY number of devices if connected and configured as above on same network.

