Astrill Application:OpenVPN Features: Difference between revisions
| Line 163: | Line 163: | ||
[[File: | [[File:Eta1.jpg]] [[File:Eta2.jpg]] | ||
Revision as of 08:09, 12 March 2013
Site Filter
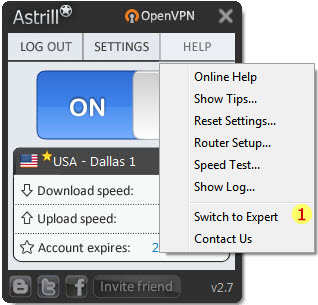
Site Filter is one of the OpenVPN features that will give you options which sites you want to go through VPN. Note that you have to be in Expert mode to see the additional features under your Settings menu, see how to switch to Expert mode.
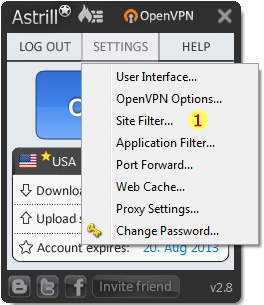
- Site Filter feature is under the Settings Menu.
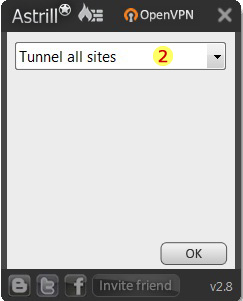
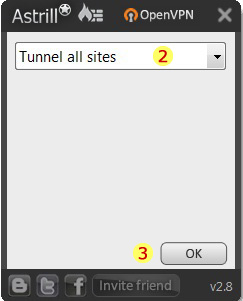
- Once you click on the Site Filter feature, you will see it is set to "Tunnel all sites" mode as default.
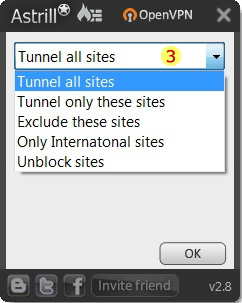
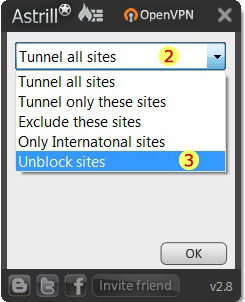
- Site Filter modes, click on the drop down arrow button to show the Site Filter modes.
Tunnel all sites
This mode will allow all sites to go through VPN and is best for your privacy protection. This mode is more secure among other options since all sites are encrypted and protected.
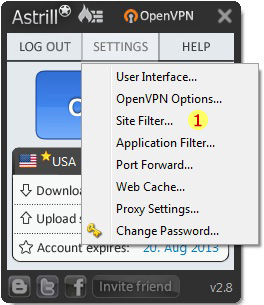
- To choose Tunnel all sites mode, go to Settings menu then choose Site Filter.
- By default it is set to Tunnel all sites mode.
- Click OK, now all sites will go through VPN even the local sites.
Tunnel only those sites
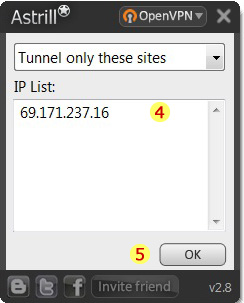
This mode will allow you to specify the only sites that you wish to tunnel through VPN. You will have to specify a list of IP addresses(one per line). You can use IP blocks in CIDR format as well, e.g. 12.13.14.0/24.
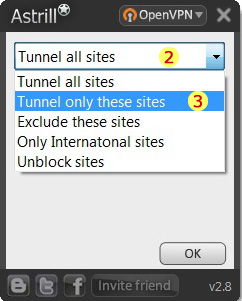
- To choose Tunnel only these sites mode, go to Settings menu then choose Site Filter.
- Click the drop down arrow to show the other Site filter modes.
- Choose Tunnel only these sites.
- Specify the list of IP addresses that you wish to tunnel through VPN. Shown example is the IP address of facebook.
- Click OK.
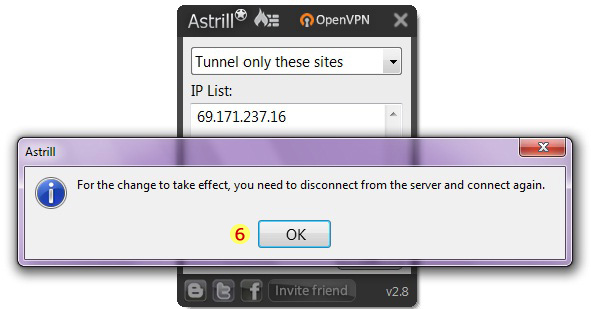
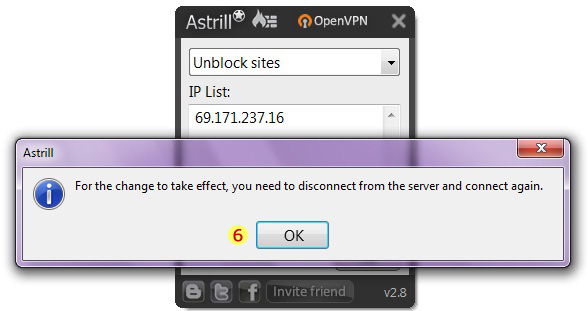
- A message box will appear that you need to disconnect from the server, click OK.
Exclude these sites
This mode will allow you to specify the sites that you do not want to tunnel through VPN. You will have to specify a list of IP addresses(one per line as well). You can use IP blocks in CIDR format as well, e.g. 12.13.14.0/24.
- To choose Exclude these sites mode, go to Settings menu then choose Site Filter.
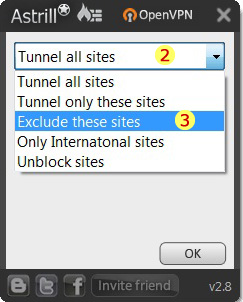
- Click the drop down arrow to show the other Site filter modes.
- Choose Exclude these sites.
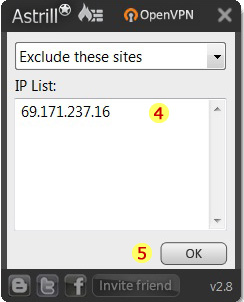
- Specify the list of IP addresses that you wish not to tunnel through VPN.
- Click OK.
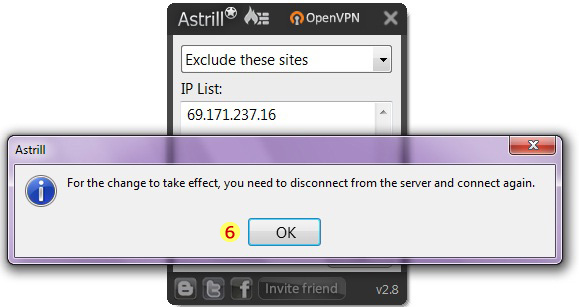
- A message box will appear that you need to disconnect from the server, click OK.
Only International sites
This mode will allow you to unlock geo-locked contents, for example streaming TV, and all local sites will load directly thus their speed will not be affected.
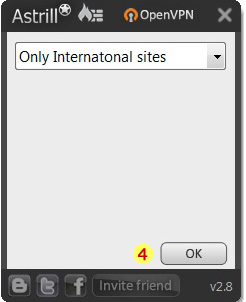
- To choose Only international sites mode, go to Settings menu then choose Site Filter.
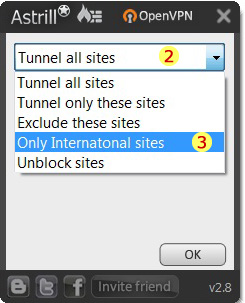
- Click the drop down arrow to show the other Site filter modes.
- Choose Only international sites.
- Click OK.
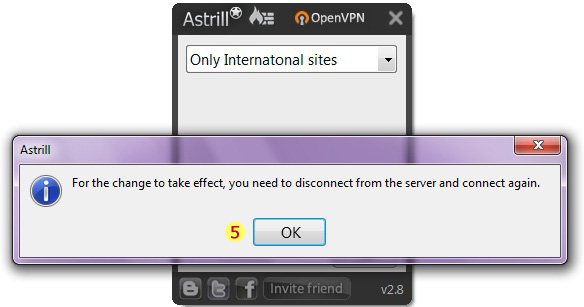
- A message box will appear that you need to disconnect from the server, click OK.
Unblock sites
If you are located in China, use this mode to tunnel only blocked sites through VPN. All other sites will go directly.
- To choose Unblock sites mode, go to Settings menu then choose Site Filter.
- Click the drop down arrow to show the other Site filter modes.
- Choose Unblock sites.
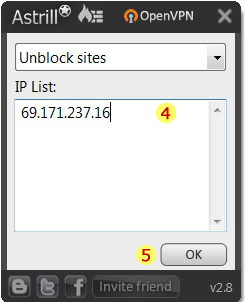
- Specify the list of IP addresses that you wish to tunnel through VPN. Shown example is the IP address of facebook.
- Click OK.
- A message box will appear that you need to disconnect from the server, click OK.
Application Filter
Application Filter is one of the OpenVPN features that will give you options which applications you want to go through VPN. Note that you have to be in Expert mode to see the additional features under your Settings menu, see how to switch to Expert mode.
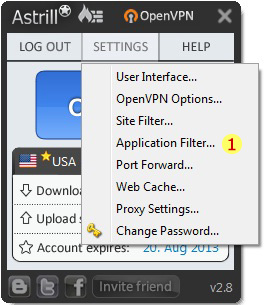
- Application Filter feature is under the Settings Menu.
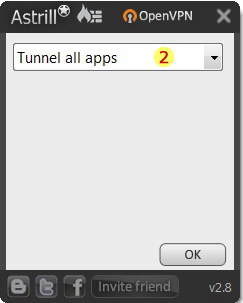
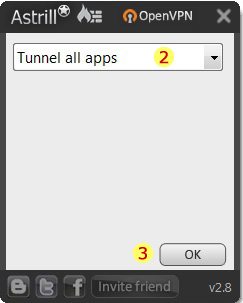
- Once you click on the Application Filter feature, you will see it is set to "Tunnel all apps" mode as default.
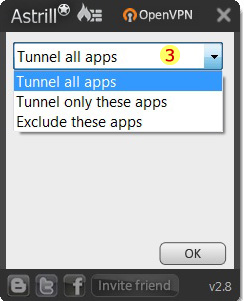
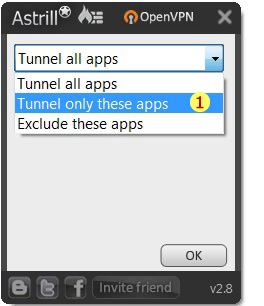
- Application Filter modes, click on the drop down arrow button to show the Application Filter modes.
Tunnel all apps
This mode will allow all applications to go through VPN and is best for your privacy protection. This mode is more secure among other options since all applications are protected.
- To choose Tunnel all apps mode, go to Settings menu then choose Application Filter.
- By default it is set to Tunnel all apps mode.
- Click OK, now all applications will go through VPN.
Tunnel only these apps
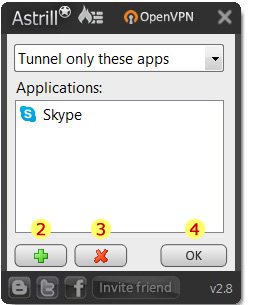
This mode will allow you to specify the only application/s you wish to go through VPN.
- Click the drop down arrow and select Tunnel only these apps.
- Click the Add button and select a program that you want to tunnel (Example: Skype).
- To remove from the list, highlight the program and click the "x" button.
- Click OK.
Exclude these apps
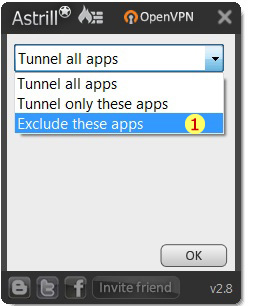
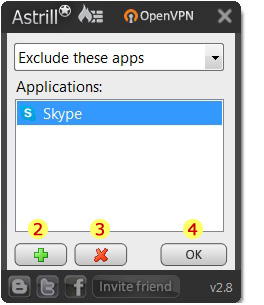
Exclude these apps, this mode will allow you to exclude selected application/s to go through VPN.
- Click the drop down arrow and select Exclude these apps.
- Click the Add button and select a program that you want to tunnel (Example: Skype).
- To remove from the list, highlight the program and click the "x" button.
- Click OK.
Port Forward
This function forwards a port from VPN IP(external IP) to your computer. This is useful for Bittorent download programs.
File:Port Forward1.jpg File:Port Forward2.jpg File:Port Forward3.jpg
- Click Help >> Switch to Expert.
- Click Settings >> Port Forwarding options.
- Tick the Enable Port Forwarding box (A specific ports will be assigned to you).
- Click OK.
Web Cache
Web Caching is used to speed up web surfing by keeping static web files on your hard disk.
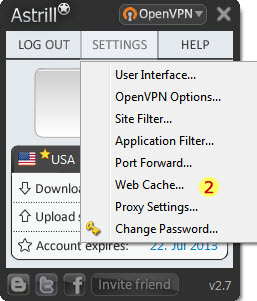
- Click Help >> Switch to expert.
- Click Settings >> Web Cache options.
- Tick Enable Web Caching box.
- For the fastest surfing, select Max level. In case you receive outdated pages, lowering caching level will fix it.
- This is the folder where cached files will be stored.
- How many days cached will be kept.
- How much memory to use for caching files.
- Specify list of sites you wish to exclude from caching.
- Specify list of sites you wish to block (for example ads).
- Delete cached files permanently.
- Click OK.
OpenVPN Options
This OpenVPN features will allow you to choose OpenVPN mode whether UDP or TCP mode and connection port for better speed and stability.
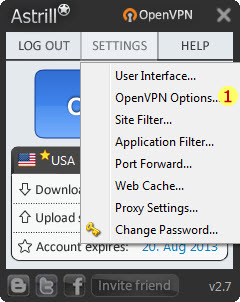
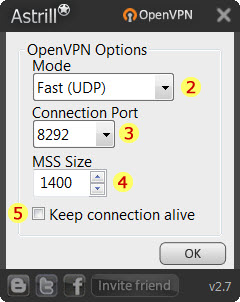
- OpenVPN Options is under the Settings menu.
- By default, OpenVPN mode is set to Fast (UDP).
- By default, the Connection Port is set to 8292.
- By default, the MSS size value is set to 1400. MSS Size is only enabled in Fast (UDP) mode. If you have problem with connection speed, you can lower it's value to 1300 or 1200.
- By default, the Keep connection alive check box is unchecked. You can check this box if you want to keep the connection with VPN server alive. You can use this option only if you experience frequent disconnection.
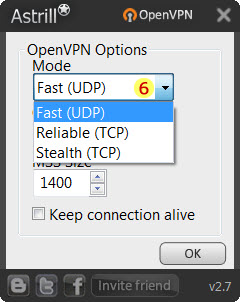
- Click on the drop down arrow on Mode to show other OpenVPN modes. It has Fast (UDP), Reliable (TCP) and Stealth (TCP) mode.
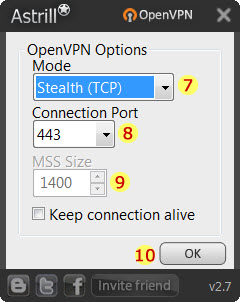
- For stability, you can choose Stealth (TCP) mode.
- Set the Connection Port to 443.
- You will notice that the MSS Size box will be disabled if you choose any (Reliable or Stealth) TCP mode.
- Click OK.
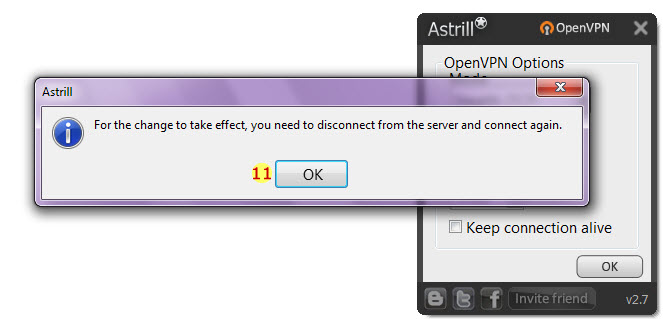
- Click OK, you have to disconnect from the server and then reconnect for the changes to take effect.
