Astrill Setup Manual:How to Change Region/Country in App Store: Difference between revisions
Jump to navigation
Jump to search
No edit summary |
No edit summary |
||
| Line 55: | Line 55: | ||
== '''STEP 7:''' Fill out all information == | == '''STEP 7:''' Fill out all information == | ||
'''NOTE''': DO NOT use same information (address/phone number) as mentioned below in screenshot. | |||
---- | |||
Go to this following link for generating legit Canadian address: http://www.fakeaddressgenerator.com/World/ca_address_generator | |||
[[File:Iosregion7.png|400px|]] | [[File:Iosregion7.png|400px|]] | ||
| Line 67: | Line 69: | ||
---- | ---- | ||
Revision as of 13:20, 22 August 2017
This tutorial is for iOS devices (iPhone, iPad, or iPod).
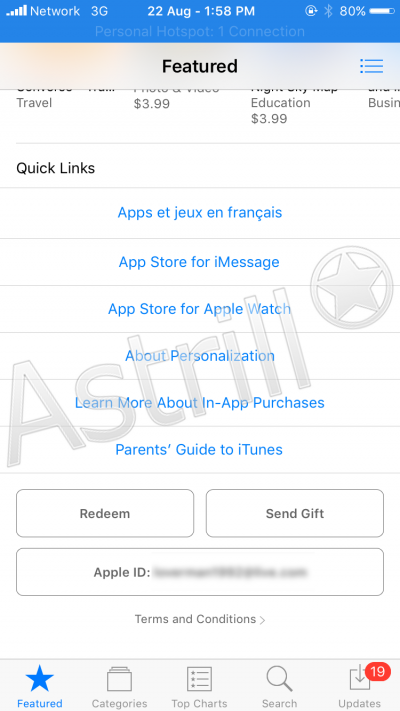
STEP 1: Go to the App Store.
Now scroll down to the bottom of App Store and tap the button which is showing your Apple ID.
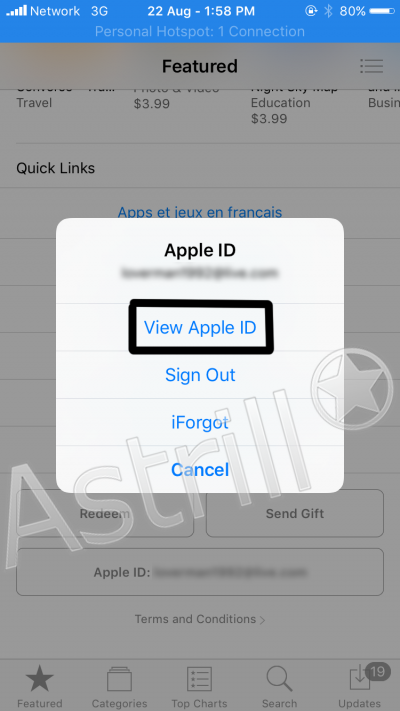
STEP 2: Tap View Apple ID.
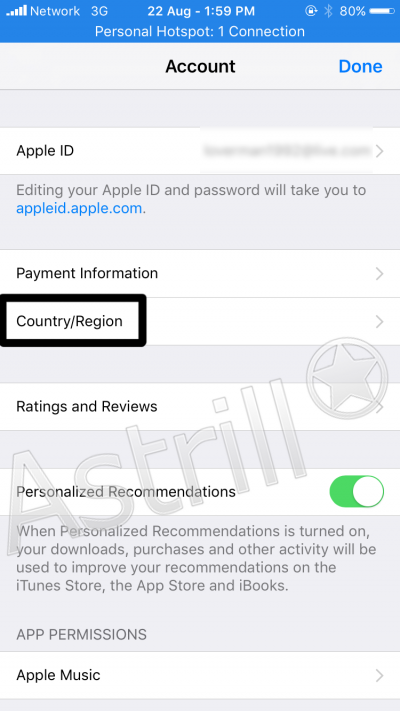
STEP 3: TAP on Country/Region
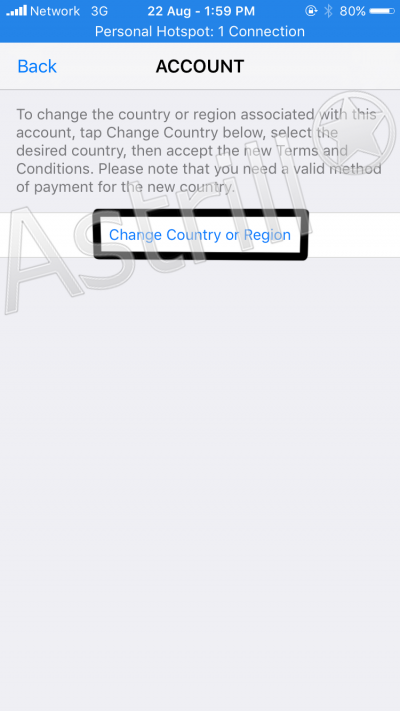
STEP 4: Tap Change Country or Region
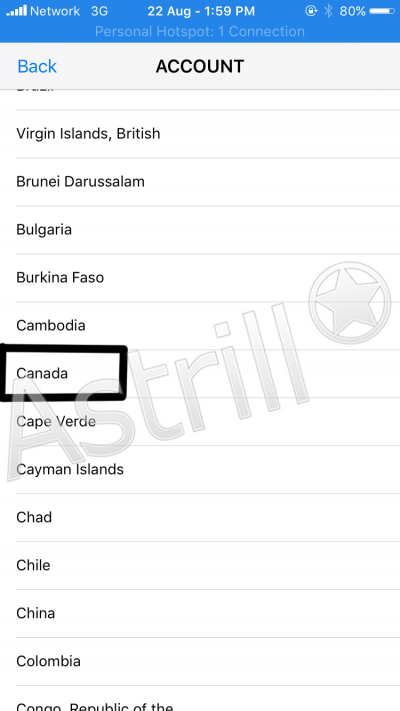
STEP 5: Select Canada
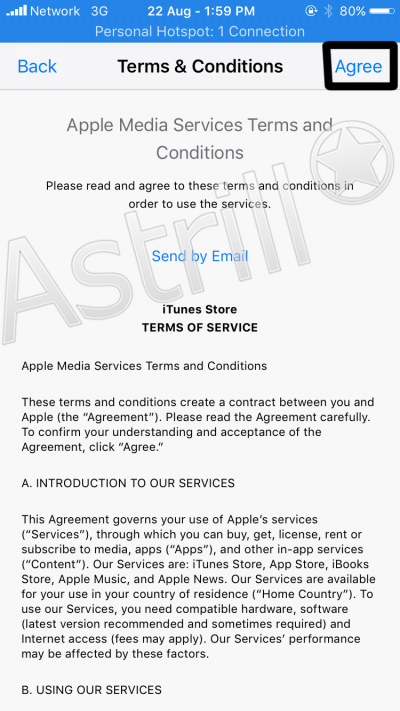
STEP 6: Tap Agree
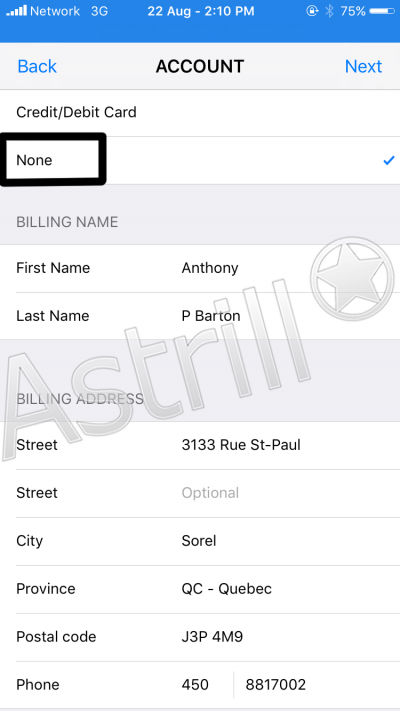
STEP 7: Fill out all information
NOTE: DO NOT use same information (address/phone number) as mentioned below in screenshot.
Go to this following link for generating legit Canadian address: http://www.fakeaddressgenerator.com/World/ca_address_generator
STEP 8: Installation
After filling out all information tap on "Next" to return to the App Store. Now tap in search box then type Astrill VPN and download it.
