Astrill Setup Manual:How to change your iPhone's DNS: Difference between revisions
Jump to navigation
Jump to search
No edit summary |
No edit summary |
||
| Line 30: | Line 30: | ||
== STEP 5 == | == STEP 5 == | ||
Delete the current DNS servers, and enter the new DNS servers. (If you enter more than one DNS server, be sure sure to separate the servers with commas.) Google DNS- enter 8.8.8.8 and 8.8.4.4 | Delete the current DNS servers, and enter the new DNS servers. (If you enter more than one DNS server, be sure sure to separate the servers with commas.) For Google DNS- enter 8.8.8.8 and 8.8.4.4 | ||
[[File:DNS4.jpg]] | [[File:DNS4.jpg]] | ||
Revision as of 03:28, 7 September 2014
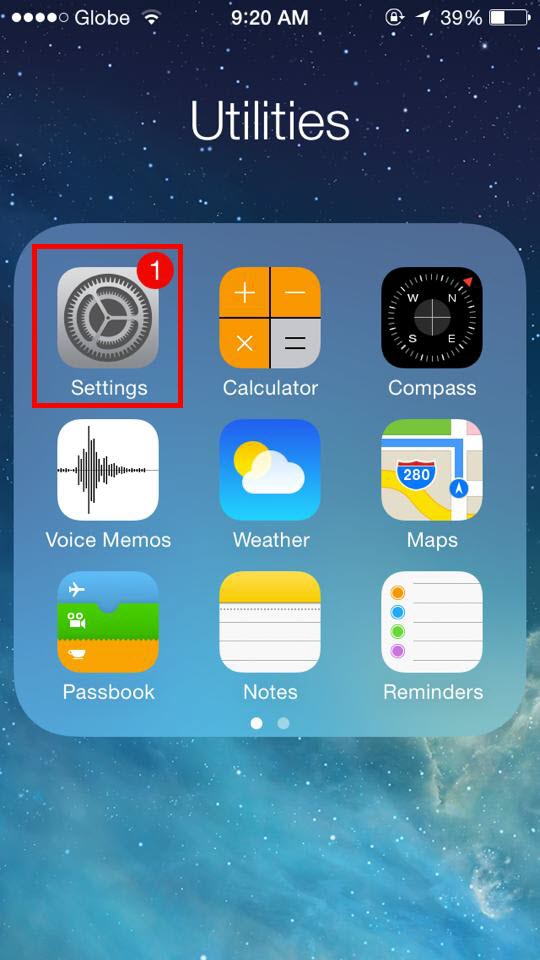
STEP 1
From the iPhone's home screen, tap Settings.
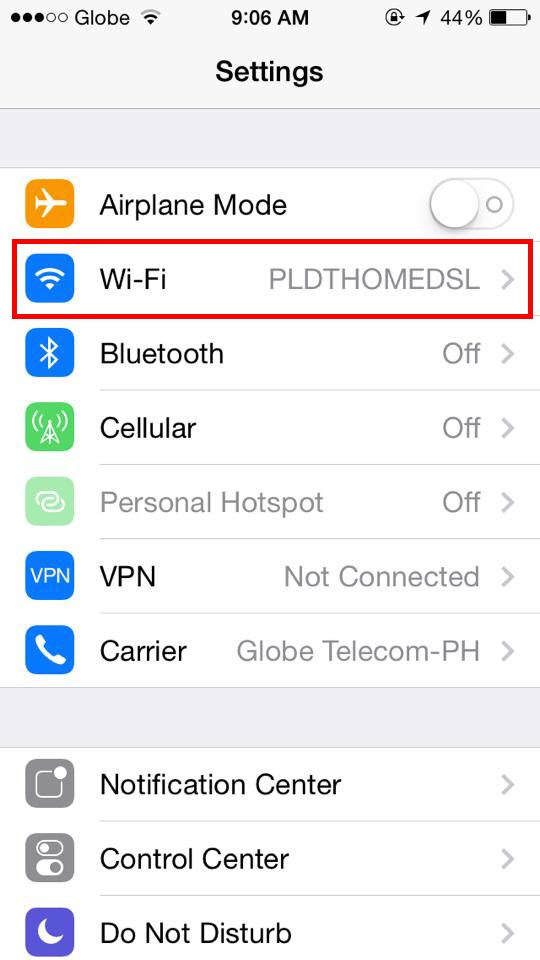
STEP 2
Tap Wi-Fi.
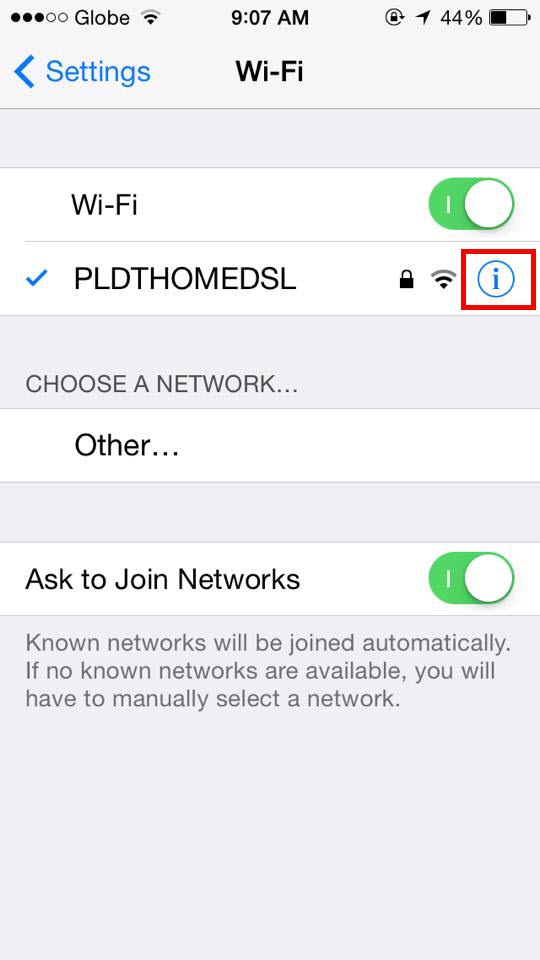
STEP 3
Find your wireless network in the list, and then tap the "i" icon.
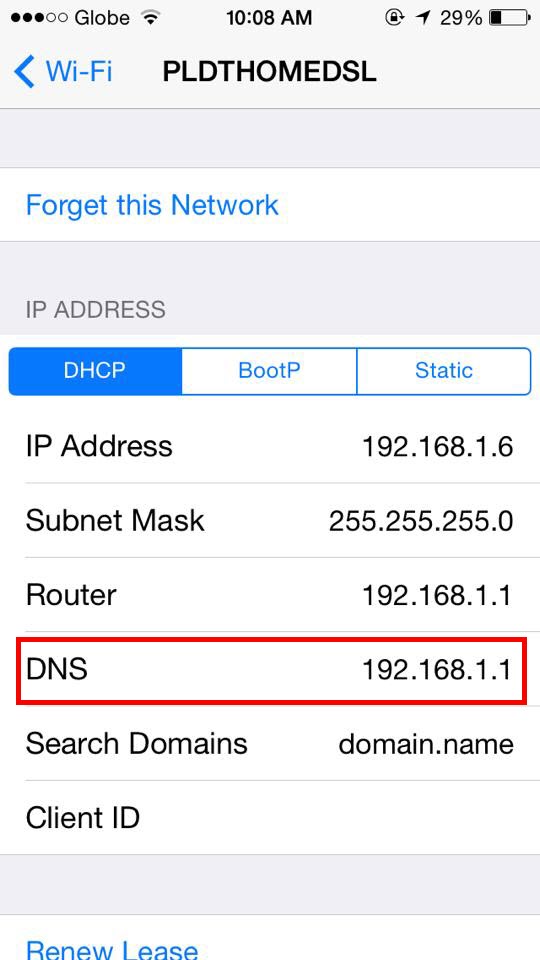
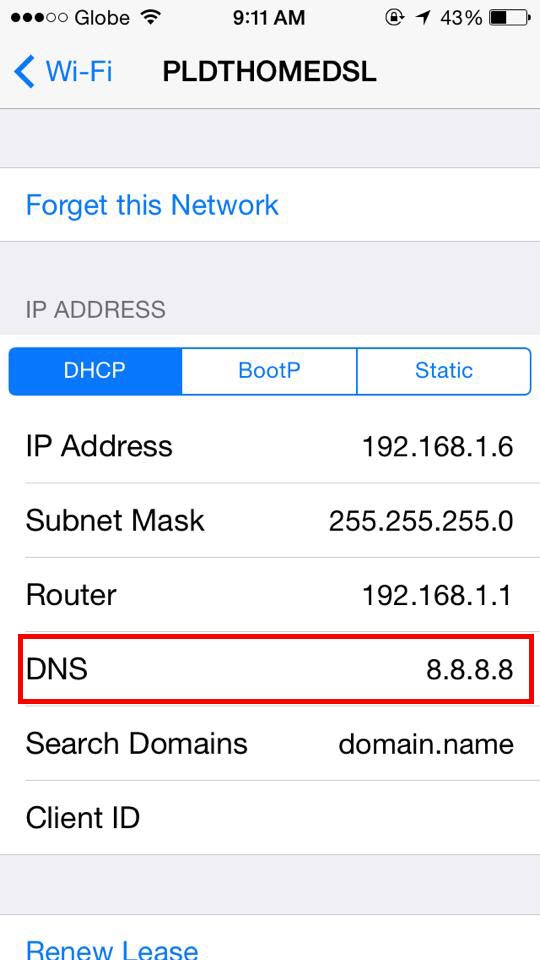
STEP 4
Tap the DNS field.
STEP 5
Delete the current DNS servers, and enter the new DNS servers. (If you enter more than one DNS server, be sure sure to separate the servers with commas.) For Google DNS- enter 8.8.8.8 and 8.8.4.4
