Astrill Setup Manual:How to configure IKEv2 IPSEC with Windows built-in client on Windows 8: Difference between revisions
No edit summary |
No edit summary |
||
| Line 5: | Line 5: | ||
[[File:Win8-ike1.png|border]] | [[File:Win8-ike1.png|border]] | ||
== '''Step 2''' == | |||
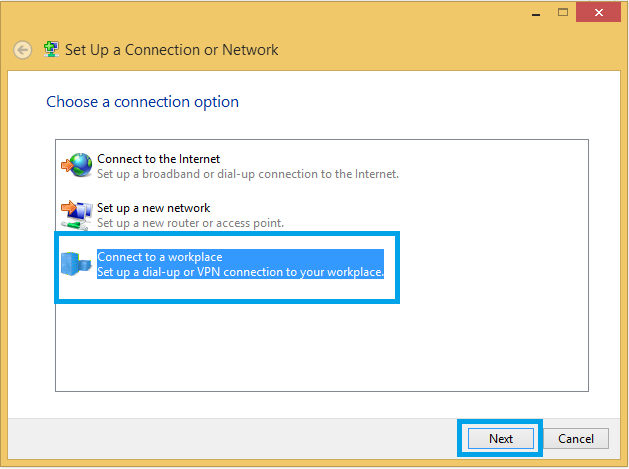
Select ''''Connect to a workplace'''' and click '''Next''' | |||
[[File: | [[File:Win8-ike2.png|border]] | ||
3 | == '''Step 3''' == | ||
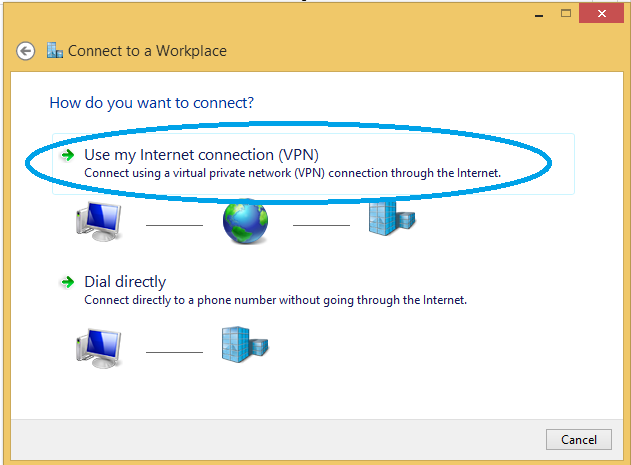
Select '''Use my Internet connection (VPN)'''. | |||
- | [[File:Win8-ike3.png|border]] | ||
== '''Step 4''' == | |||
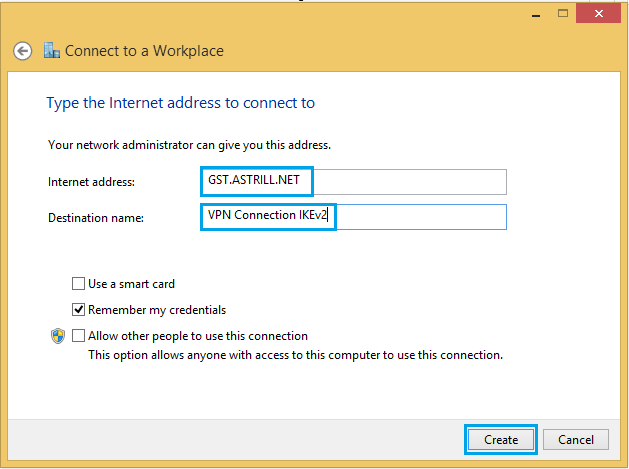
In '''Internet Address''', input the preferred '''Server Address''', for e.g. as '''GST.ASTRILL.NET'''. i | |||
In '''Destination Name''' you can provide any preferred label/name of the connection then click on ''''Create''''. | |||
[[File:Win8-ike4.png|border]] | |||
[[File: | == '''Step 5''' == | ||
Then go to the connection's properties; '''Network and Sharing Center''' > '''Change Adapter Settings''' and right click on the particular connection to select its '''Properties'''. | |||
[[File:Win8-ike5.png|border]] | |||
Within its properties, navigate to '''Security''' Tab and change the ''''Type of VPN''' : '''IKEv2'''' | Within its properties, navigate to '''Security''' Tab and change the ''''Type of VPN''' : '''IKEv2'''' | ||
[[File: | [[File:Win8-ike5.2.png|border]] | ||
Under '''Authentication''', select '''Use Extensible Authentication Protocol''' (EAP) option and press '''OK''' to save the settings. | Under '''Authentication''', select '''Use Extensible Authentication Protocol''' (EAP) option and press '''OK''' to save the settings. | ||
[[File: | [[File:Win8-ike5.3.png|border]] | ||
== '''Step 6''' == | |||
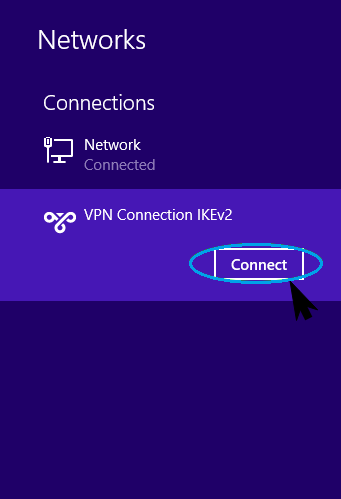
Then click on Network icon within windows taskbar and select the connection and click on ''''Connect'''' button. | |||
[[File: | [[File:Win8-ike6.1.png|border]] | ||
[[File: | [[File:Win8-ike6.2.png|border]] | ||
== '''Step 7''' == | |||
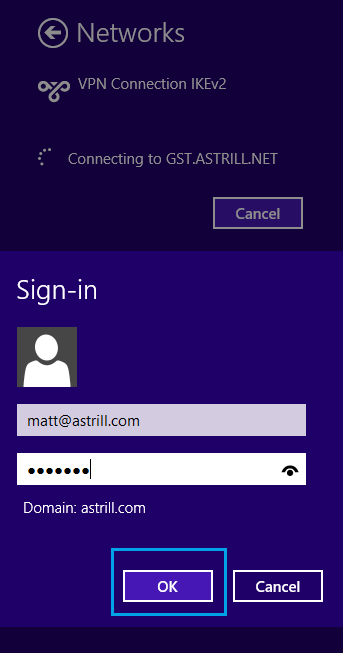
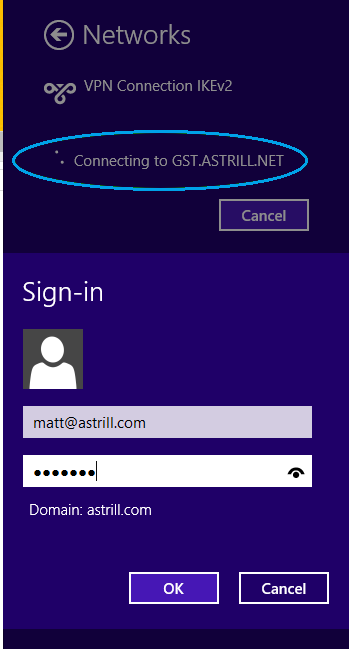
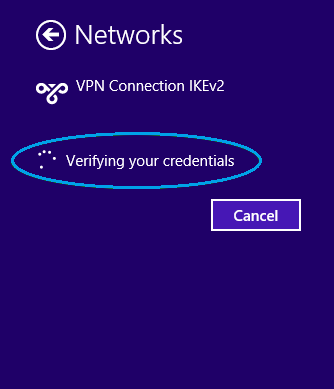
You need to then input your Astrill account's login credentials. | |||
[[File: | [[File:Win8-ike7.1.png|border]] | ||
[[File: | [[File:Win8-ike7.2.png|border]] | ||
[[File: | [[File:Win8-ike7.3.png|border]] | ||
== '''Step 8''' == | |||
You can verify that the VPN is connected from Network connections list and also check for the IP change from [http://www.astrill.com/check-ip.php Astrill Check My IP Page]. | |||
[[File: | [[File:Win8-ike8.1.png|border]] | ||
[[File: | [[File:Win8-ike8.2.png|border]] | ||
Revision as of 04:10, 28 June 2017
Step 1
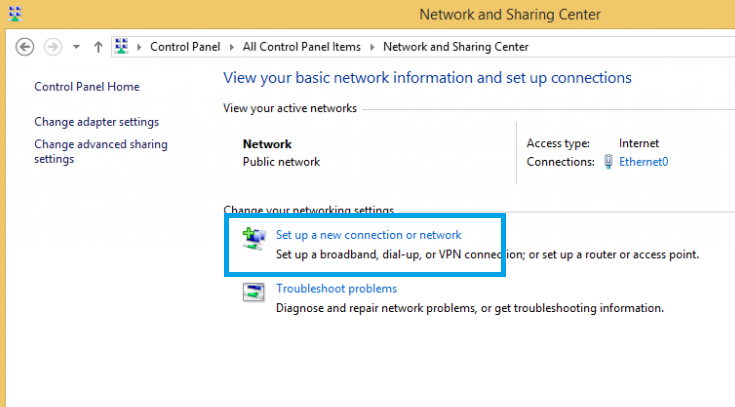
Go to Control Panel and select Network and Sharing Center. Then click on 'Set up a new connection or network'
Step 2
Select 'Connect to a workplace' and click Next
Step 3
Select Use my Internet connection (VPN).
Step 4
In Internet Address, input the preferred Server Address, for e.g. as GST.ASTRILL.NET. i
In Destination Name you can provide any preferred label/name of the connection then click on 'Create'.
Step 5
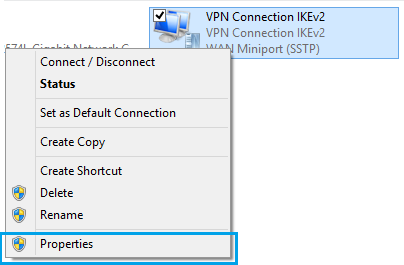
Then go to the connection's properties; Network and Sharing Center > Change Adapter Settings and right click on the particular connection to select its Properties.
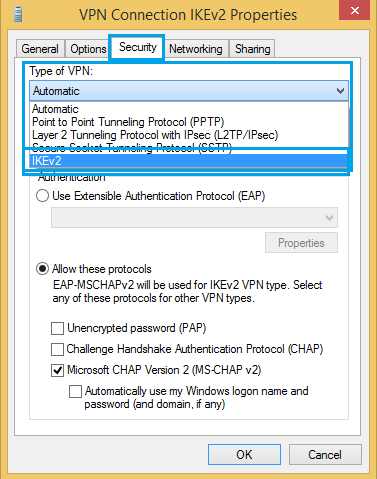
Within its properties, navigate to Security Tab and change the 'Type of VPN : IKEv2'
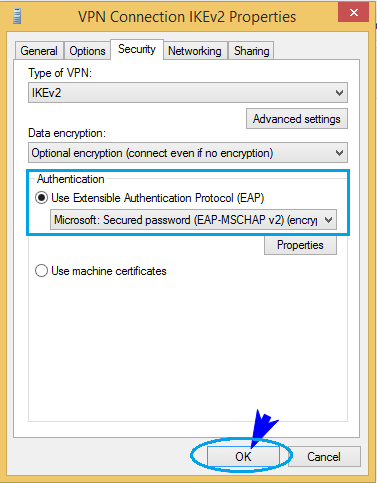
Under Authentication, select Use Extensible Authentication Protocol (EAP) option and press OK to save the settings.
Step 6
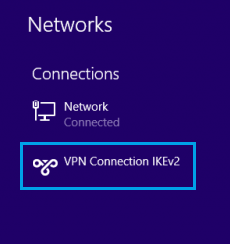
Then click on Network icon within windows taskbar and select the connection and click on 'Connect' button.
Step 7
You need to then input your Astrill account's login credentials.
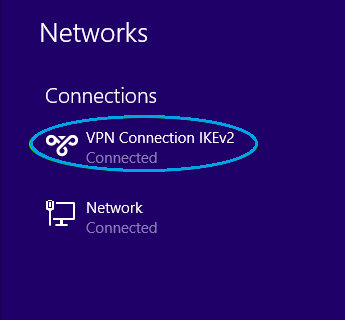
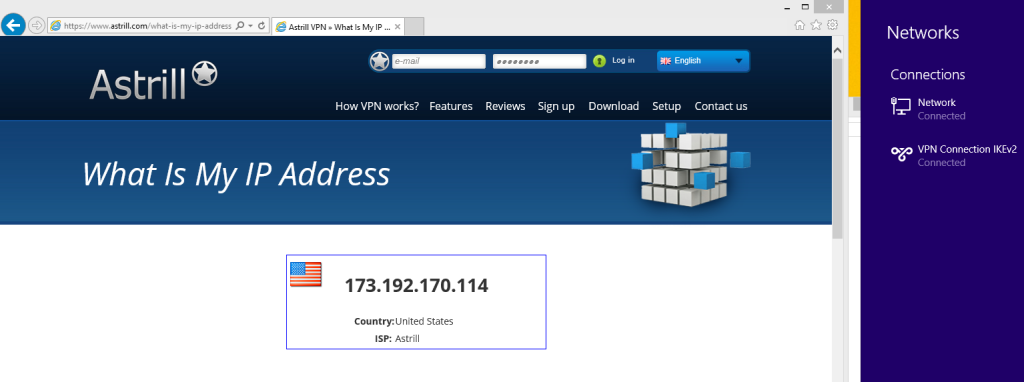
Step 8
You can verify that the VPN is connected from Network connections list and also check for the IP change from Astrill Check My IP Page.
