Astrill Setup Manual:How to configure L2TP/IPSec PSK on Android: Difference between revisions
Jump to navigation
Jump to search
No edit summary |
No edit summary |
||
| Line 22: | Line 22: | ||
== '''Step 4''' == | == '''Step 4''' == | ||
Tap on ''Add VPN'''. | Tap on '''Add VPN'''. | ||
[[File:and4.jpg]] | [[File:and4.jpg]] | ||
| Line 34: | Line 34: | ||
== '''Step ''' == | == '''Step 6''' == | ||
Here is a link to all Astrill L2TP, PPTP and IPSec servers. To make setup even easier, server names are the same for all 3 VPN types. https://members.astrill.com/servers-list.php | |||
For '''VPN name''' type in '''Astrill IPSec'''. | |||
For '''Set VPN server''' type in '''GTX1.ASTRILL.NET''' (always check Servers List) | |||
For '''Set IPSec pre-shared key''' type in '''way2stars''' | |||
Once you are done, tap on '''Save''' button | |||
== '''Step ''' == | == '''Step ''' == | ||
Revision as of 03:01, 24 October 2012
Step 1
On the main screen tap on Settings icon.
Step 2
Tap on Wireless & networks.
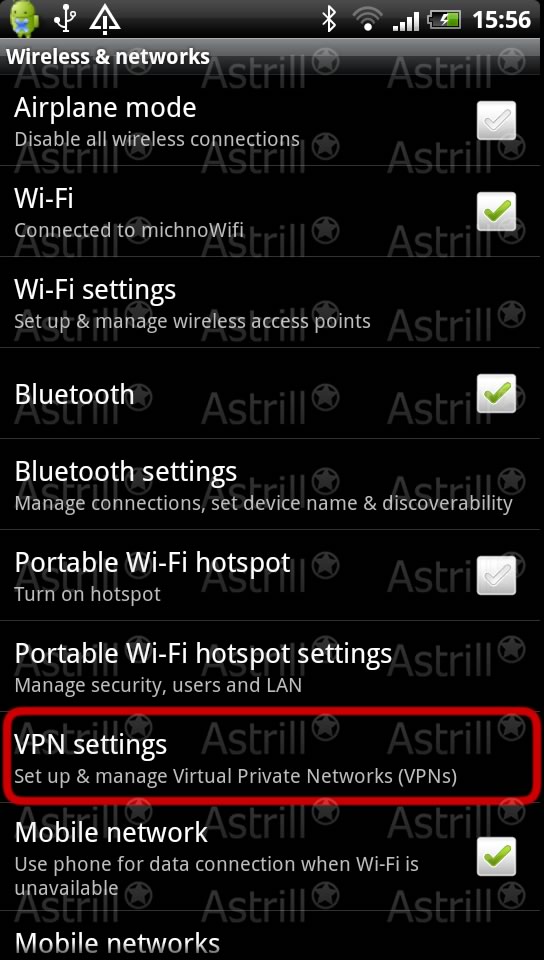
Step 3
Tap on VPN settings.
Step 4
Tap on Add VPN.
Step 5
Under Add VPN you can add as many VPN connections as you need. Let's get started, tap on Add L2TP/IPSec PSK VPN to create our first VPN connection.
Step 6
Here is a link to all Astrill L2TP, PPTP and IPSec servers. To make setup even easier, server names are the same for all 3 VPN types. https://members.astrill.com/servers-list.php
For VPN name type in Astrill IPSec. For Set VPN server type in GTX1.ASTRILL.NET (always check Servers List) For Set IPSec pre-shared key type in way2stars Once you are done, tap on Save button


