Astrill Setup Manual:How to configure PPTP with built-in client on Mac OS X: Difference between revisions
(→STEP 5) |
No edit summary |
||
| Line 1: | Line 1: | ||
<div style="text-align:center"><p style="font-size:50px;color:red">Attention! PPTP protocol won't be supported by Astrill after 1st January, 2021.</p> </div> | |||
=='''STEP 1'''== | =='''STEP 1'''== | ||
Latest revision as of 00:43, 1 December 2020
Attention! PPTP protocol won't be supported by Astrill after 1st January, 2021.
STEP 1
Click on System Preferences icon in dock.
STEP 2
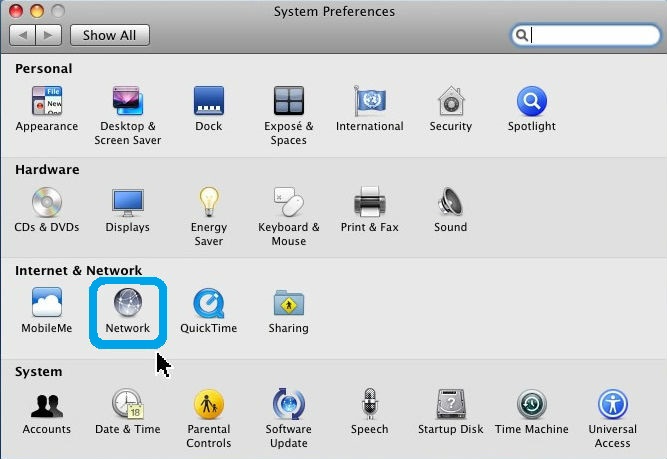
On System Preferences window, under Internet & Network, click on Network icon.
STEP 3
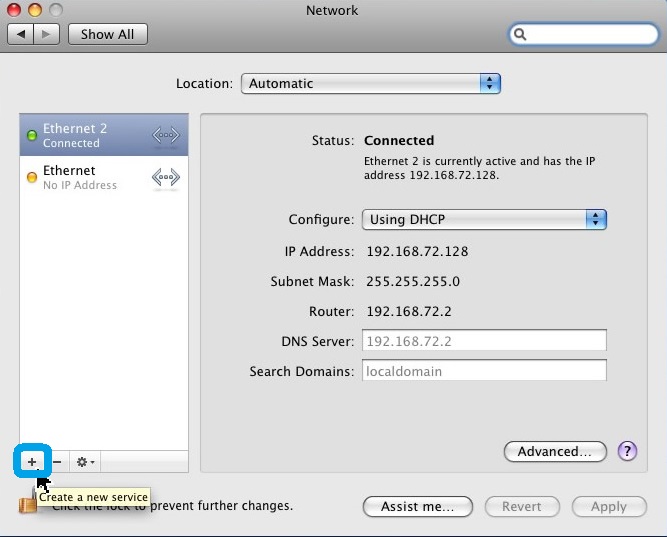
On Network window, click the plus (+) button to create PPTP VPN connection.
STEP 4
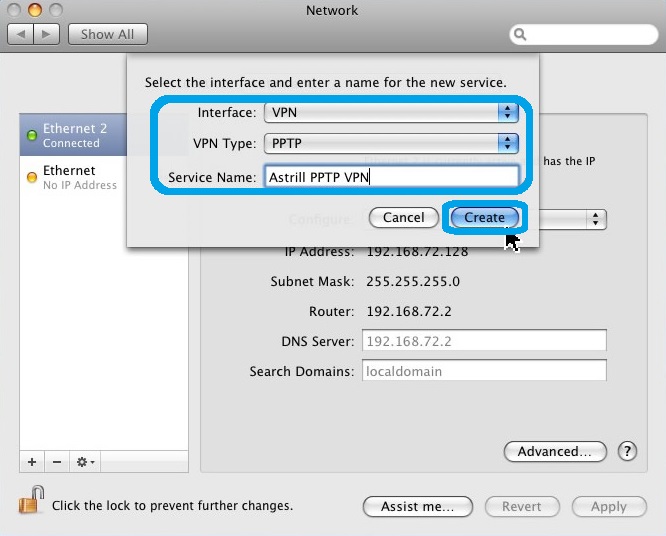
Fill out the required info:
- Interface, select VPN:
- VPN Type: select PPTP
- Service Name: type in Astrill PPTP VPN.
When done, click on Create button.
STEP 5
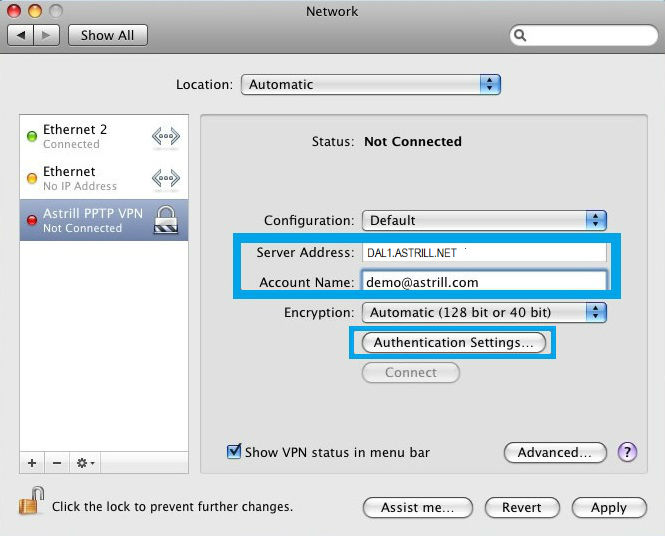
On Network screen, fill our required info:
- Server Name: See Servers List
- Account Name: Your Astrill username
When done, click on Authentication Settings... button.
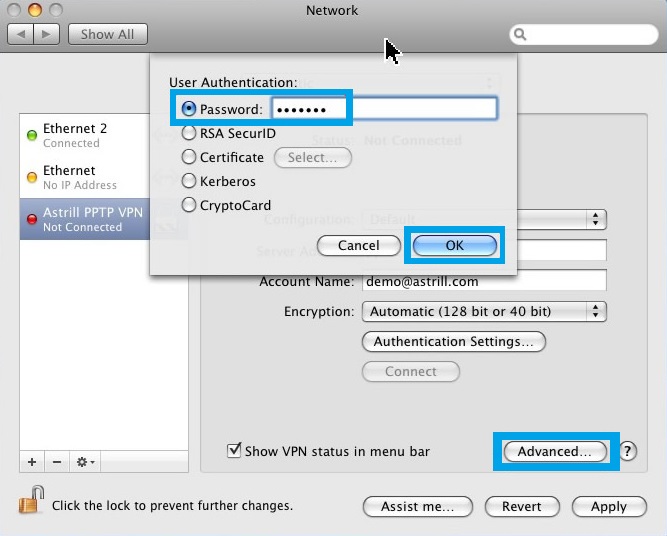
STEP 6
For User Authentication, select Password, and enter your Astrill VPN account password.
When done, click on OK button, then click on Advanced... button.
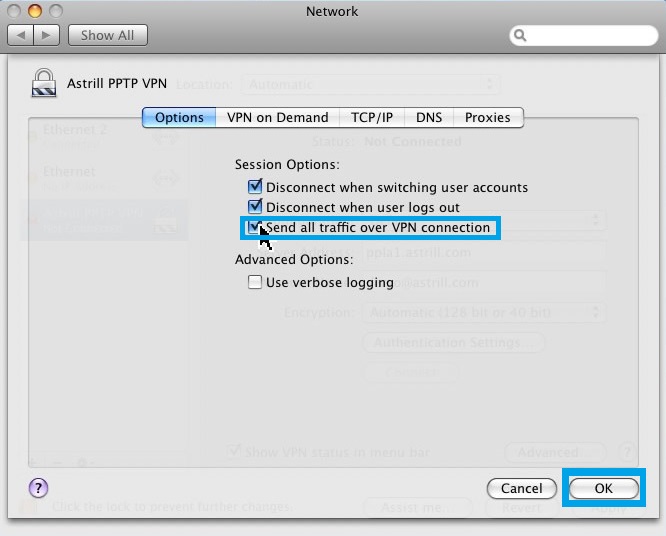
STEP 7
Tick the box Send all traffic over VPN connection, then click on OK button.
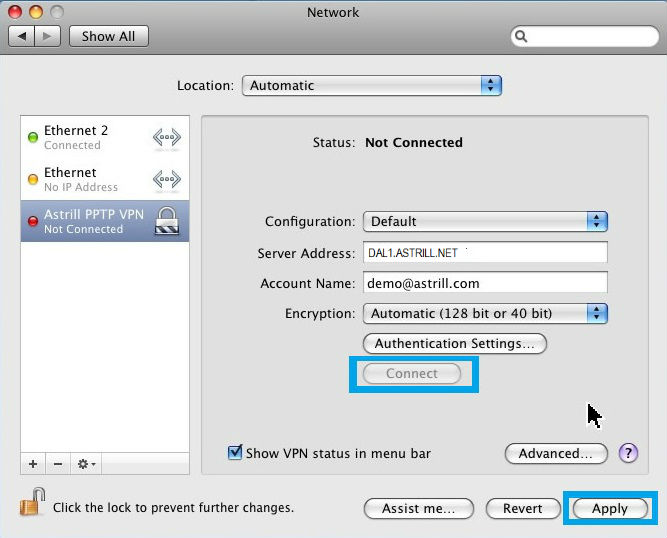
STEP 8
Click on Apply button, then to connect to Astrill PPTP VPN, click on Connect button.
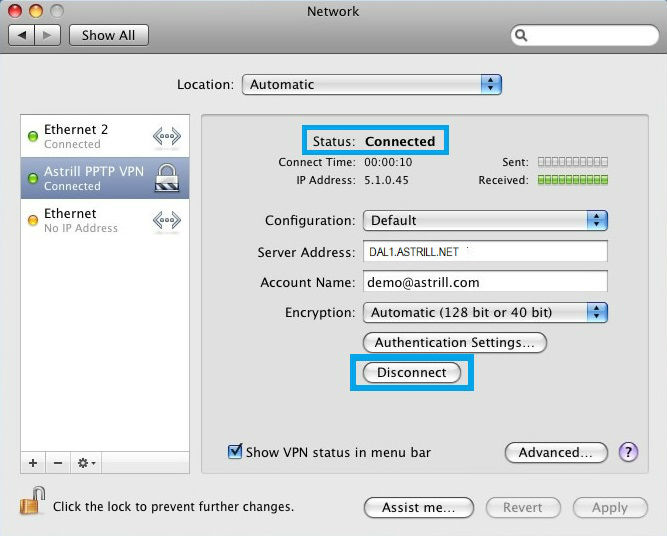
STEP 9
Once you are connected, you will see Status: Connected, and to disconnect from Astrill PPTP VPN, simply click on Disconnect button.
NOTE: When using PPTP/L2TP/IPSec VPN over 3G connection, make sure proxy settings are disabled. As it's likely these protocols can't work over proxy.

