Astrill Setup Manual:How to flush DNS cache on Mac OS X: Difference between revisions
Jump to navigation
Jump to search
(→STEP 2) |
(→STEP 2) |
||
| (2 intermediate revisions by the same user not shown) | |||
| Line 11: | Line 11: | ||
In the terminal type in '''dscacheutil -flushcache''' and then press enter. '''This will clear old DNS cache'''. | In the terminal type in '''dscacheutil -flushcache''' and then press enter. '''This will clear old DNS cache'''. | ||
Check other commands below: | |||
* OSX 10.5 – 10.6 | * OSX 10.5 – 10.6 | ||
sudo dscacheutil -flushcache | sudo dscacheutil -flushcache | ||
* OSX 10.9 – 10.8 – 10.7 | |||
* OSX 10.9 – 10.8 – 10.7 | sudo killall -HUP mDNSResponder | ||
sudo killall -HUP mDNSResponder | * OSX 10.10.0 – 10.10.3 | ||
sudo discoveryutil mdnsflushcache | |||
* OSX 10.10.0 – 10.10.3 | * OSX 10.10.4 | ||
sudo discoveryutil mdnsflushcache | sudo killall -HUP mDNSResponder | ||
* OSX 10.11.0 | |||
* OSX 10.10.4 | sudo killall -HUP mDNSResponder | ||
sudo killall -HUP mDNSResponder | * macOS Sierra 10.12.0 | ||
sudo killall -HUP mDNSResponder | |||
* OSX 10.11.0 | |||
sudo killall -HUP mDNSResponder | |||
* macOS Sierra 10.12.0 | |||
sudo killall -HUP mDNSResponder | |||
[[File:N.mac flushdns2.jpg|border]] | [[File:N.mac flushdns2.jpg|border]] | ||
Latest revision as of 04:21, 30 June 2017
STEP 1
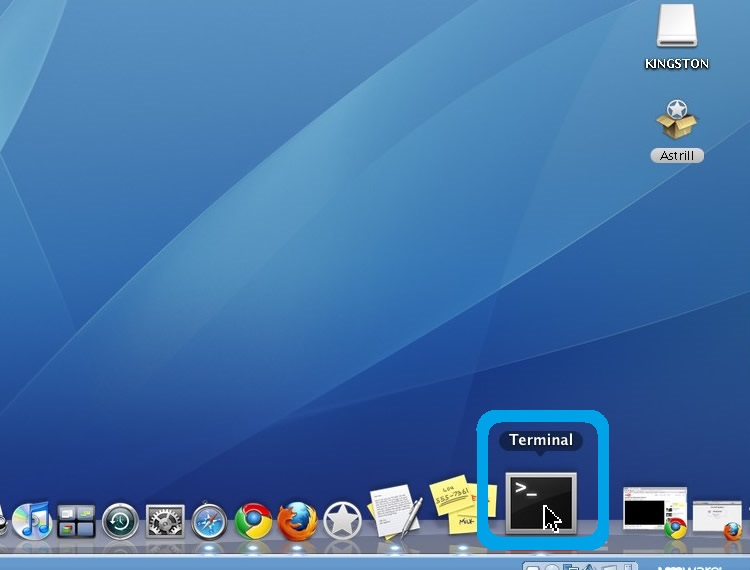
Let's clear old DNS cache. Open Terminal from the dock or from /Applications/Utilities/ or with Spotlight.
STEP 2
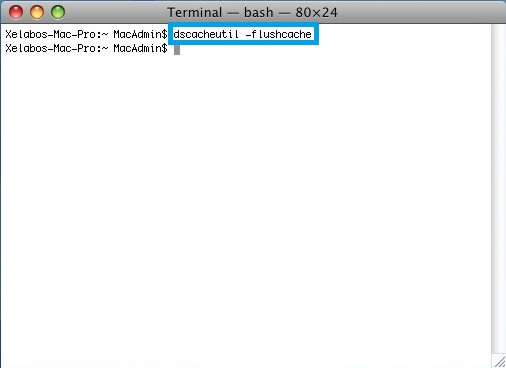
In the terminal type in dscacheutil -flushcache and then press enter. This will clear old DNS cache.
Check other commands below:
* OSX 10.5 – 10.6
sudo dscacheutil -flushcache
* OSX 10.9  – 10.8 – 10.7
sudo killall -HUP mDNSResponder
* OSX 10.10.0 – 10.10.3
sudo discoveryutil mdnsflushcache
* OSX 10.10.4
sudo killall -HUP mDNSResponder
* OSX 10.11.0
sudo killall -HUP mDNSResponder
* macOS Sierra 10.12.0
sudo killall -HUP mDNSResponder

