Astrill Setup Manual:How to flush DNS cache on Windows 7: Difference between revisions
Jump to navigation
Jump to search
(→Step 3) |
No edit summary |
||
| Line 1: | Line 1: | ||
=='''Step1'''== | =='''Step1'''== | ||
Go to Start> All Programs | 1. Go to '''Start''' > '''All Programs'''. | ||
2. Select '''Accessories''' | |||
[[file: | 3. Right click on '''Command Prompt'''. | ||
4. Select '''Run as Administrator'''. | |||
[[file:Win7-flushdns1.jpg|border]] | |||
| Line 10: | Line 16: | ||
=='''Step 2'''== | =='''Step 2'''== | ||
Type '''ipconfig /flushdns''' and hit ''Enter'' | Type '''ipconfig /flushdns''' and hit ''Enter'''. | ||
[[File: | [[File:Win7-flushdns2.jpg|border]] | ||
| Line 23: | Line 29: | ||
''''Windows IP Configuration. Successfully flushed the DNS Resolver Cache.'''' | ''''Windows IP Configuration. Successfully flushed the DNS Resolver Cache.'''' | ||
[[File:Win7-flushdns3.jpg|border]] | |||
[[File: | |||
Latest revision as of 07:21, 27 June 2017
Step1
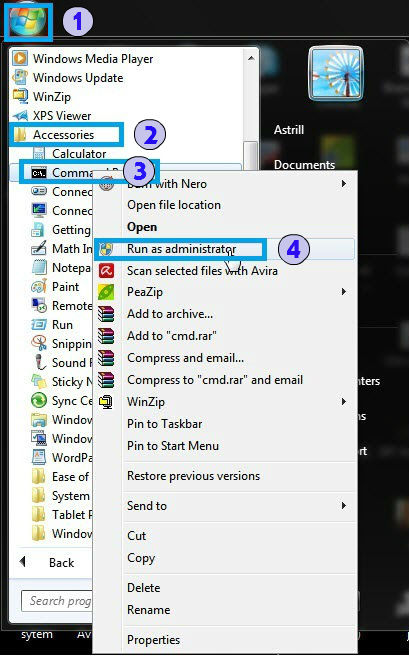
1. Go to Start > All Programs.
2. Select Accessories
3. Right click on Command Prompt.
4. Select Run as Administrator.
Step 2
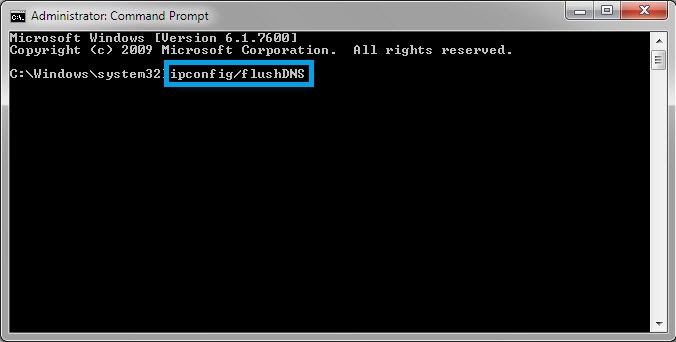
Type ipconfig /flushdns' and hit Enter.
Step 3
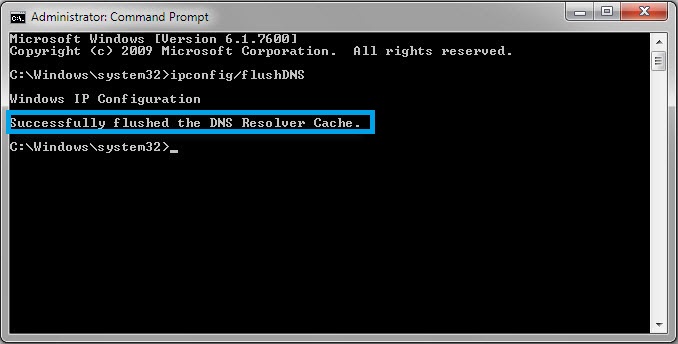
You should be able to see a confirmation dialog window:
'Windows IP Configuration. Successfully flushed the DNS Resolver Cache.'


