Astrill Setup Manual:How to flush DNS cache on Windows 8: Difference between revisions
Jump to navigation
Jump to search
(→Step 2) |
No edit summary |
||
| Line 1: | Line 1: | ||
=='''Step1'''== | =='''Step1'''== | ||
Open metro application UI screen, search | Open metro application UI screen, search '''Command prompt''' tile right click on it and click "Run as administrator" to run cmd utility. | ||
[[file:Win8-flush3.jpg|border]] | |||
=='''Step 2'''== | =='''Step 2'''== | ||
| Line 9: | Line 10: | ||
Type '''ipconfig /flushdns''' and hit ''Enter'' | Type '''ipconfig /flushdns''' and hit ''Enter'' | ||
[[file:Win8-flush3.jpg|border]] | |||
=='''Step 3'''== | =='''Step 3'''== | ||
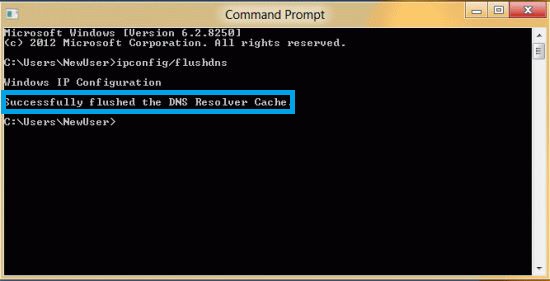
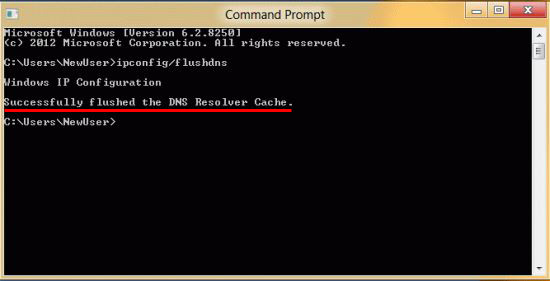
You should be able to see a confirmation dialog window: | You should be able to see a confirmation dialog window: | ||
''''Windows IP Configuration. Successfully flushed the DNS Resolver Cache.'''' | ''''Windows IP Configuration. Successfully flushed the DNS Resolver Cache.'''' | ||
[[File:Win8s3.jpg]] | [[File:Win8s3.jpg]] | ||
Revision as of 06:26, 28 June 2017
Step1
Open metro application UI screen, search Command prompt tile right click on it and click "Run as administrator" to run cmd utility.
Step 2
Type ipconfig /flushdns and hit Enter
Step 3
You should be able to see a confirmation dialog window:
'Windows IP Configuration. Successfully flushed the DNS Resolver Cache.'

