Astrill Setup Manual:How to flush DNS cache on Windows XP: Difference between revisions
Jump to navigation
Jump to search
No edit summary |
No edit summary |
||
| Line 9: | Line 9: | ||
[[File: | [[File:DNS-Flush-Win-Xp-1.jpg|border]] | ||
[[File: | [[File:DNS-Flush-Win-Xp-2.jpg|border]] | ||
| Line 26: | Line 26: | ||
[[File: | [[File:DNS-Flush-Win-Xp-3.jpg|border]] | ||
[[File: | [[File:DNS-Flush-Win-Xp-4.jpg|border]] | ||
Latest revision as of 03:42, 6 April 2020
STEP 1 - Run Command Prompt
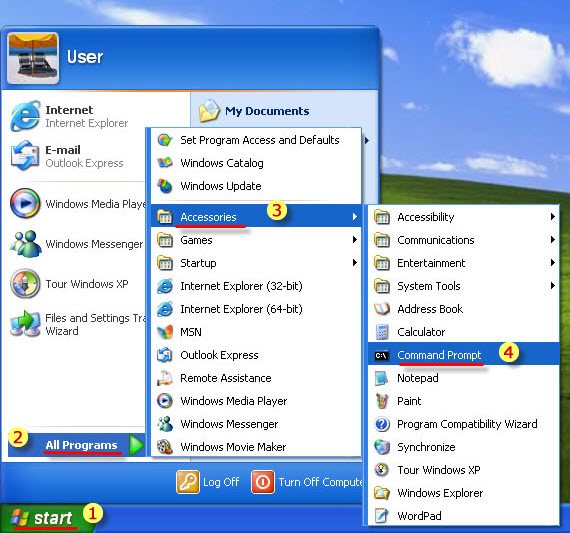
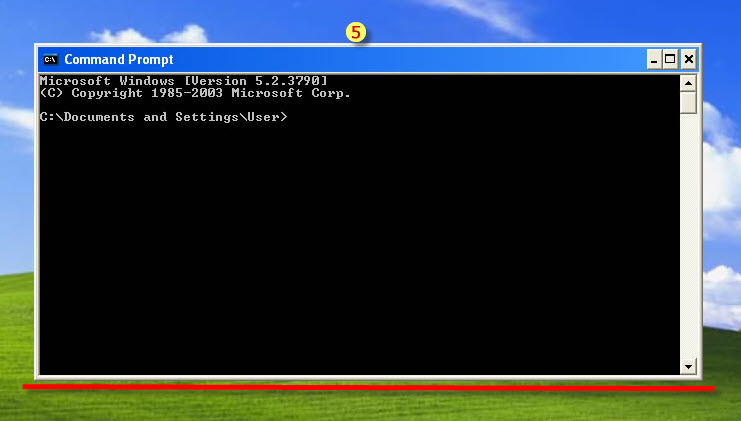
1. Click on Windows Startup Menu and navigate to the command prompt (All Programs > Accessories > Command Prompt)
2. Make sure that you Right Click on the command prompt application and choose "Run as Administrator" to run command prompt.
STEP 2 - Flush DNS cache
1. In the command prompt, type in ipconfig /flushdns then press Enter key.
2. This is a confirmation that you have Successfully flushed the DNS resolver cache.


