Astrill Setup Manual:How to configure OpenVPN with Network Manager on Linux
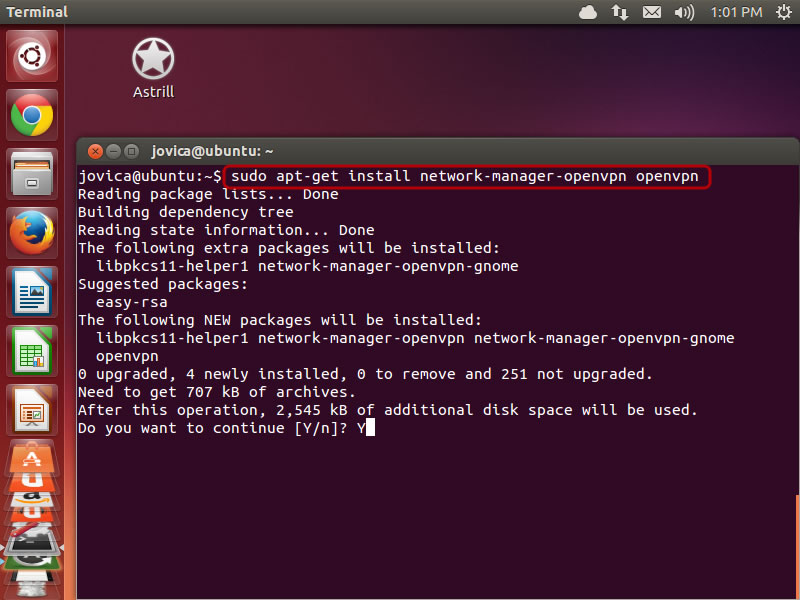
1. First open terminal, and use this command to install the OpenVPN Network Manager plugin:
sudo apt-get install network-manager-openvpn openvpn
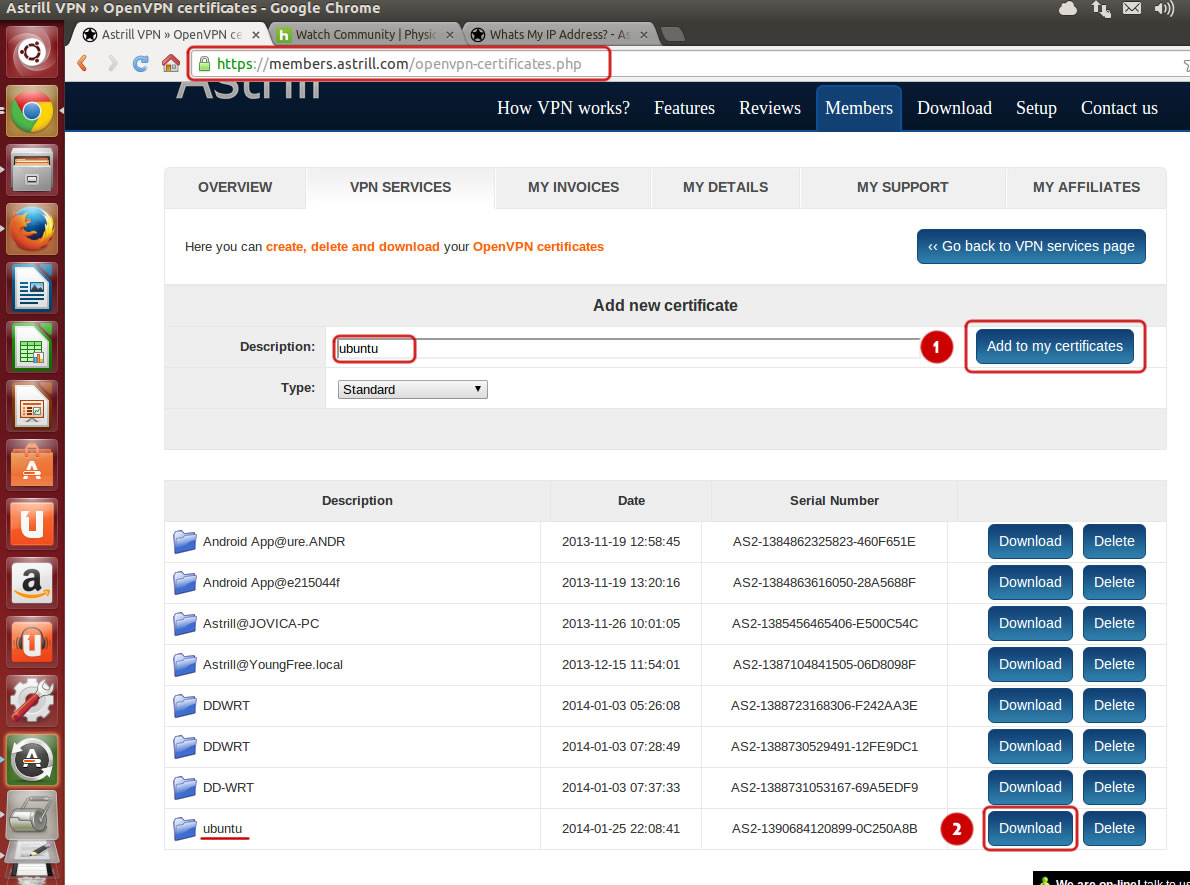
2. Login to Members area, and create and download a certificate for OpenVPN with configuration files. Click on Members, login to your account, then click VPN Services, and then click on OpenVPN certificates generation.
https://members.astrill.com/openvpn-certificates.php
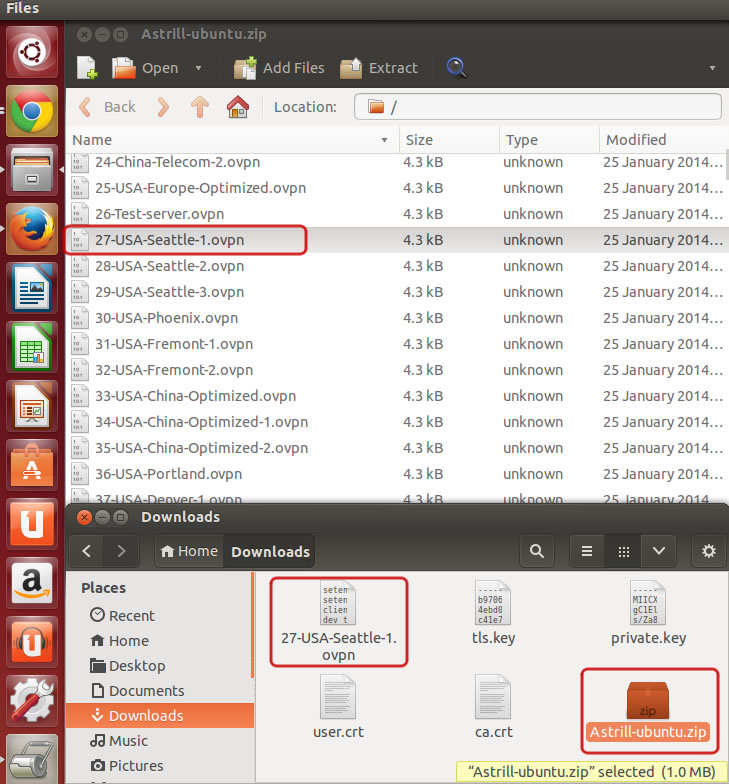
3. Open Astrill-ubuntu.zip file you just downloaded, and pick a server and extract the OVPN file (in this example 27-USA-Seattle-1.ovpn).
Then make 4 copies of 27-USA-Seattle-1.ovpn file, and rename them and edit them accordingly:
Text between <ca></ca> tags goes into ca.crt file
Text between <cert></cert> tags goes into user.crt file
Text between <key></key> tags goes into private.key file
Text between <tls-auth></tls-auth> tags goes into tls.key file
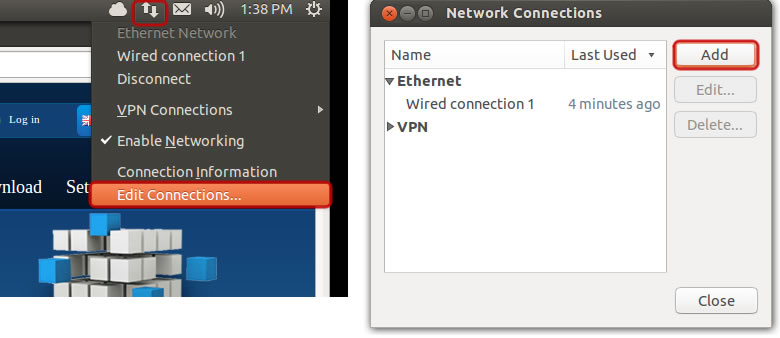
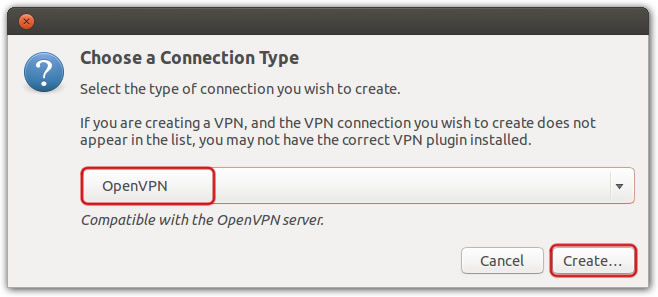
4. Open Network Manager, and then click on Add button to create new connection.
Select OpenVPN for connection type, and then click on Create... button to create new OpenVPN connection.
5. Run the OpenVPN client with the downloaded client config file. You can use any VP server, type in sudo openvpn --config 01-USA-Dallas-1.ovpn. If you see Initialization Sequence Completed, that means you are successfully connected to Astrill OpenVPN.
File:Linux-openvpn-client-005.jpg
