How to Set Up Parental Controls on iPhone and iPad?

Bisma Farrukh
If you gave your kid an iPhone or iPad for their birthday, and are having second thoughts about it, don’t worry because you’re not alone. As tech-savvy as kids are, some parental oversight is still a good idea. The good news is iOS, the operating system that powers iPhones and iPads, has some built-in features that make it easy to set limits and monitor how your child uses the device.
In just a few taps, you can restrict web browsing, set content filters, limit screen time, see reports on your kid’s app usage, and more by ios parental controls. The controls may not be foolproof but they provide extra protection and peace of mind. Here’s how to put parental controls on iPhone or iPad.
Table of Contents
How to turn on Parental Controls on iPhone and iPad?
To enable parental controls on iPhone and iPad, here are the steps:
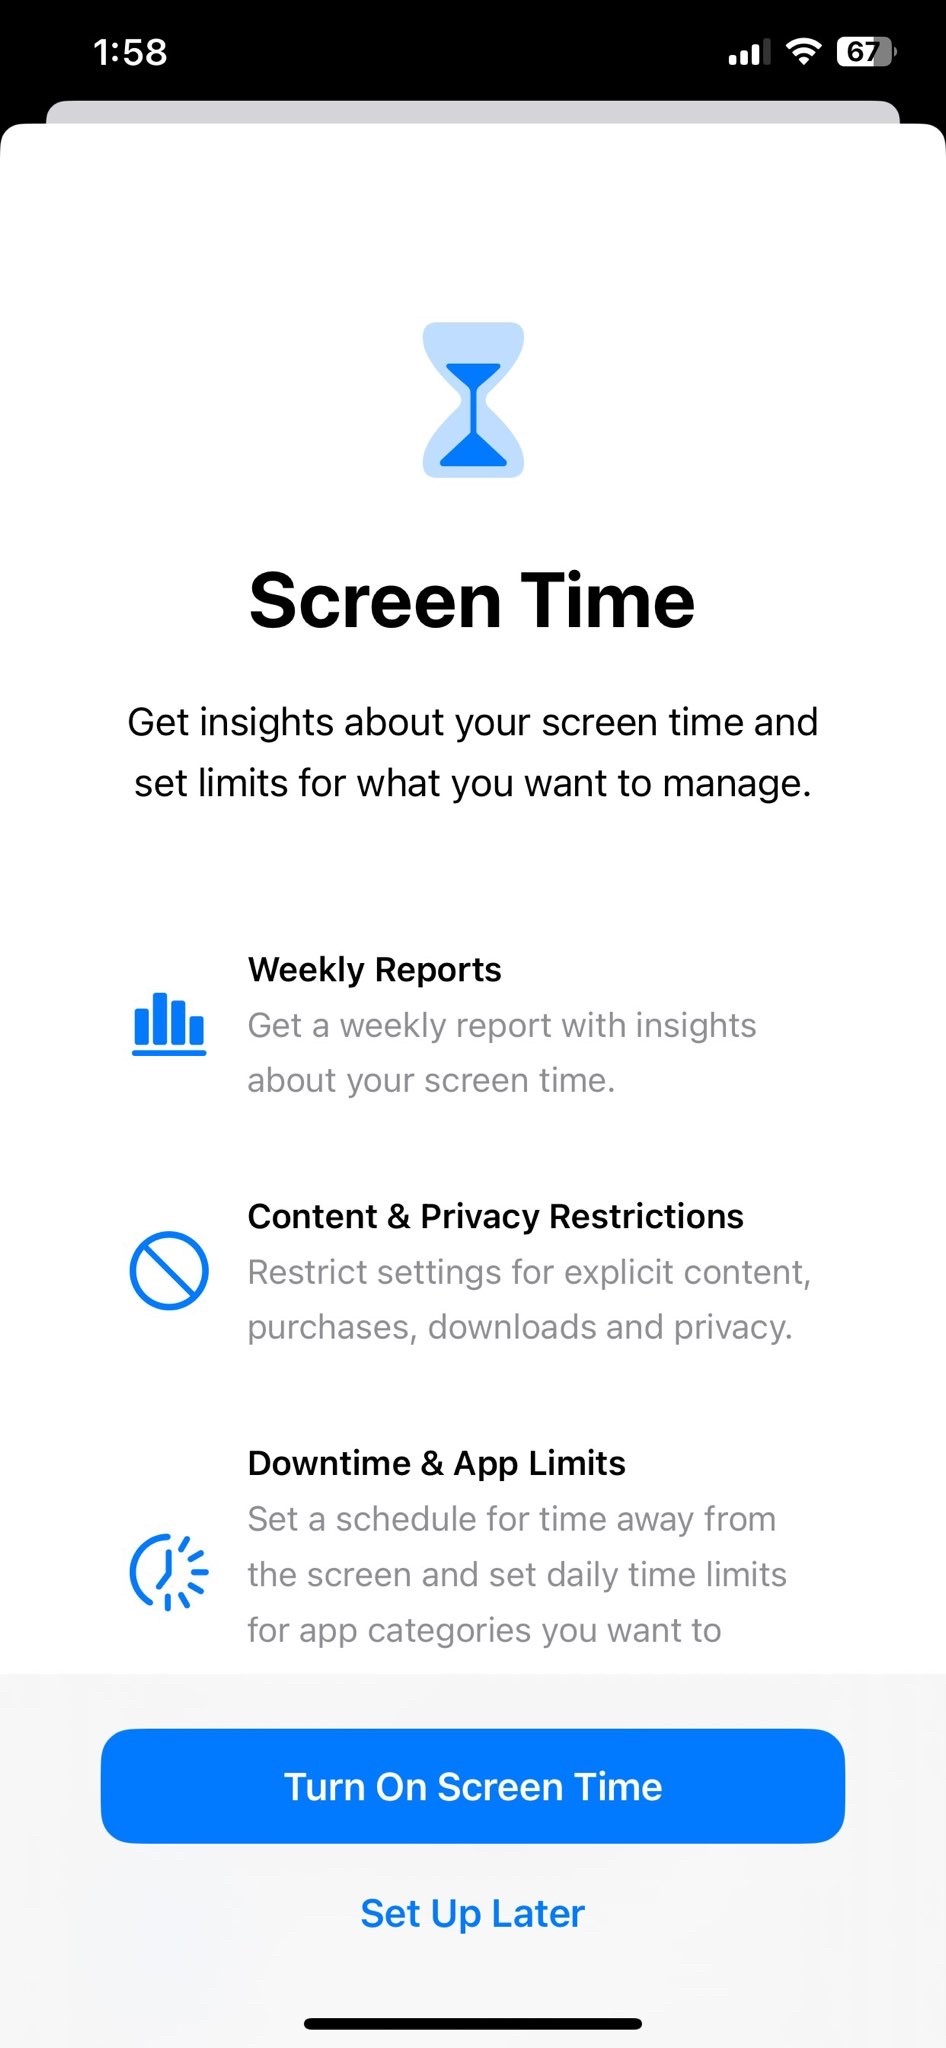
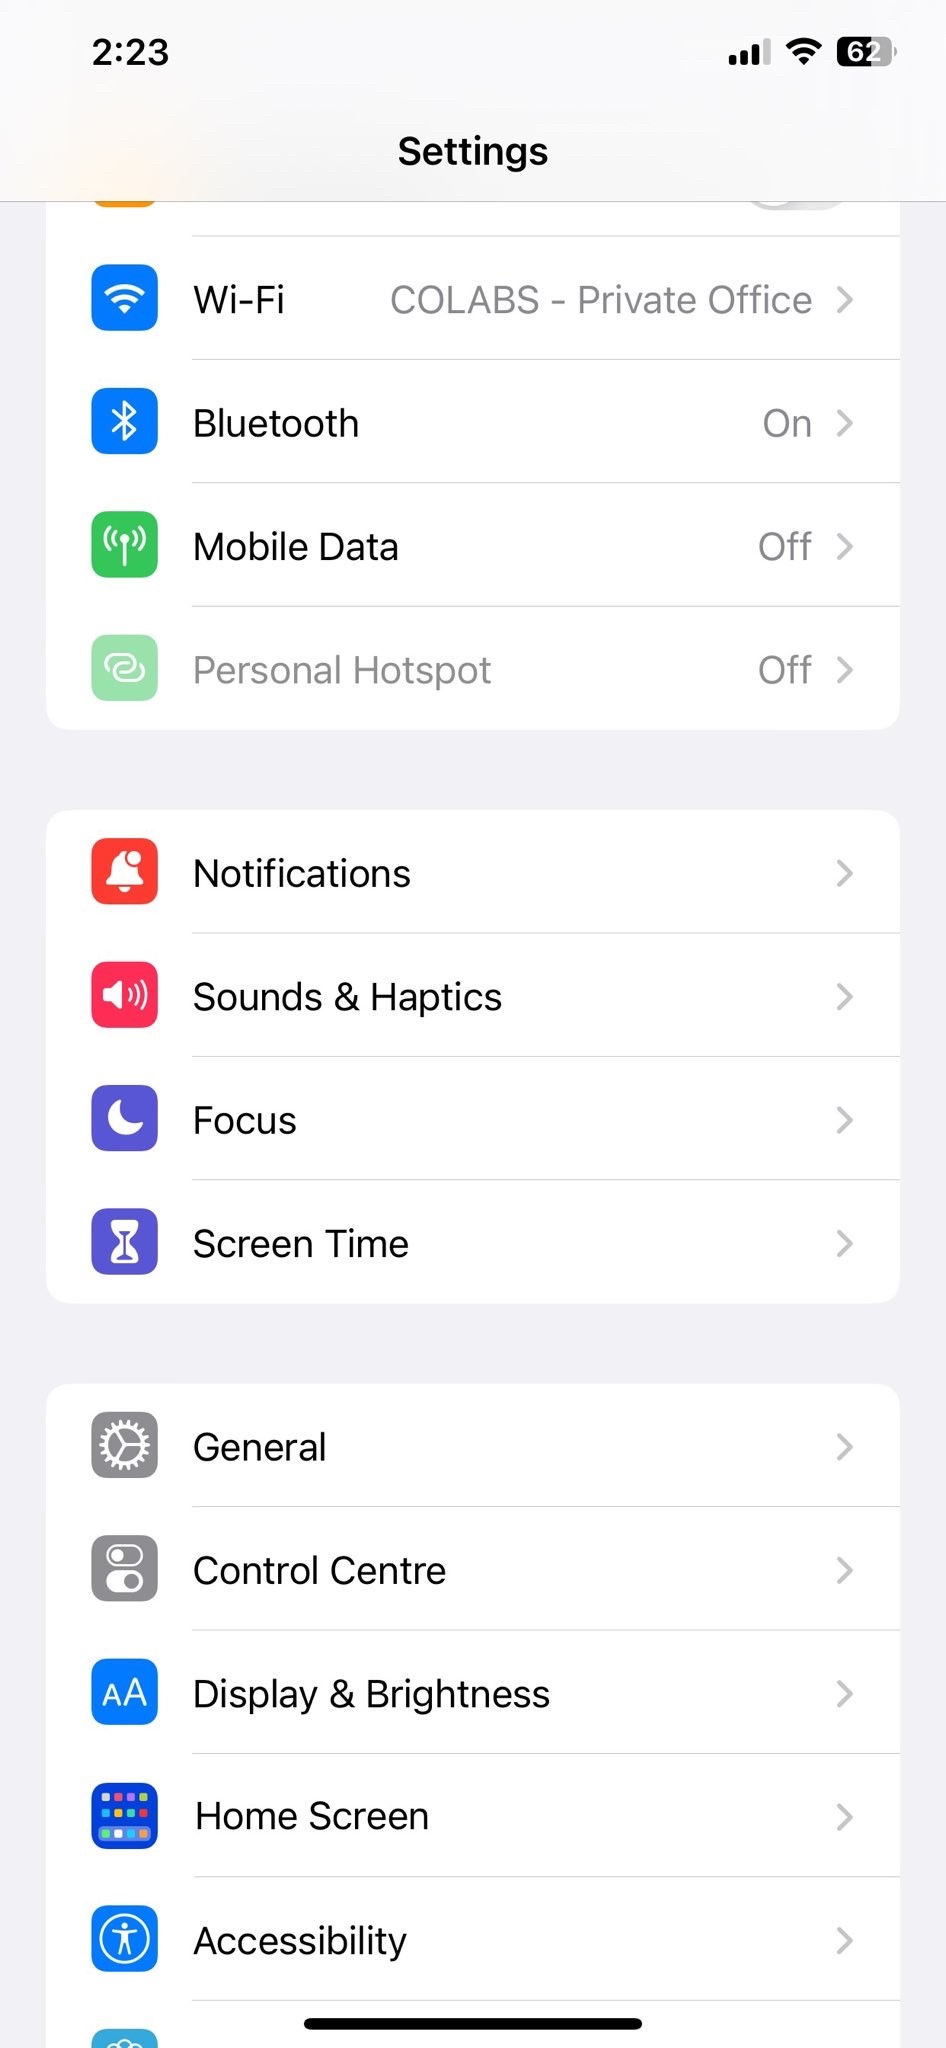
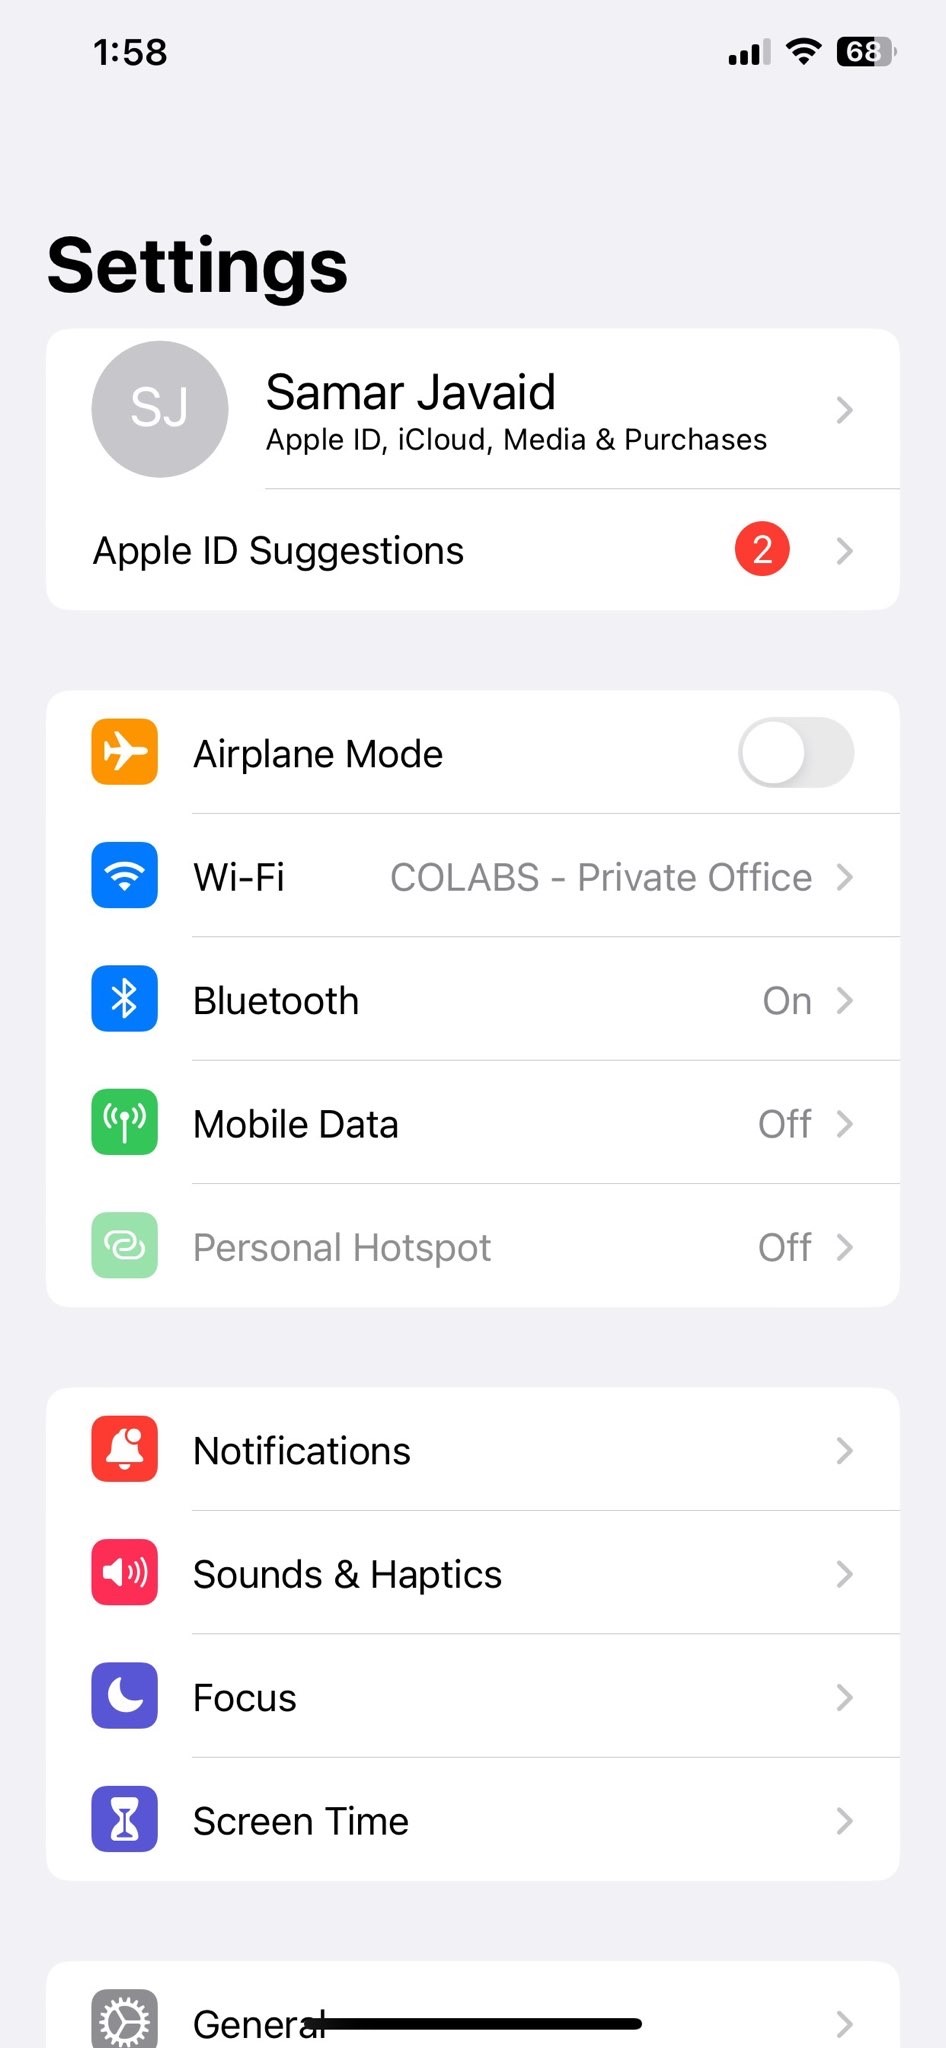
- First, open the Settings app on your device. Tap ‘Screen Time’ and then tap ‘Turn On Screen Time.’ You’ll need to enter your passcode to get started.

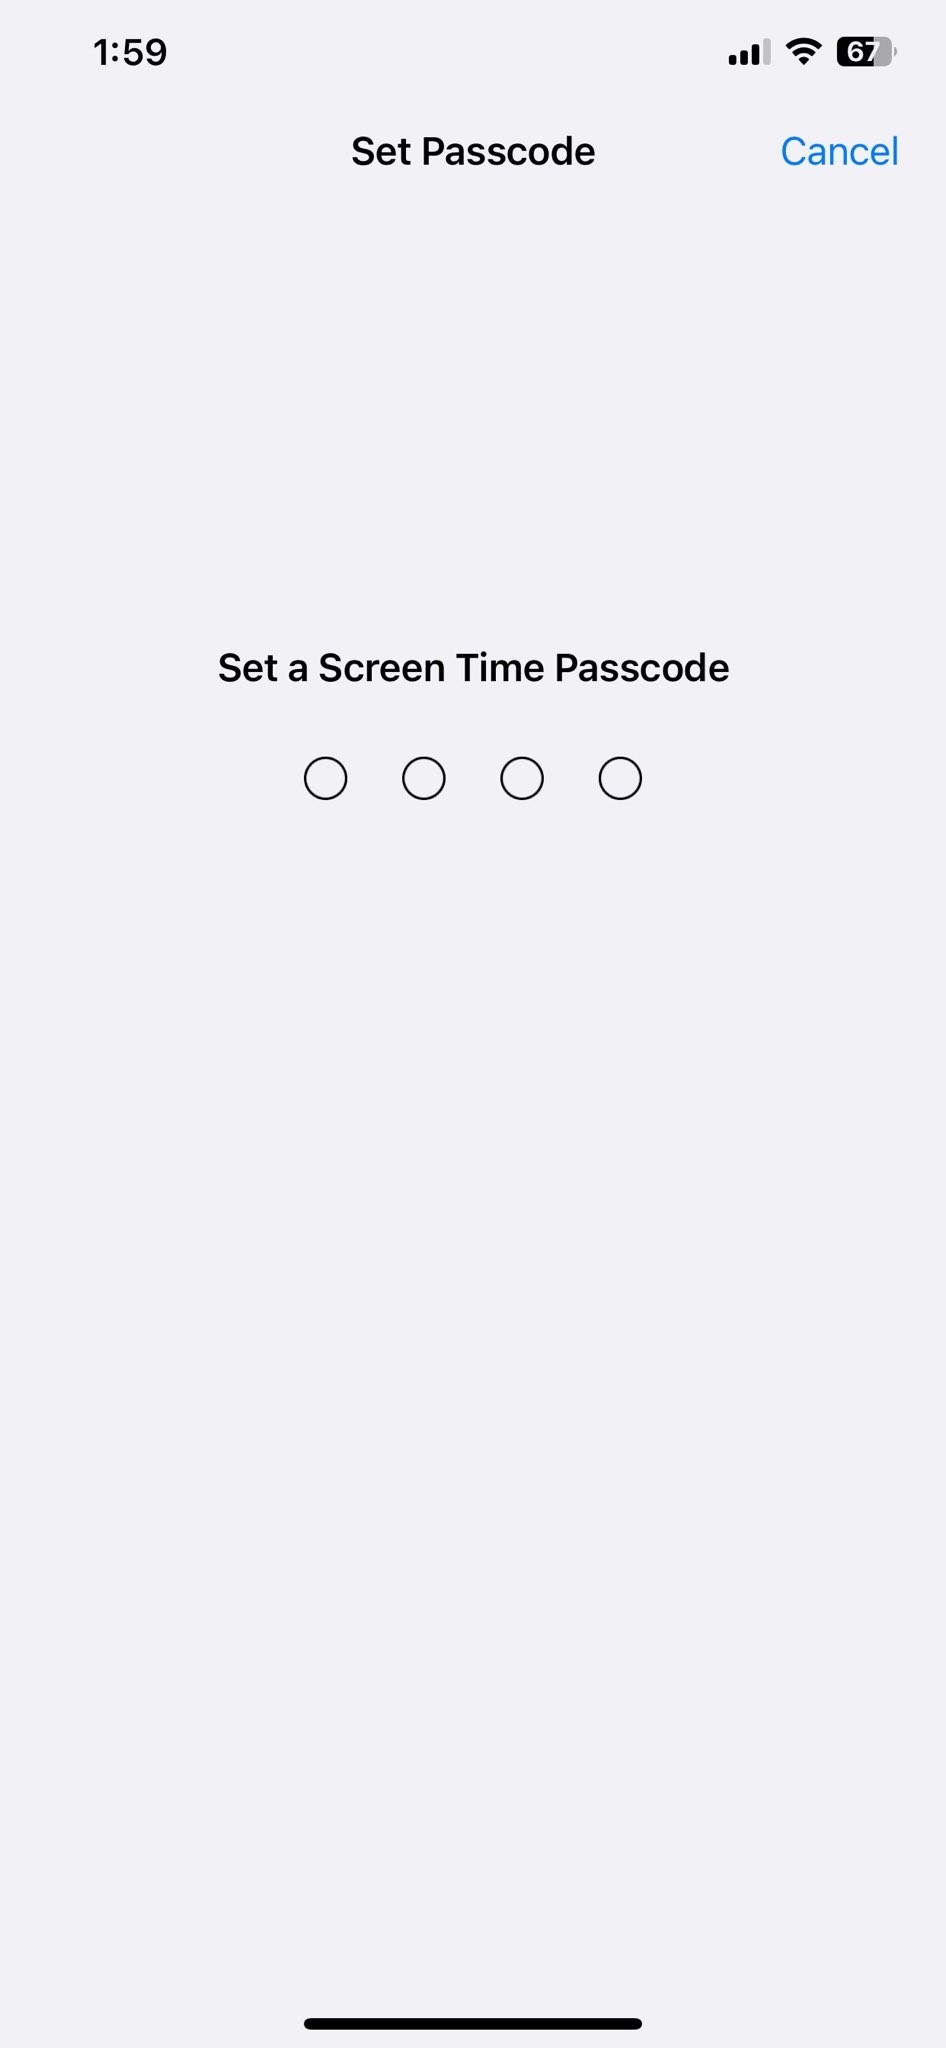
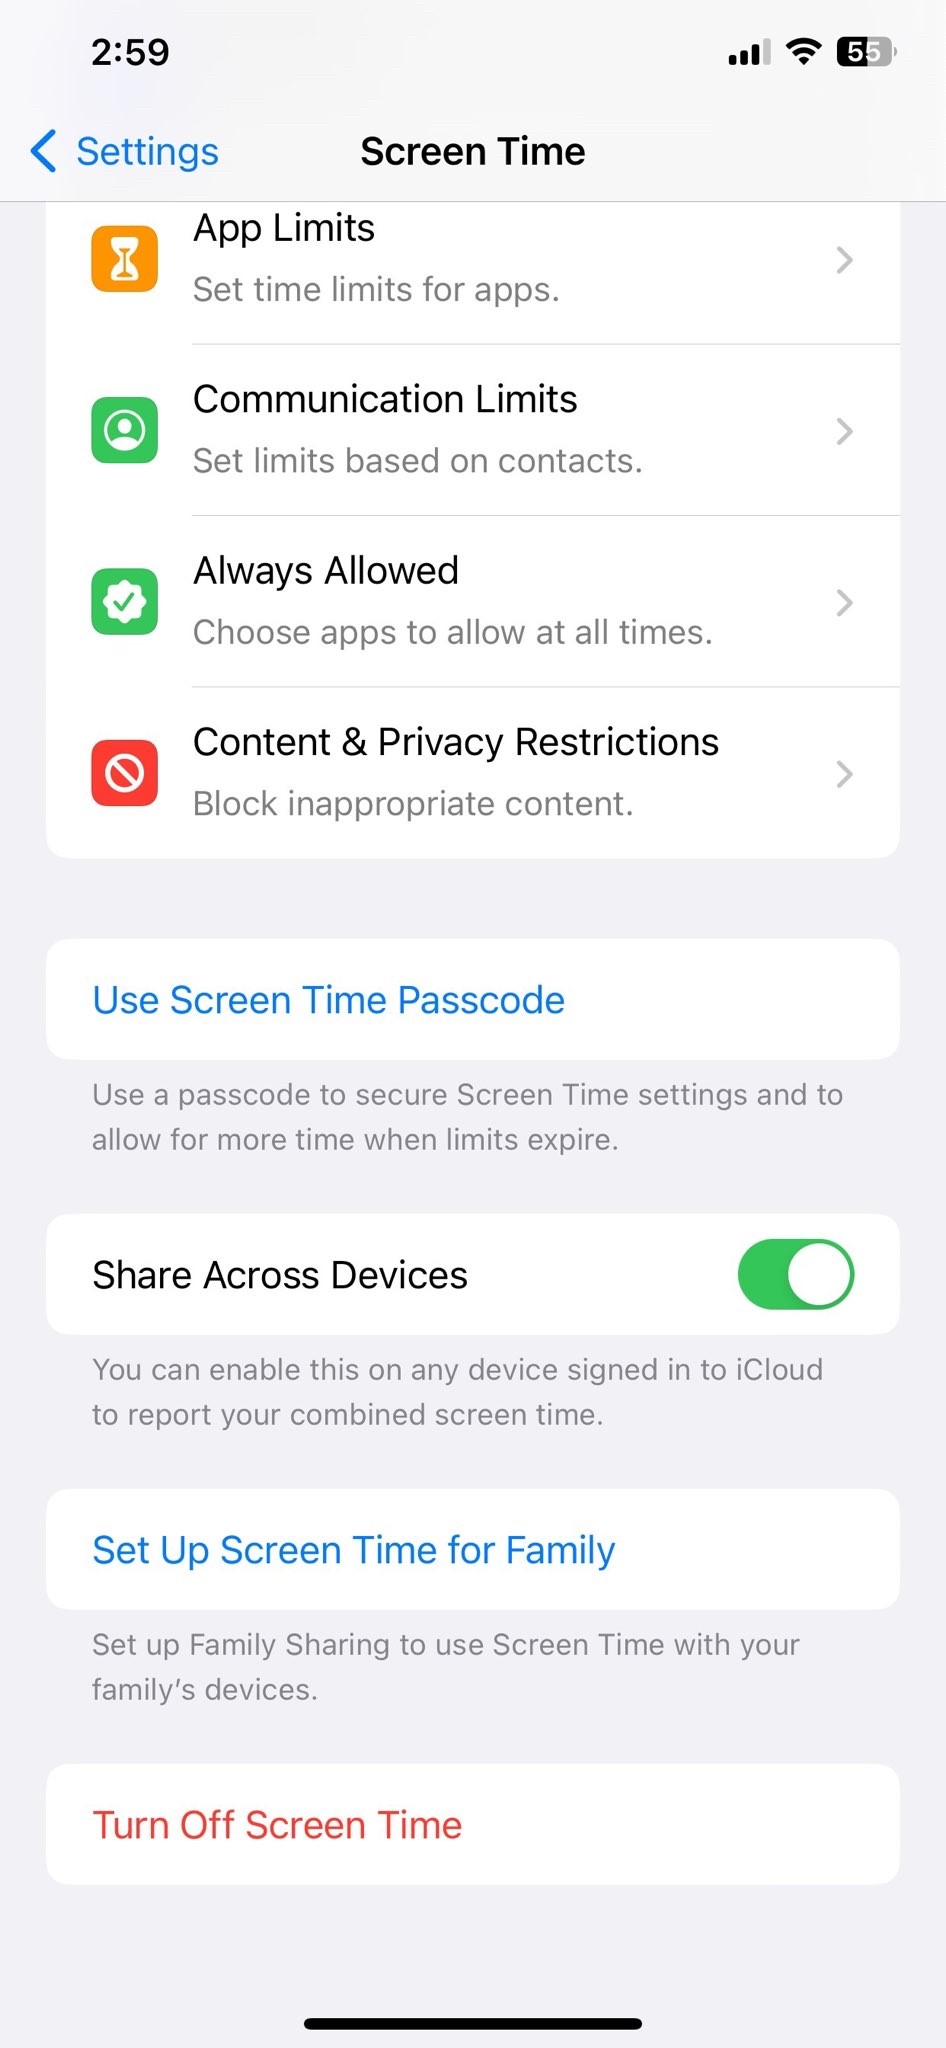
- Next, tap ‘Use Screen Time Passcode’ to create a separate passcode that will be used to manage parental controls for iPhone and make changes to settings. Make sure this differs from your device passcode and is hard for kids to guess!

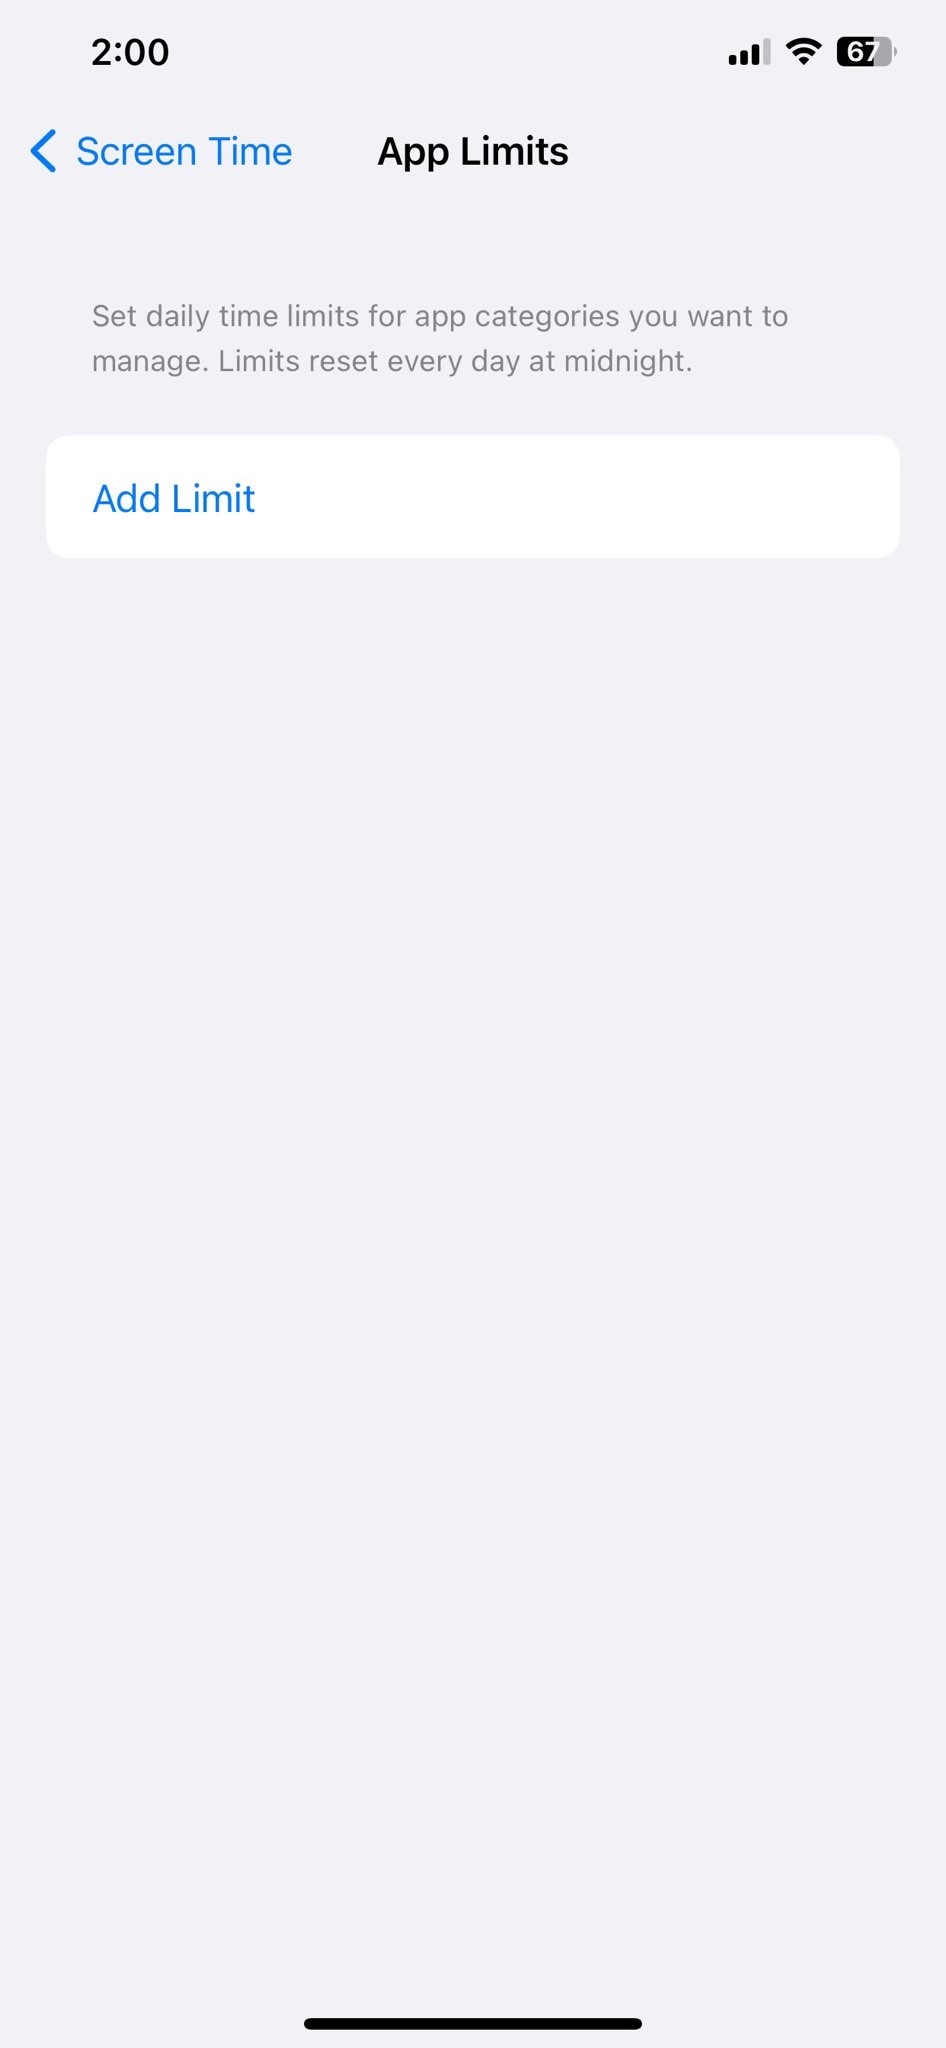
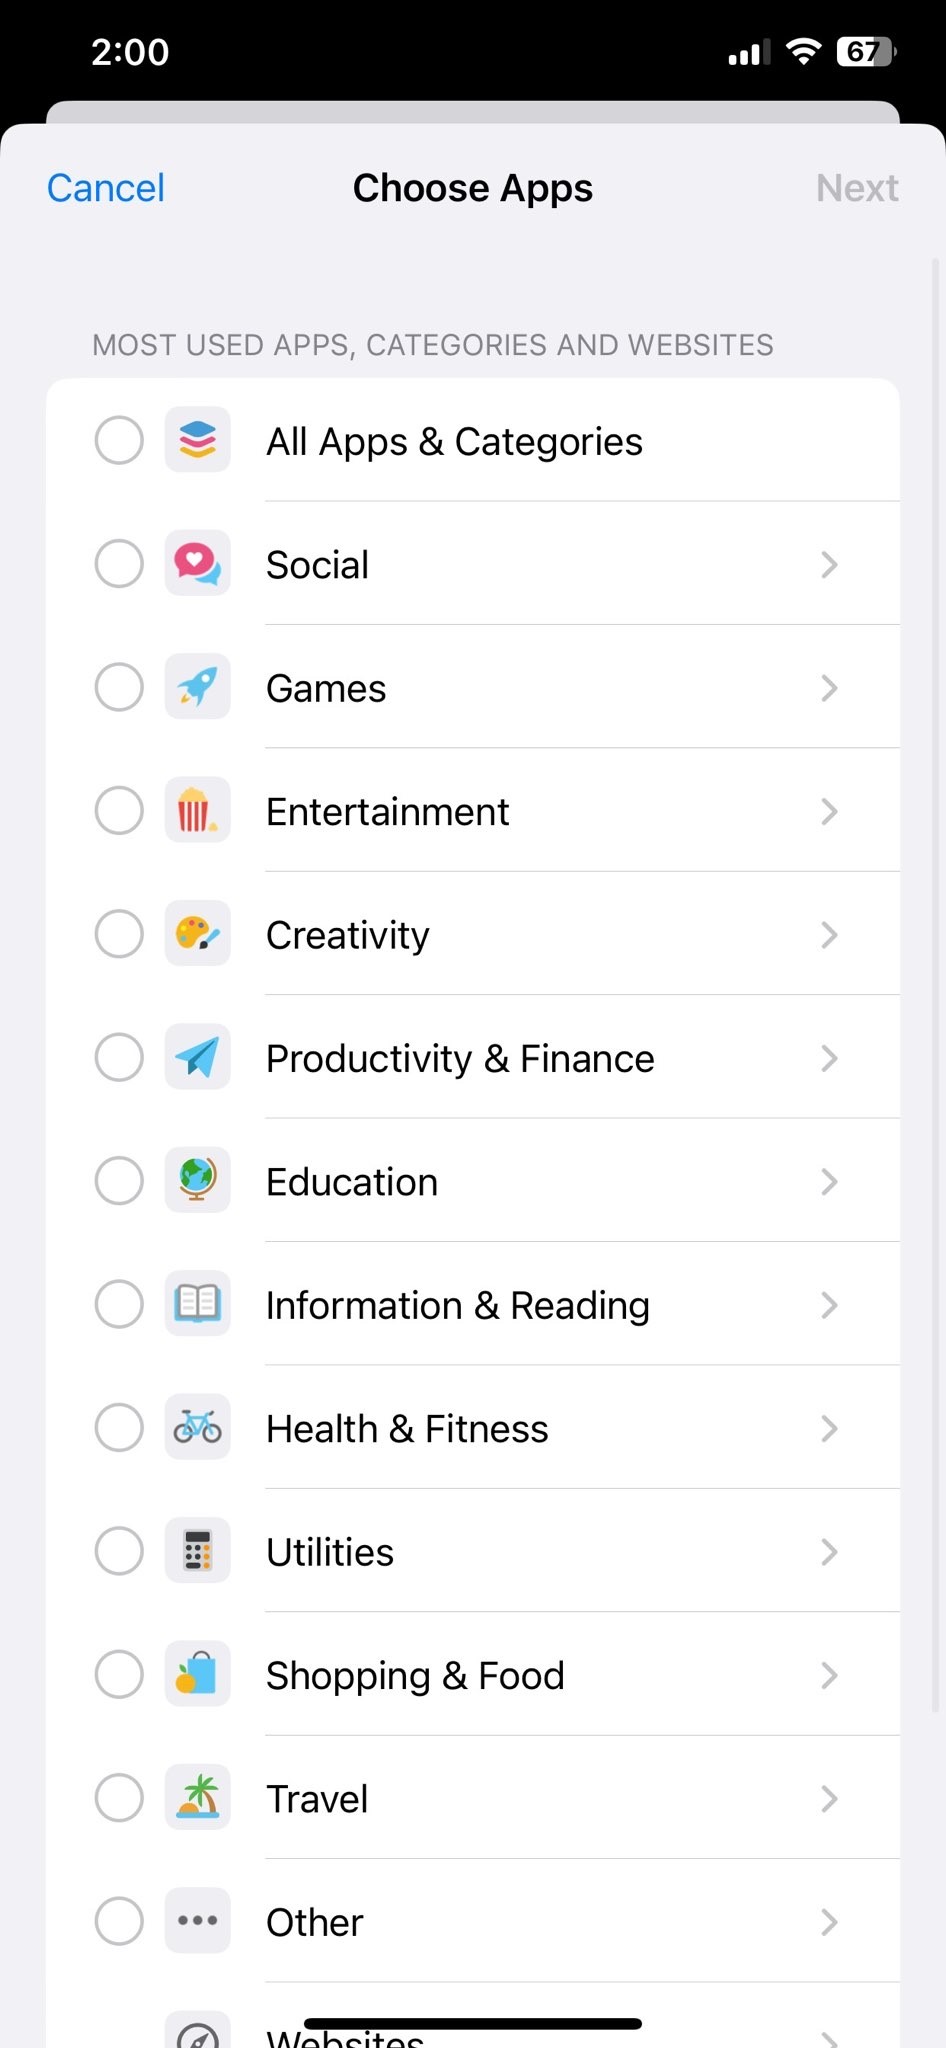
- Under ‘Screen Time,’ tap ‘App Limits’ to set daily time limits for apps, websites and app categories. Select the apps or websites you want to limit and tap ‘Add’ to set a time limit. You can also tap ‘Always Allowed’ to whitelist certain apps.
- To block apps or websites, tap ‘Content & Privacy Restrictions’ and then ‘Web Content.’ Here you can block categories like ‘Mature Websites’ or add specific domains to block. Tap ‘Add Website’ or ‘Add App’ to add items to the block.
- Lastly, tap’ Activity Reports’ under Screen Time to view your child’s device usage reports. You’ll see detailed reports showing how much time is spent using apps, websites, and more. These reports are a helpful way to stay on top of your child’s online activity and set healthy limits.

Set Content Restrictions to Block Inappropriate Content
You’ll want to set some content restrictions to block inappropriate content on your kid’s iPhone or iPad.
- Go to Settings > General > Restrictions. Tap ‘Enable Restrictions’ to get started. You’ll be asked to enter a restrictions passcode to lock the settings. Choose a passcode your kids won’t guess!

- Under ‘Allowed Content,’ tap ‘Web Content.’ Here you can block adult websites and only allow kid-friendly content. Enable ‘Limit Adult Content’ to automatically filter out mature stuff.


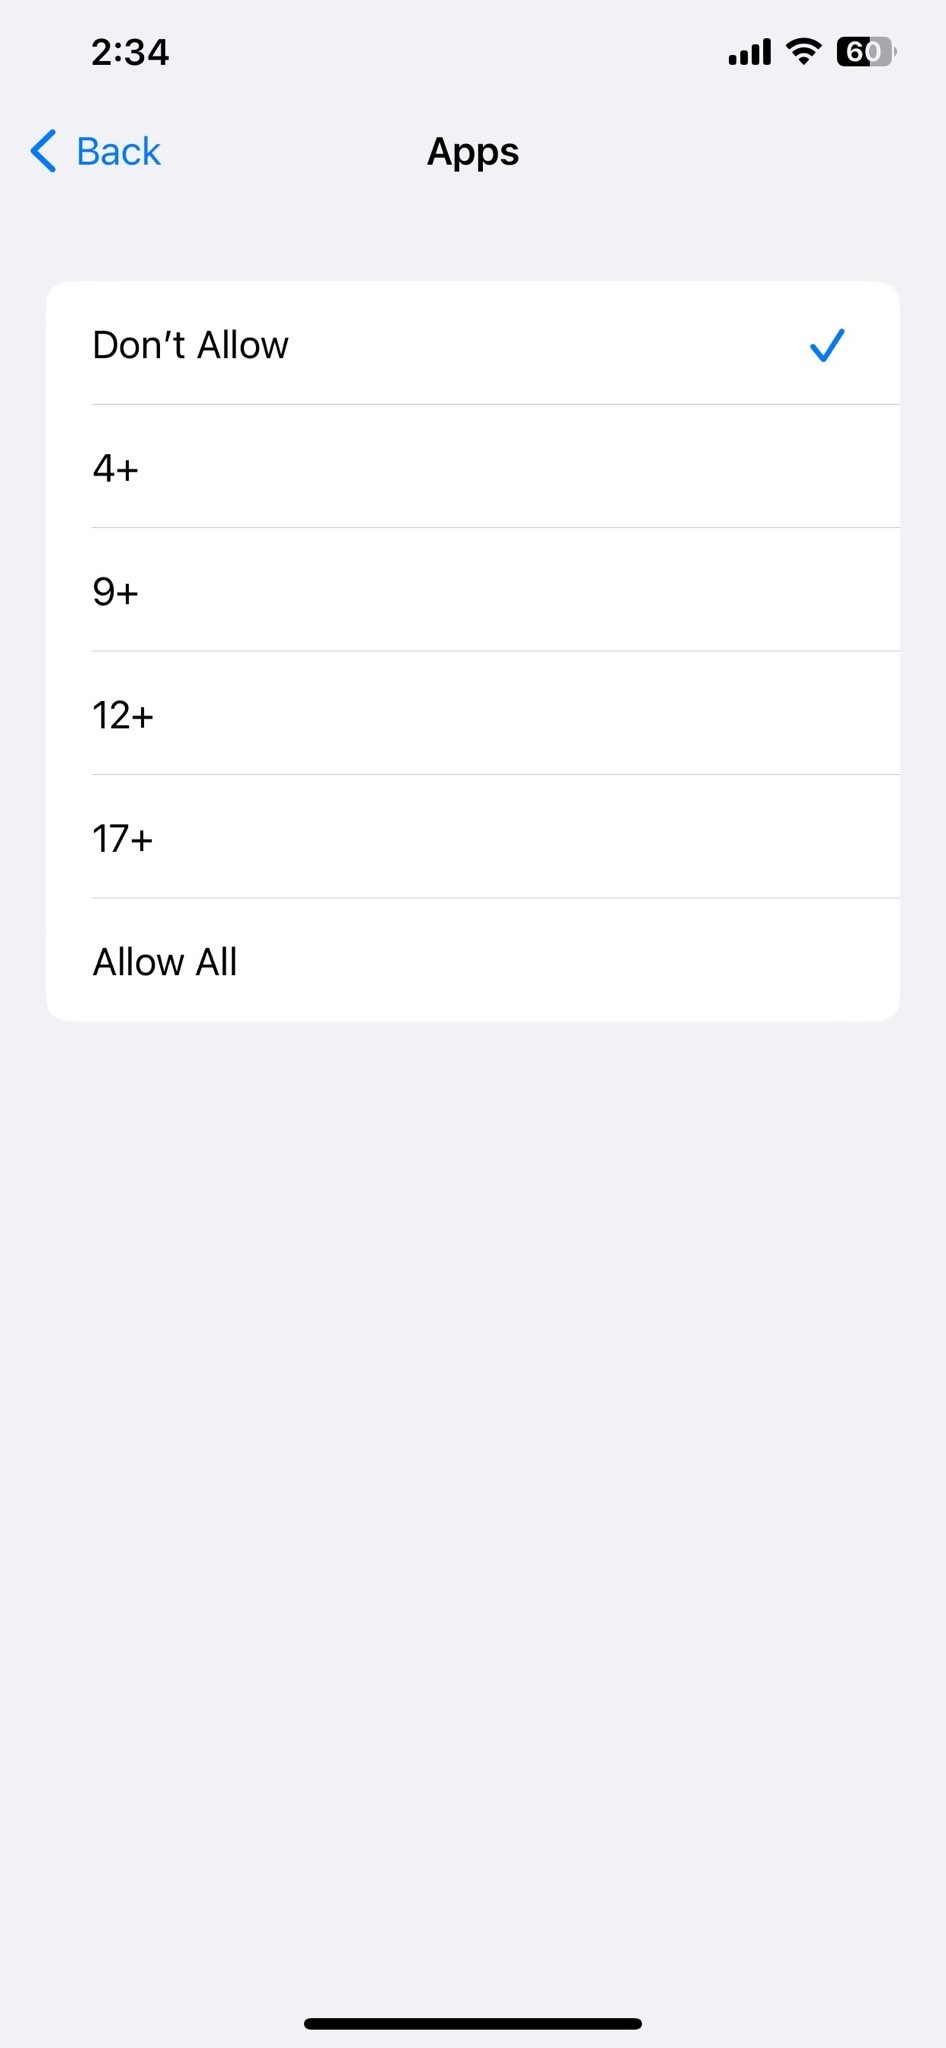
- For apps, tap ‘Apps’ and select an age limit to block apps rated above it. You can also add specific apps to the ‘Never Allow’ list. Want to restrict movies, TV shows or books? Choose an age limit or select ‘Never Allow’ for each category.

- To block music with explicit lyrics, enable ‘Music with Explicit Lyrics.’ You can also add songs and artists to a ‘Never Allow’ list. The same goes for podcasts – set an age limit or add specific ones to block.

Limit App Store Purchases and Downloads
Enable the Ask to Buy feature to limit your child’s App Store purchases and downloads. This requires a password to be entered for any new app downloads or in-app purchases.

To turn on Ask to Buy:
- Open the Settings app on your iPhone or iPad and select Screen Time.
- Tap “Ask to Buy” and turn it on.
- Set up a password to use for purchases and enter it to enable Ask to Buy.
- Choose an age rating for purchases or select “Don’t Allow Apps” to prevent any App Store downloads.
With Ask to Buy enabled, your child will have to request your approval for any new apps they want to download or in-app purchases they attempt to make. You’ll receive a notification on your own iPhone or iPad asking you to review and approve or decline the request. This gives you oversight and control over how your child uses their device to access the App Store.
Prevent Explicit Content and Set Content Ratings
To prevent your kids from accessing explicit content and set content ratings on their devices, you’ll want to enable restrictions in Screen Time.
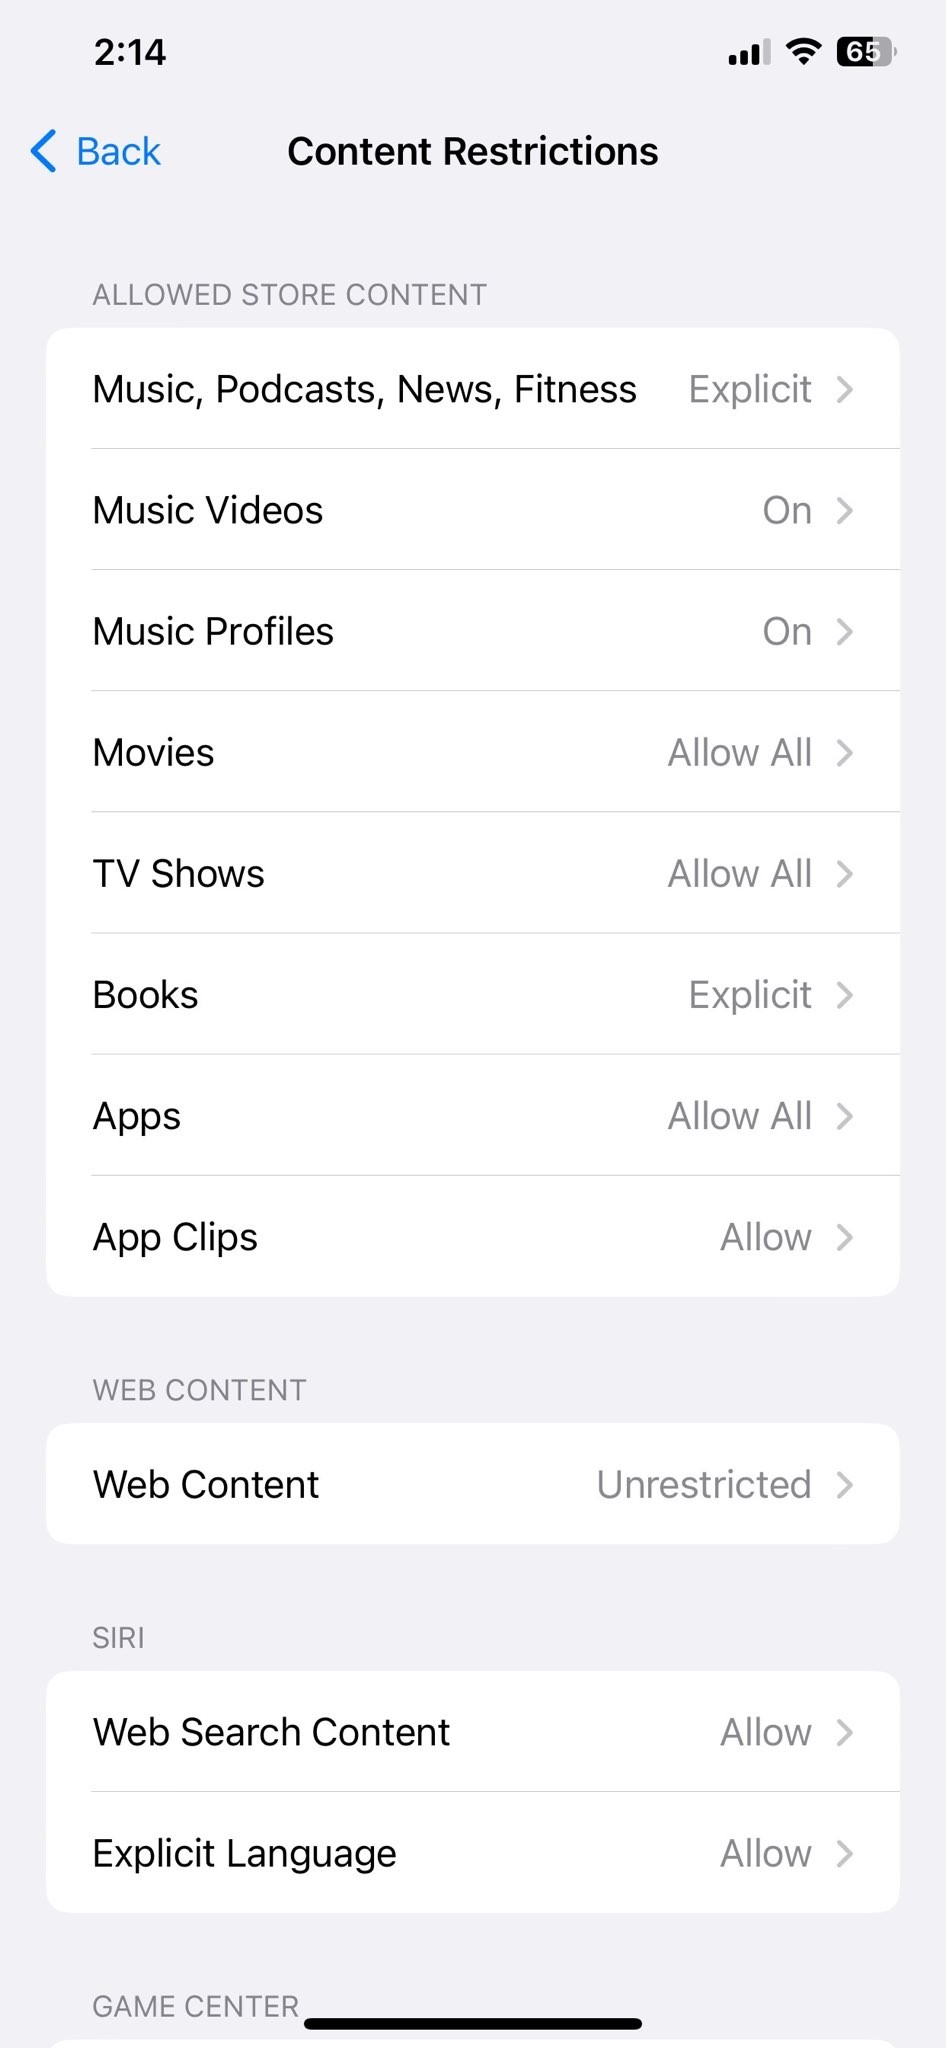
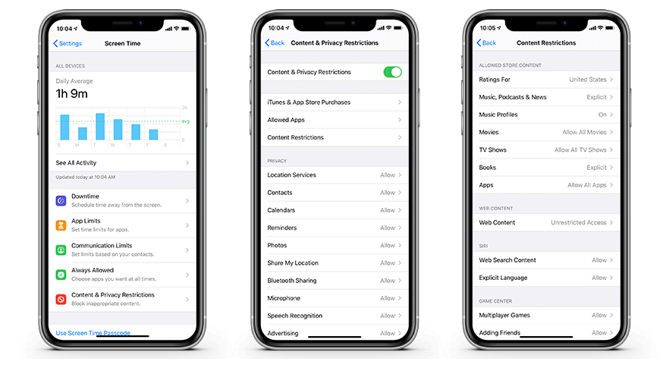
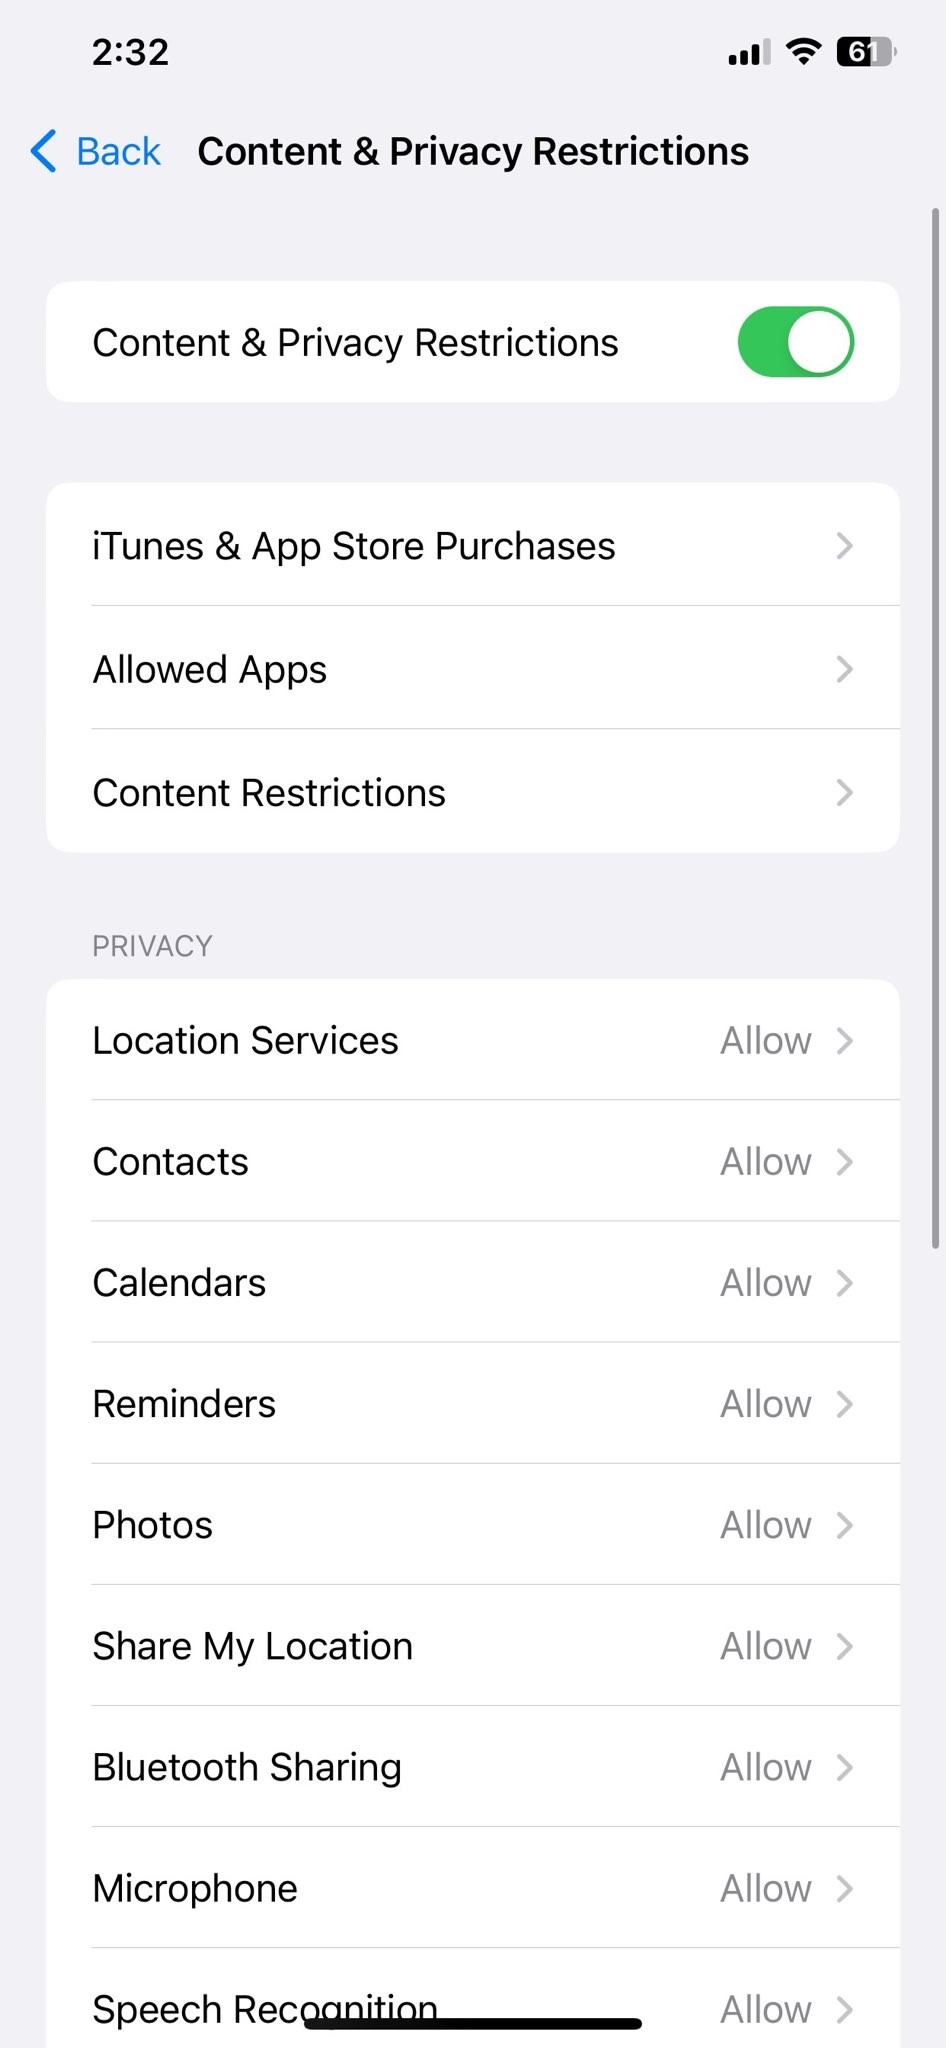
- Go to Settings → Screen Time. Tap “Content & Privacy Restrictions”, then toggle “Content & Privacy Restrictions” to on. This will block inappropriate content across apps, websites and more. You can also set content ratings for movies, TV shows, books and apps to ensure age-appropriate content.
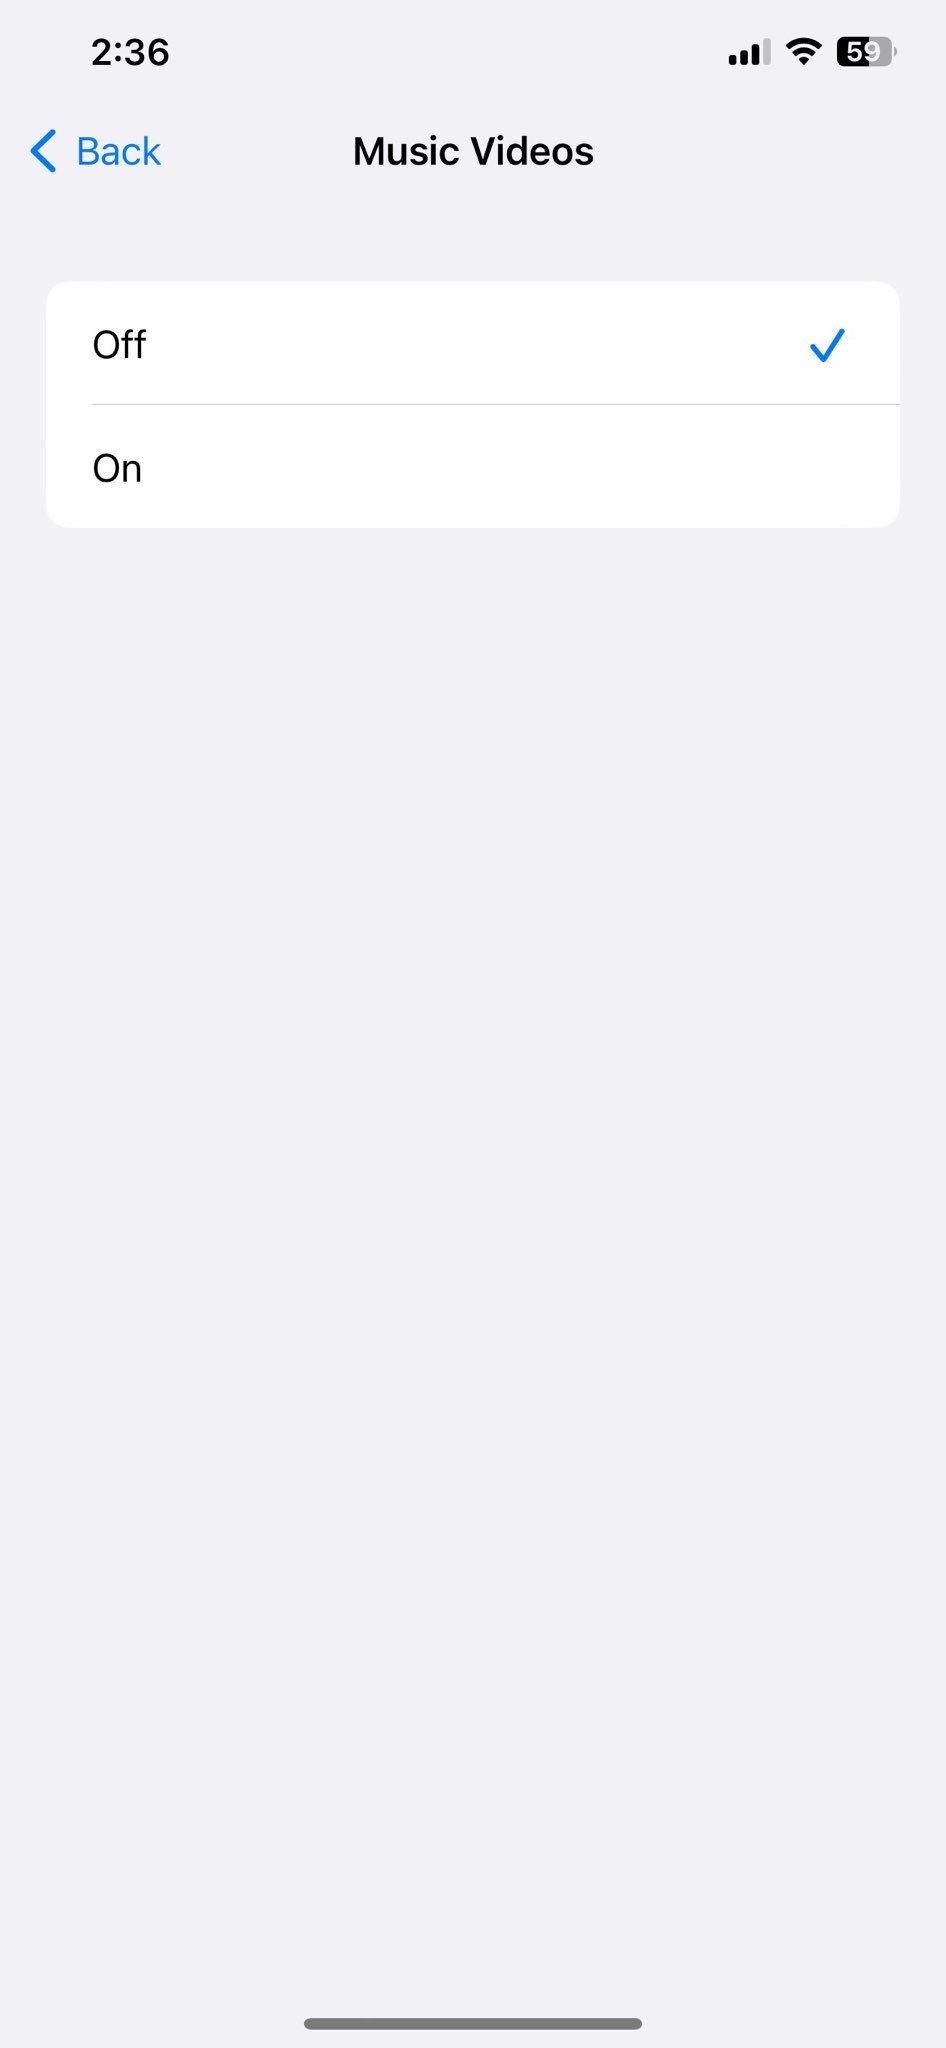
- Select a content rating like PG or G for movies and TV shows to block anything more mature. Do the same for books and news. For apps, choose “Preschool”, “Kids”, “Teens” or “Adults” to filter apps in the App Store by minimum age.
- Turn on “Explicit Website Content” to block adult websites. Toggle “Explicit Language” to block music with swearing and offensive lyrics.
You now have controls in place to filter explicit content and set content ratings for an iPhone or iPad. Make changes to these settings at any time to find the right balance of restrictions as your child matures.
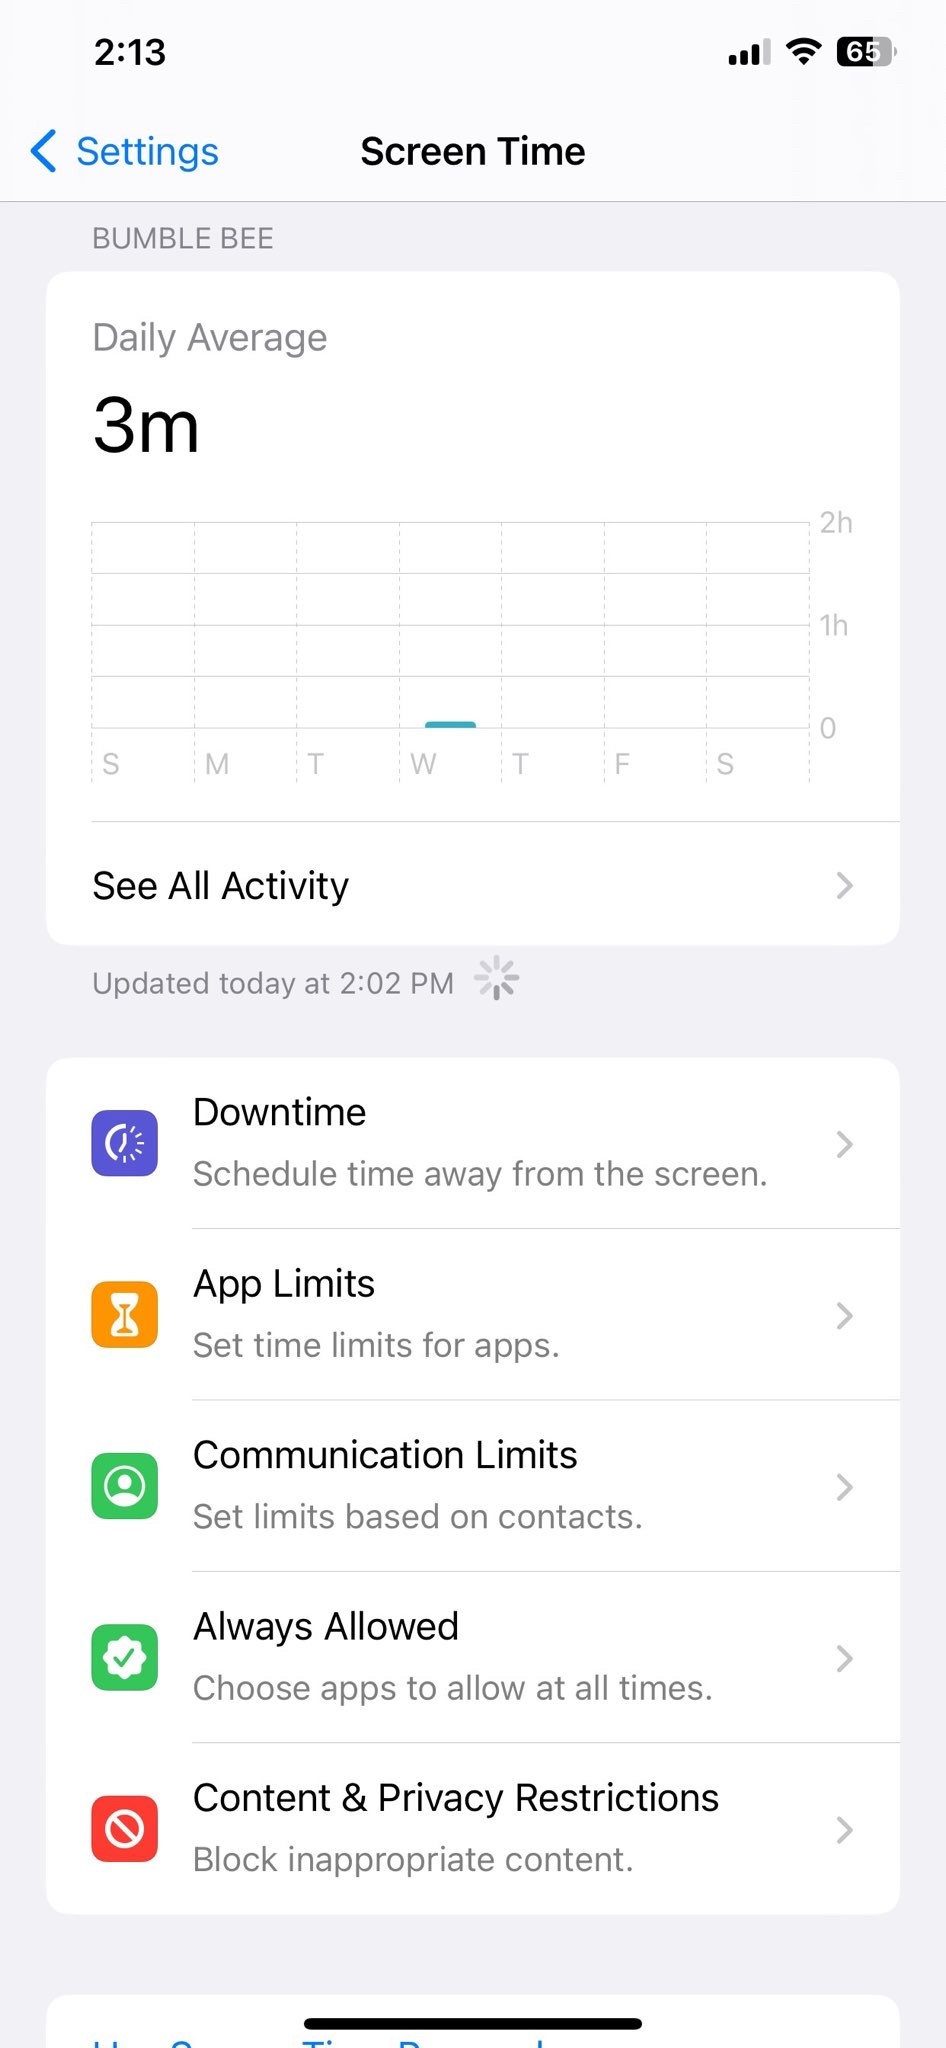
Use Screen Time to Curb Device Addiction
The Screen Time feature allows you to see how much time you and your kids spend on apps, websites and more. It also lets you set daily time limits for each device.
To enable Screen Time on your iPhone or iPad:
- Go to Settings -> Screen Time. Tap ‘Turn On Screen Time’ to enable it.

- Tap ‘Continue’ to get started. You must set a passcode to prevent anyone from turning Screen Time off.

- Choose whether you want to share your Screen Time password with your family. If you have multiple Apple devices, turning this on will sync your settings.
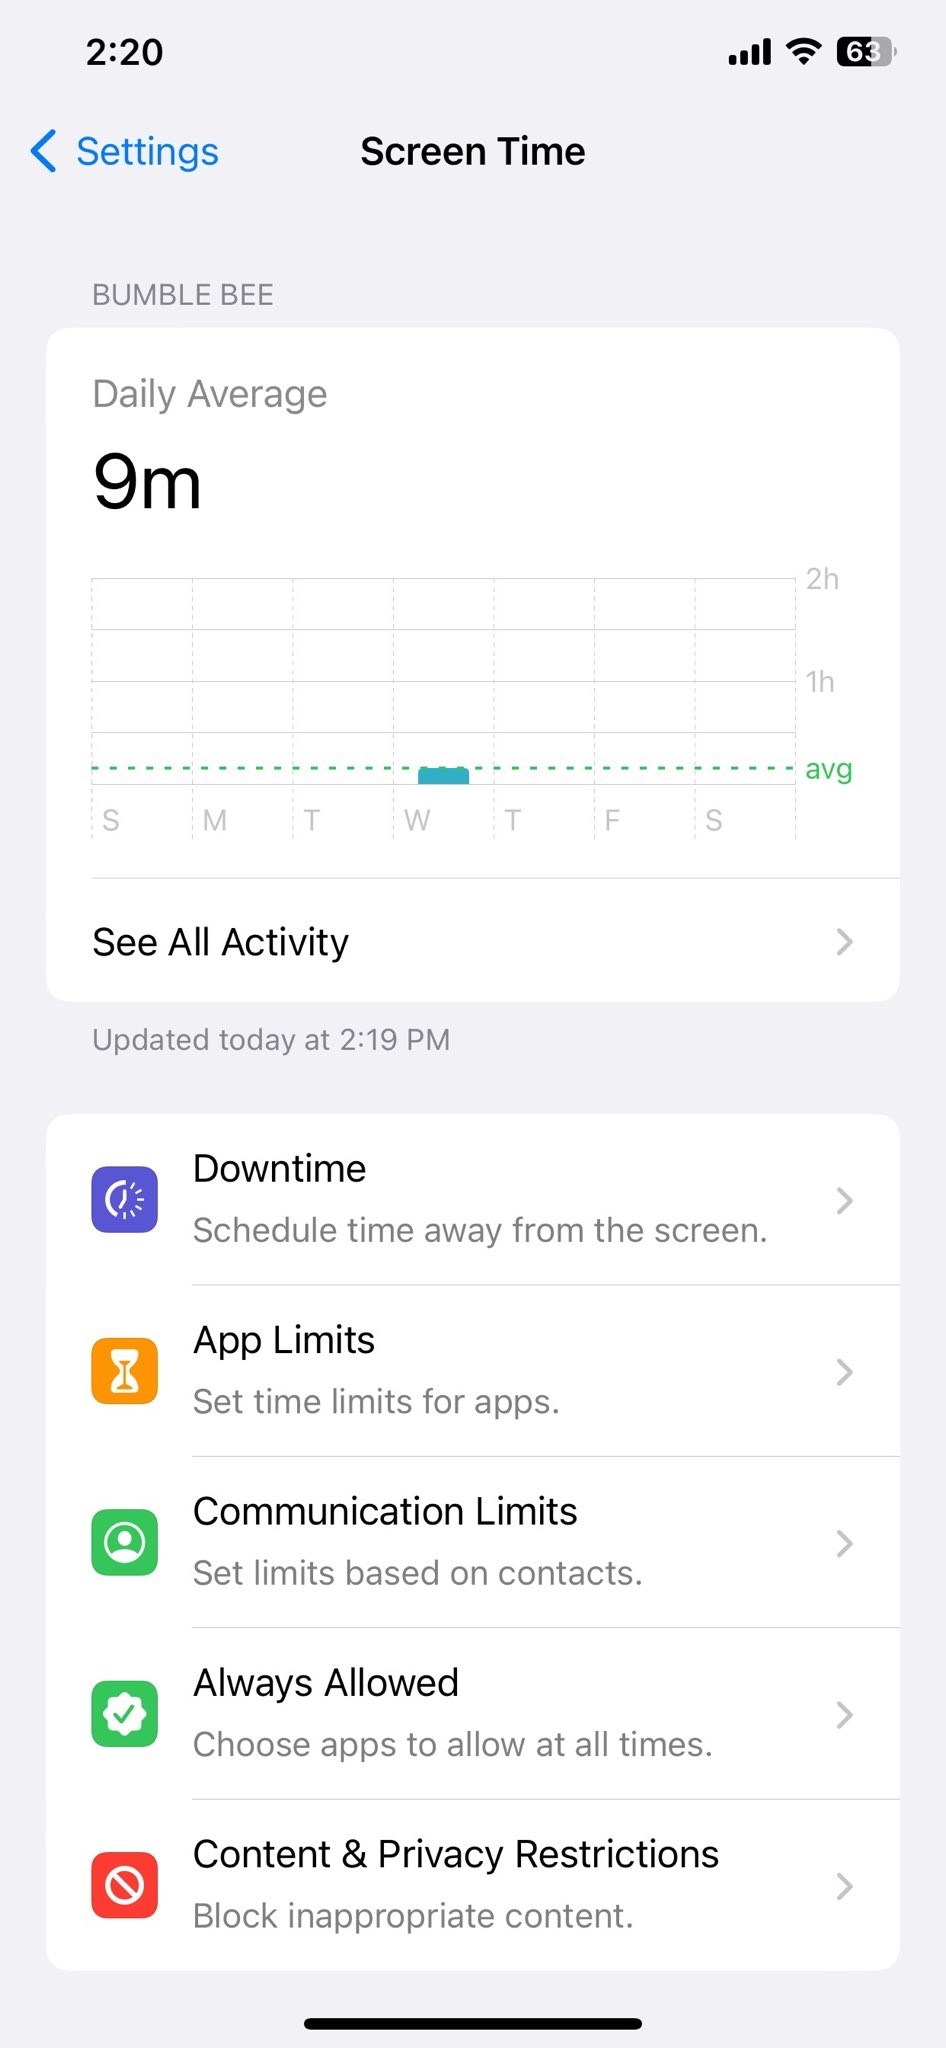
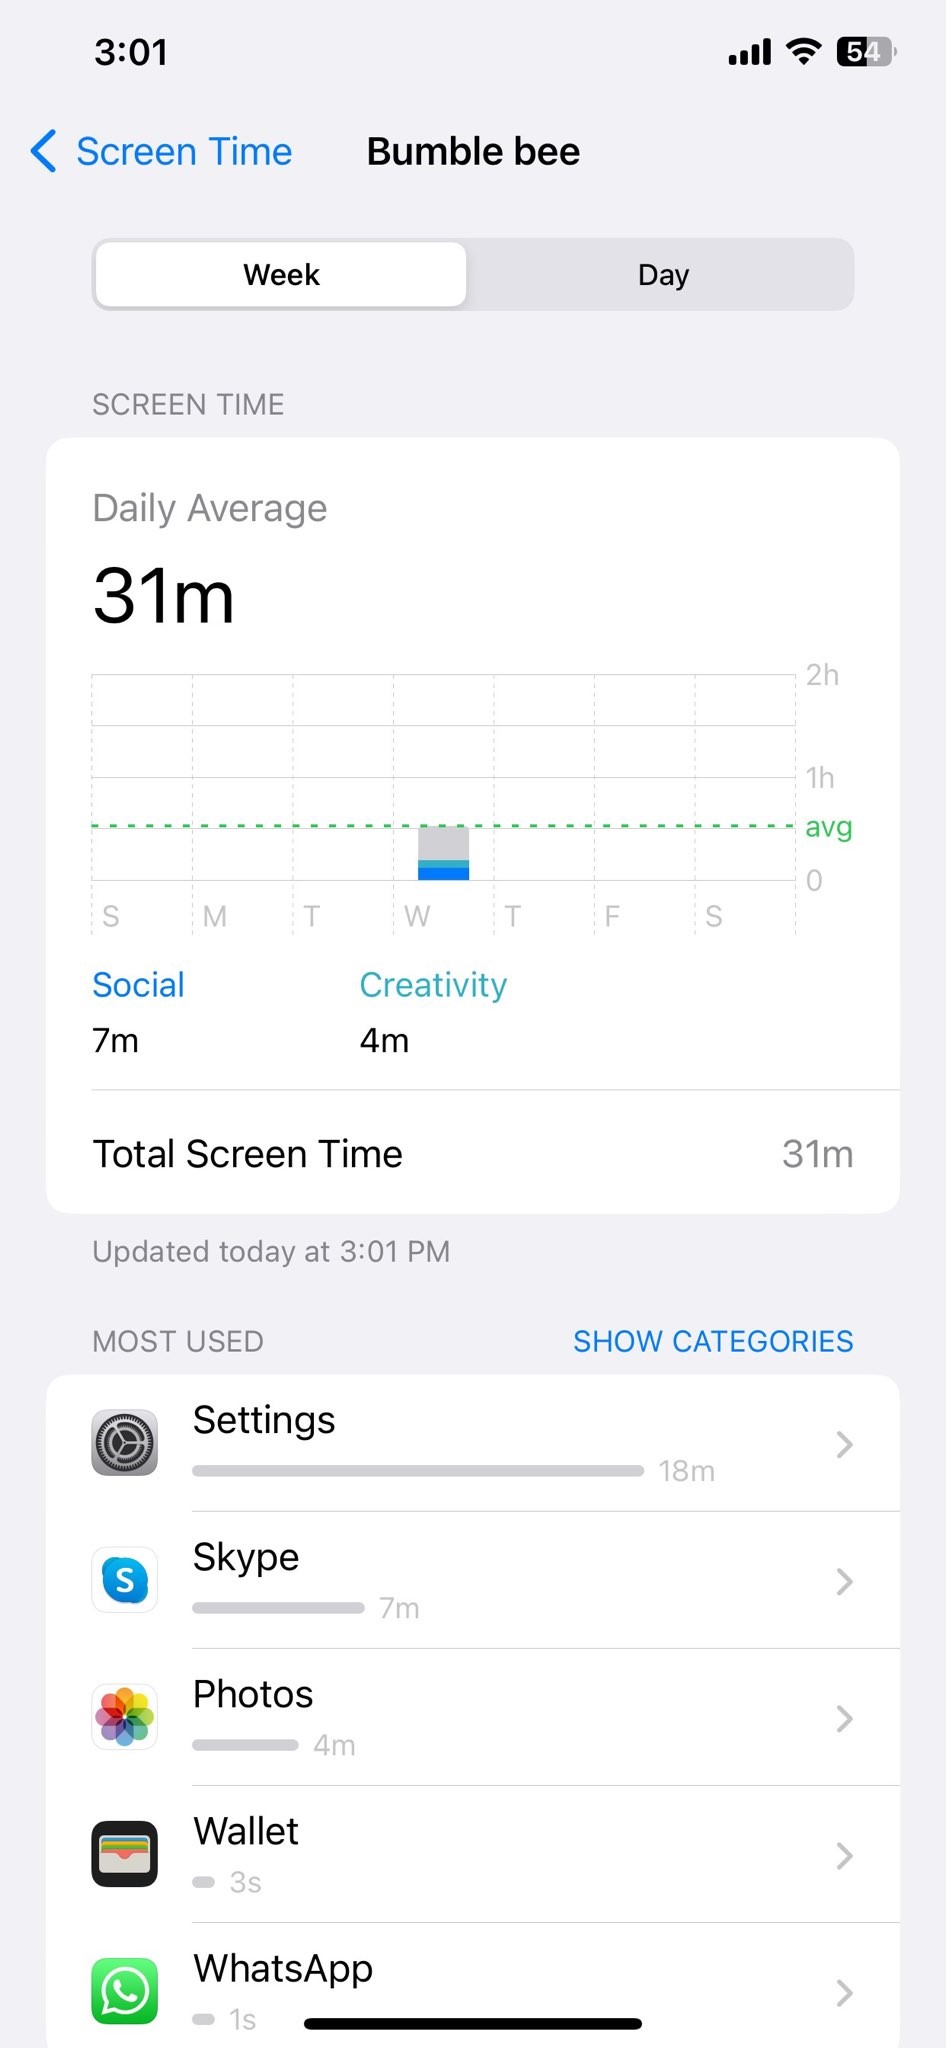
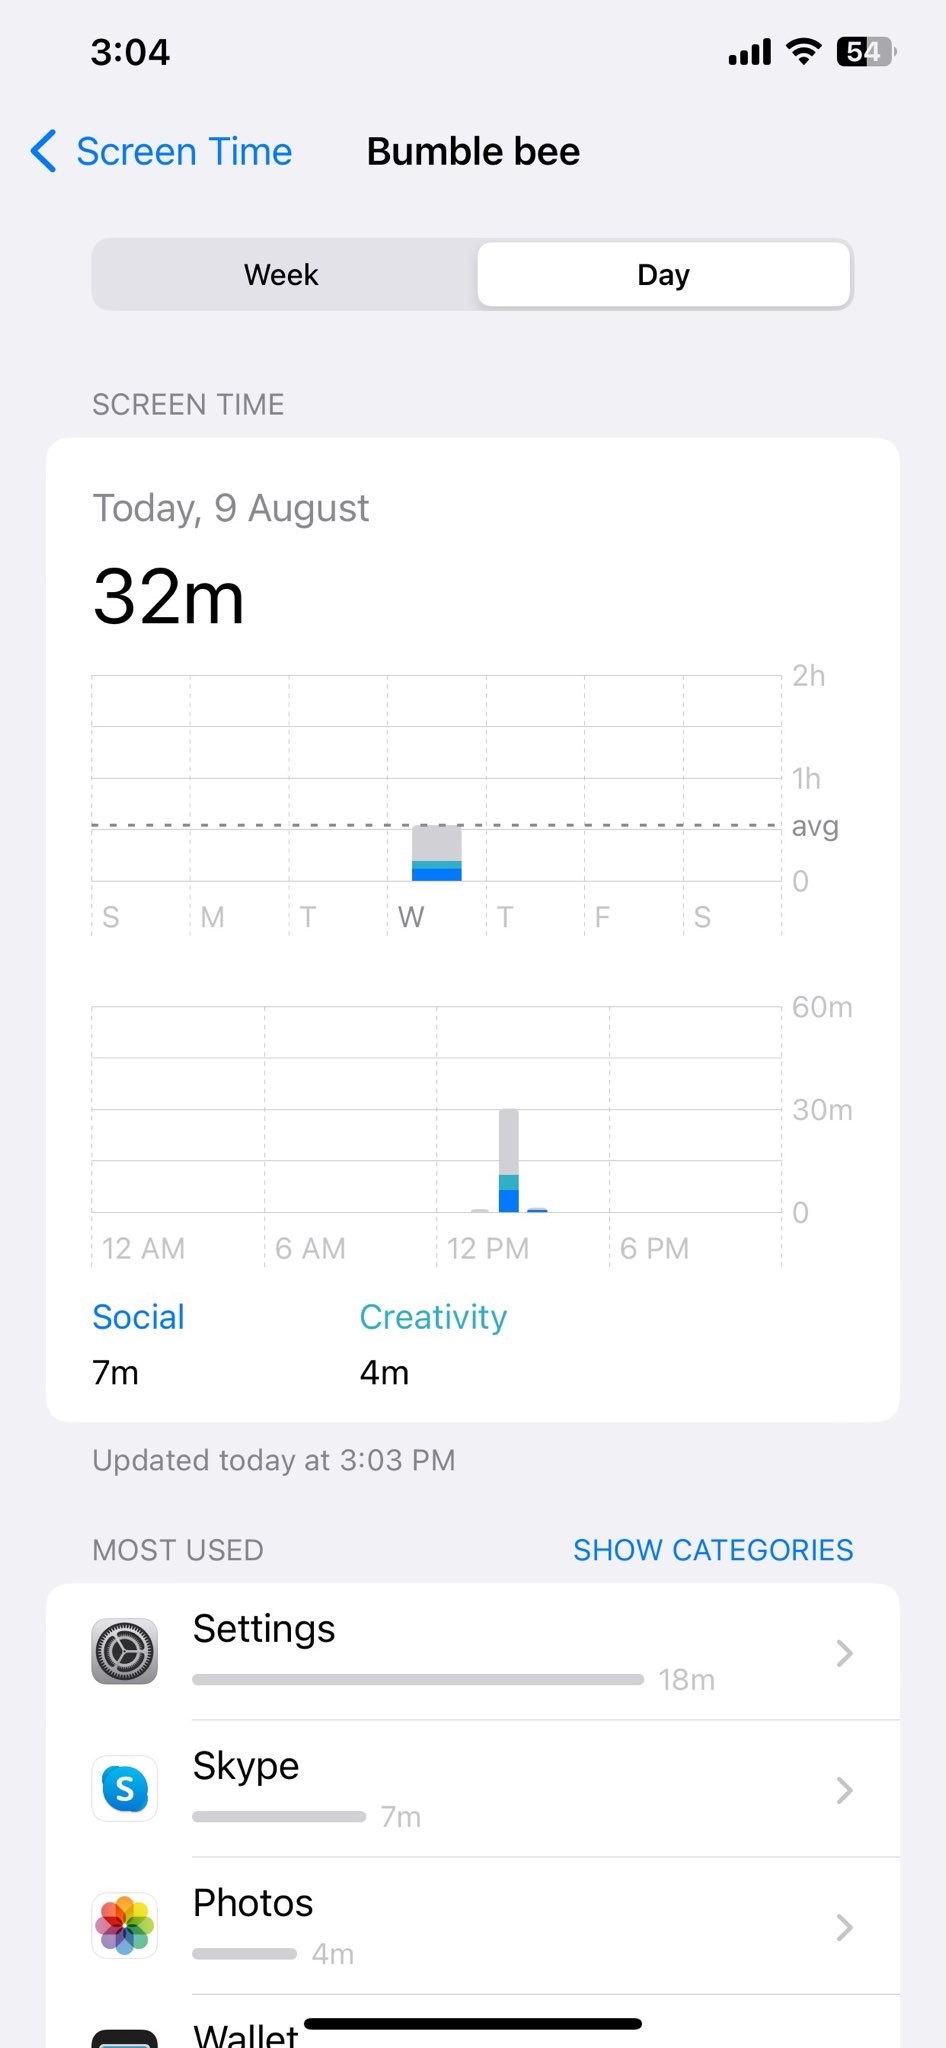
- Review your weekly report to see how much time you spend in each app category. Make any changes to the daily time limits for your kids’ devices. For example, limit social networking to 1 hour per day.
- Turn on content restrictions to block inappropriate websites and apps for your kids. You can also disable certain built-in apps like Safari or iTunes.
- Check your kids’ Screen Time reports and set appropriate limits based on their age and responsibilities. Be open to making changes as needed to find the right balance.
Monitor Your Child’s Location and Set Limits With Find My app
With Find My app, you can set limits for your child’s location and receive notifications when they leave or enter locations like home, school or work.
To set up location limits:
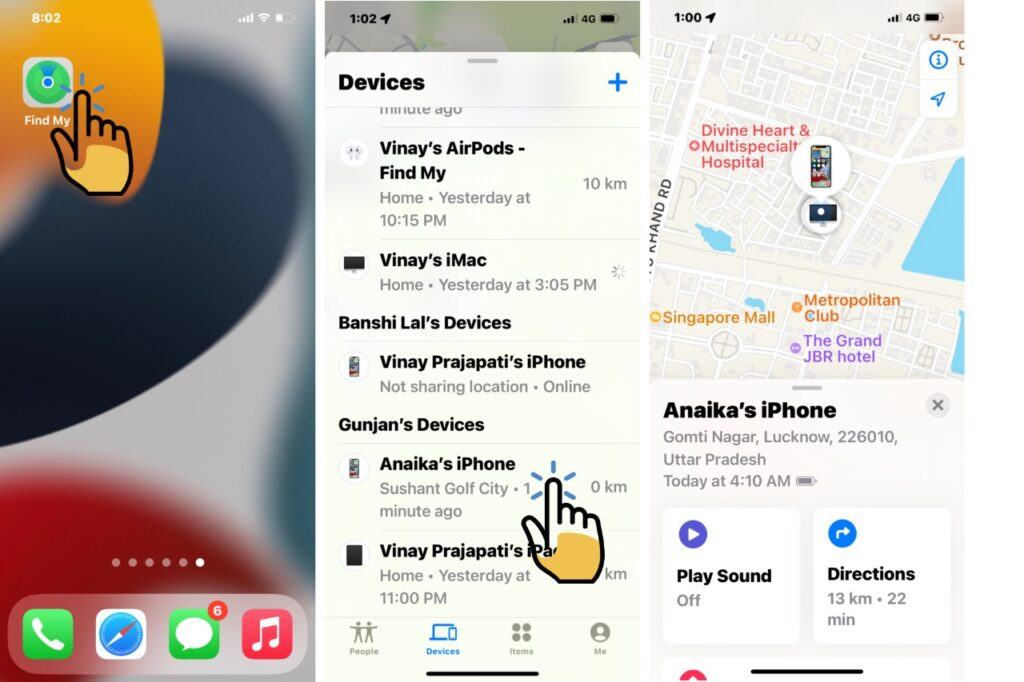
- Open the Find My app on your iPhone or iPad.
- Tap on the name or photo of the family member you want to enable location sharing for.
- Tap “Enable” to turn on location sharing. Your child will receive an alert on their device asking them to enable location sharing with you.
- Once enabled, tap “Add” under “Location Alerts” to set a new location limit.
- Enter an address or tap the map to drop a pin at the location. Set a radius around that point, like 1/4 mile or 500 feet.
- Give the location a name like “School” or “Home” and tap Done.
- Repeat to add additional locations. You’ll receive notifications on your device when your child leaves or arrives at the set locations.
Other Useful Parental Control Settings for iPhone and iPad
The parental controls for iPad and iPhone offer several useful settings beyond content restrictions. Here are a few more options worth exploring:
- Prevent specific apps from being downloaded or used. This helps ensure only age-appropriate content and tools are accessible.
- Remove apps from the home screen for users above 18+ so they’re not as tempting to open. The apps will still be installed but not visible.
- Require your child to request your approval for any app purchases and downloads. This avoids surprise charges on your account or downloads of content you’d rather they not have.
Exploring all the options in the parental controls and setting the limits that make sense for your family can help you feel more at ease about the devices your kids use daily. With consistent monitoring and open conversations, technology and children can co-exist responsibly.
Specify which websites your child is allowed to visit
You’ll want to set up website restrictions to limit which websites your child can access on their iPhone or iPad. Here are the steps:
- Open the Settings app on your child’s iPhone or iPad.
- Tap Screen Time.
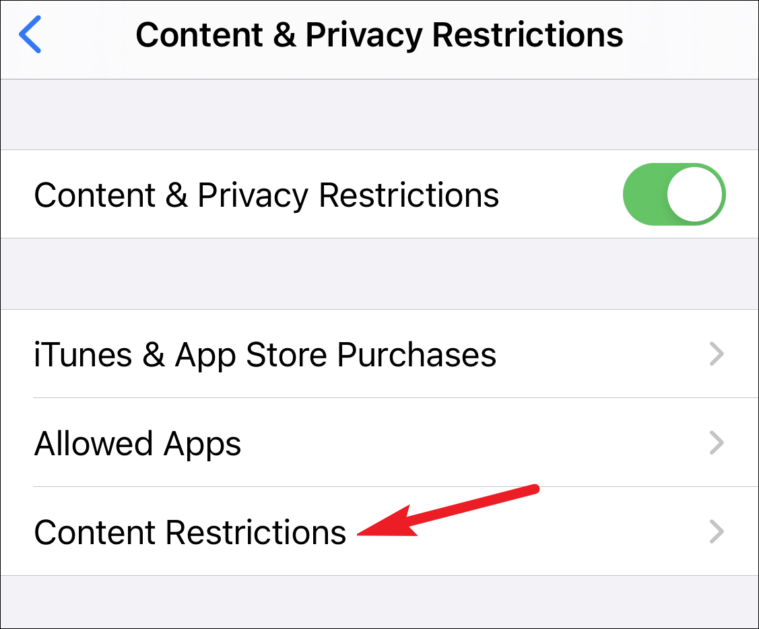
- Tap Content & Privacy Restrictions.
- Tap Content Restrictions.
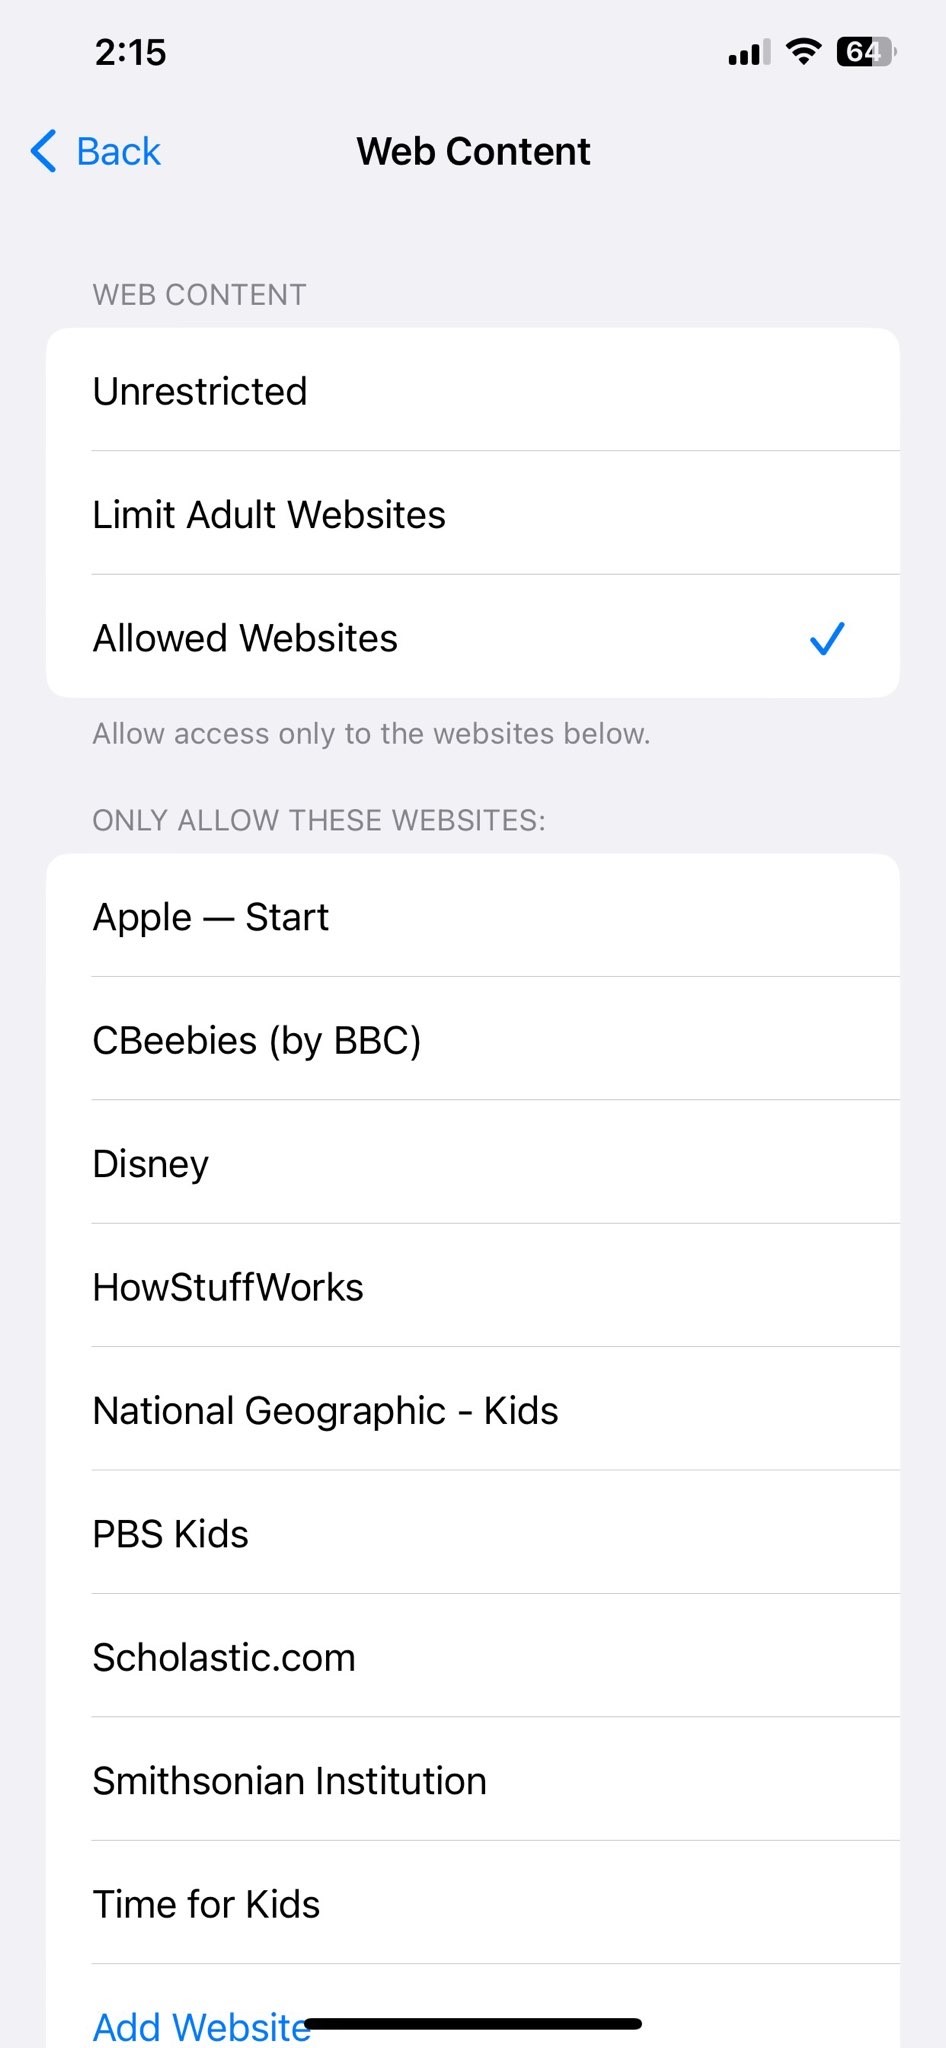
- Tap Web Content.
- Tap Limit Adult Content to on. This will filter most inappropriate content.
- Tap Customize to specify which websites are allowed or blocked.
- Tap Add Website and enter the URL of a site you want to always allow, like a homework help site.
- Tap Add to add it to the allowed list.
- To block a website, tap Add Website and enter the URL. Tap Add to add it to the blocked list. Your child won’t be able to access those sites.
- Tap Done when finished. The settings may take a few minutes to sync across your child’s devices.
Enable restriction with AstrillVPN
To enable parental controls on an iPhone or iPad with AstrillVPN, follow these steps:
- Download the AstrillVPN app on your device and create an account. AstrillVPN is a popular VPN service that also offers parental control features to help restrict what your kids can access.
- Once you’ve signed up, tap the menu icon in the AstrillVPN app.
- To block specific websites or apps, tap ‘Website and app Filter‘ and enter the names of sites or apps you want to restrict. Tap ‘Add’ to save them to the block list.
- Finally, you’ll want to set a password to lock the AstrillVPN app so your kids can’t simply disable the parental controls.
- Go to ‘App Lock’ on iphone and enable the lock, then enter a secure password.
- Now the settings you enabled can only be changed by entering this password.
With AstrillVPN’s parental controls set up on the iPhone or iPad, you can rest assured your kids will only have access to age-appropriate content and apps. Be sure to periodically check on the settings to ensure they continue meeting your needs.
FAQs
Yes, with iPhone parental controls, you can enable message monitoring to see your child’s SMS text messages, MMS messages, and iMessages. You’ll get an alert whenever they send or receive a message, and you can view the actual content of each message.
Absolutely. The Remote Management feature allows you to lock your child’s iPhone instantly if needed. You can lock the entire device or specific apps. When the device is locked, your child will be unable to access it until you enter the passcode to unlock it. This is a great option if their phone is lost or stolen, or if you need to restrict access for disciplinary reasons.
A kid mode, known as Guided Access, is available on iPhone to limit your child to a single app. Once Guided Access is enabled, your child will be unable to exit the app. You can also restrict touchscreen and hardware buttons. To exit Guided Access mode, you’ll need to enter your passcode. This feature is ideal for young children or if you want to limit distractions.
Conclusion
So there you have a few simple steps to help you set up parental controls on your iPhone or iPad and give you more peace of mind. Now you can rest a little easier knowing you have more oversight and control. And when your kids eventually do get their own phones, you’ll be well-versed in the features to keep them safe. Stay up to date as new options become available, but for now, put these controls in place and enjoy your devices with fewer worries. Take it from one tech-savvy parent to another, you’ve got this!

Secure your privacy instantly. Try AstrillVPN with zero risk.
About The Author
No comments were posted yet