How to Port Forward Minecraft Server Easily

Arsalan Rathore
With Minecraft, you may make your own server from the ground up. Who needs it if they can’t show their amazing creations to their loved ones? No one enjoys venturing out on their own to explore, mine, and craft. For situations like these, port forwarding is a lifesaver.
You can easily configure port forwarding for Minecraft servers in the router’s settings by following a few easy steps. You will learn all you need to know about Minecraft port forwarding in this comprehensive guide for your server.
Table of Contents
What Is Port Forwarding?
Port forwarding is a method that lets devices or services outside your network connect to specific devices or applications inside it. It works by setting up your router or firewall to direct incoming traffic from a specific external port to an internal device’s IP address and port.
Port forwarding ensures internet data reaches the right device or application on your network. For example, if you’re hosting a web or gaming server, port forwarding allows users outside your network to connect to it by routing the traffic correctly.
Usually, routers block incoming internet requests for security. Port forwarding bypasses this for specific ports, allowing approved traffic to reach the intended device securely.
Why Do You Need Port Forwarding for Your Minecraft Server?
Port forwarding is essential for hosting a Minecraft server because it allows players outside your local network to connect to your server. By default, most home routers block incoming internet traffic to protect your network. However, this security feature can prevent external users from accessing your Minecraft server unless you configure port forwarding.
Here’s why port forwarding is necessary:
- Without port forwarding, your Minecraft server will only be accessible to devices within your home network. By opening the specific port Minecraft uses (usually port 25565), you enable players from anywhere worldwide to join your server.
- Hosting your Minecraft server gives you complete control over game settings, mods, and rules. Port forwarding ensures that your server is discoverable by friends or the public, depending on your preferences.
- Whether running a private server for friends or a public server for the community, port forwarding ensures a seamless connection for players. It reduces potential connection issues that could arise from blocked or misrouted traffic.
Many Minecraft server management tools require access to the server from an external network. Port forwarding ensures these tools function correctly, allowing you to monitor and control your server remotely.
How to Set Up a Minecraft Server
Before port forwarding, you’ll have to set up a Minecraft server. Follow the procedures mentioned below to set up a Minecraft server:
Minecraft Server Setup for Windows 10 & 11
Follow these steps to set up a Minecraft server on your Windows 10 or 11 PC:
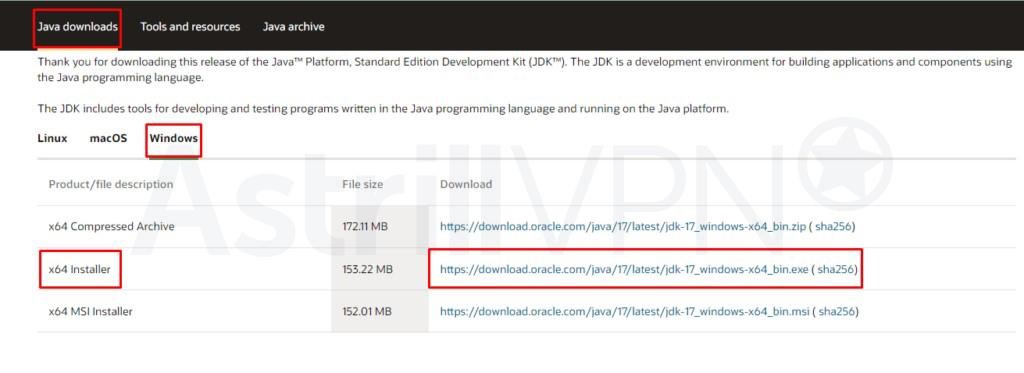
- Download and Install Java 17.
- Now, create a new folder on your desktop.
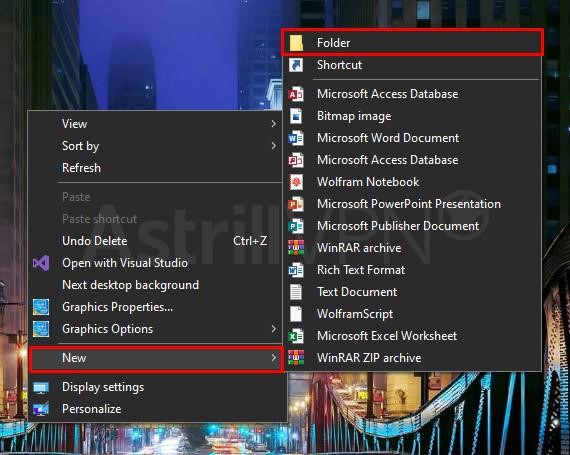
- Name this folder “Minecraft Server.”
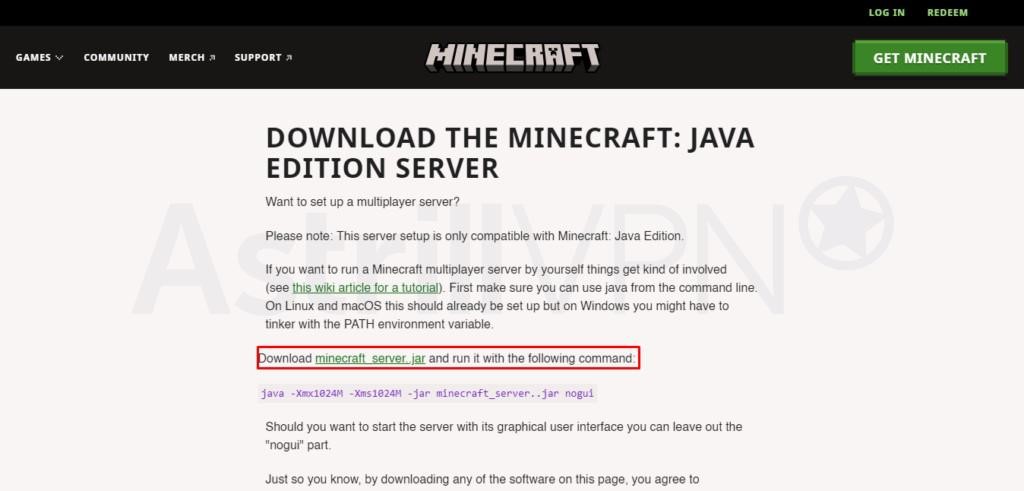
- Now, copy the Minecraft server “server.jar” file from Downloads into the new folder.
- Now open the file to start the server.
Requirements to Port Forward Minecraft
Before forwarding a port for your Minecraft server, it’s essential to ensure that you meet certain requirements to ensure a smooth and secure setup. Here are the key requirements:
- The static IP address of your router.
- The IP address of your gaming machine.
- TCP and UDP ports that need to be forwarded.
How to Port Forward a Minecraft Server?
Step #1: Configure Your Minecraft Port Number
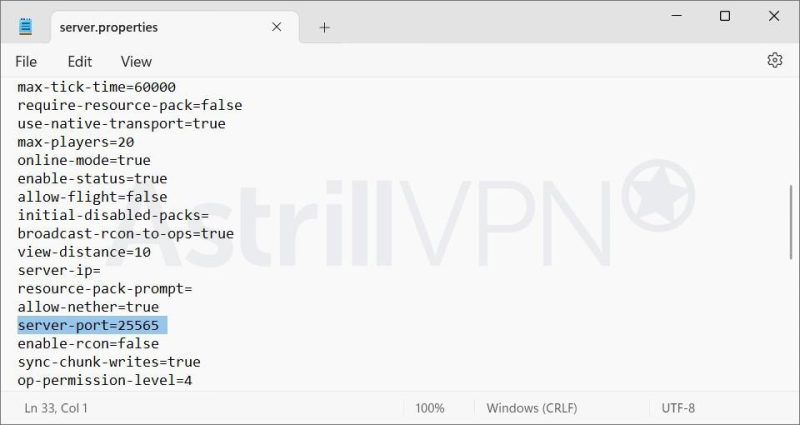
- Open the Minecraft server directory and locate the server.properties file.

- Right-click on it and open it with a text editor.
- Find the server-port line.
Here are the default port numbers for Minecraft:
- 25565 – for Java Edition.
- 19132-19133 – TCP and UDP ports for Bedrock.
Users can change the port by changing the server-port value to any within the range from 1 to 65535, although we recommend sticking with the default one.
Step #2: Allow the Minecraft Port on Your Firewall
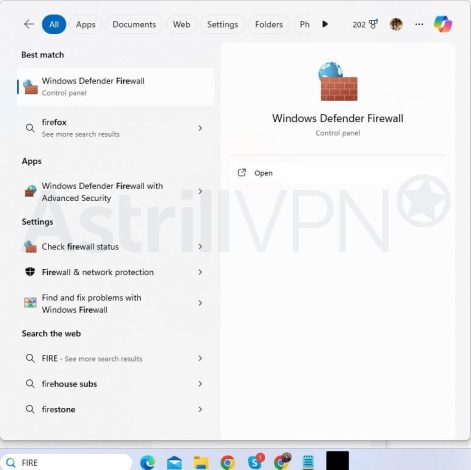
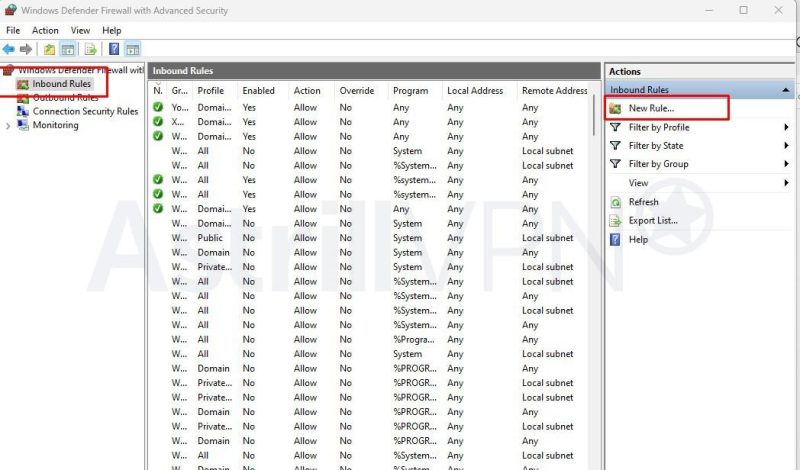
- Open Windows Defender Firewall.
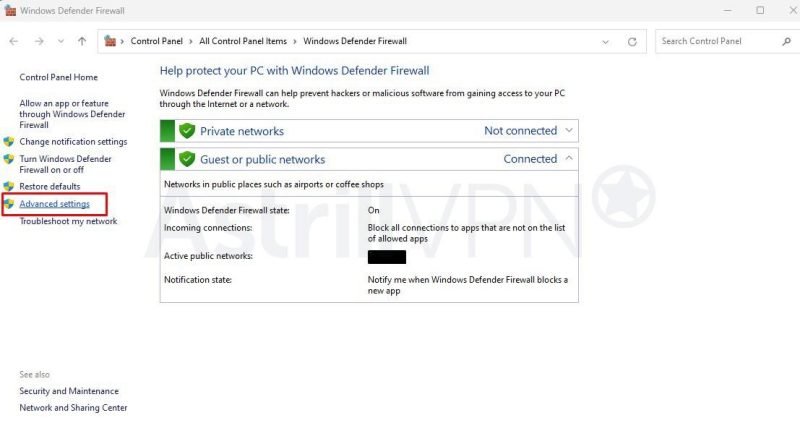
- Click on Advanced Settings from the left-hand column.
- Click on Inbound Rules and select New Rule.
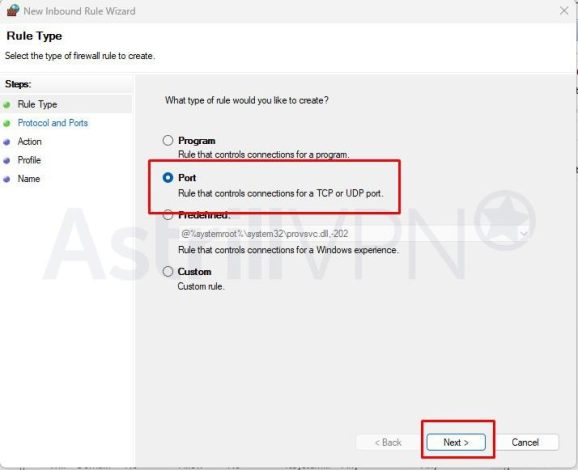
- Choose Port and click Next.
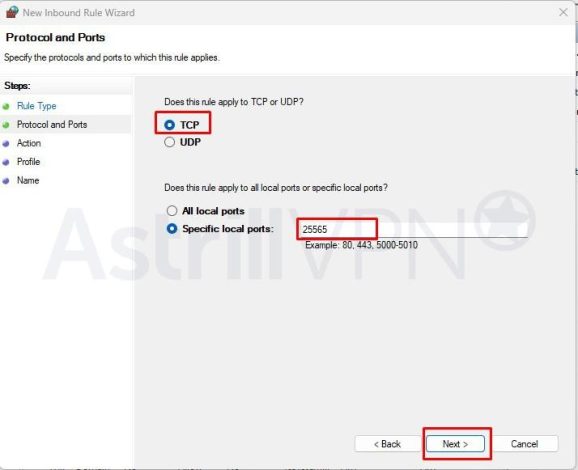
- Select TCP, and enter the Minecraft port number. In this case, it’s 25565. Once done, click Next.
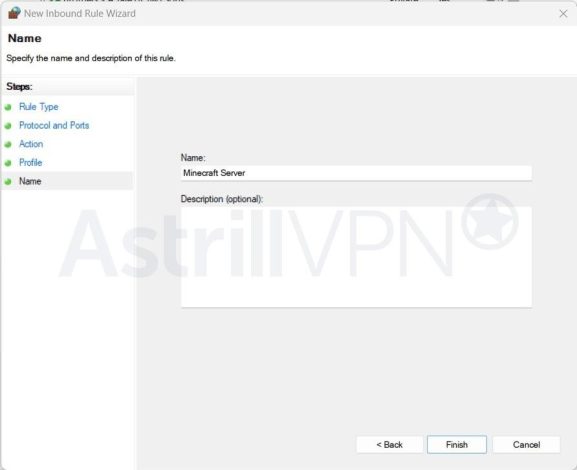
- Select Allow connection and keep clicking Next until you reach the final step. Before hitting Finish, don’t forget to give your rule a name.
- After you have created the rule, make a new one using the same configuration, but this time for UDP.
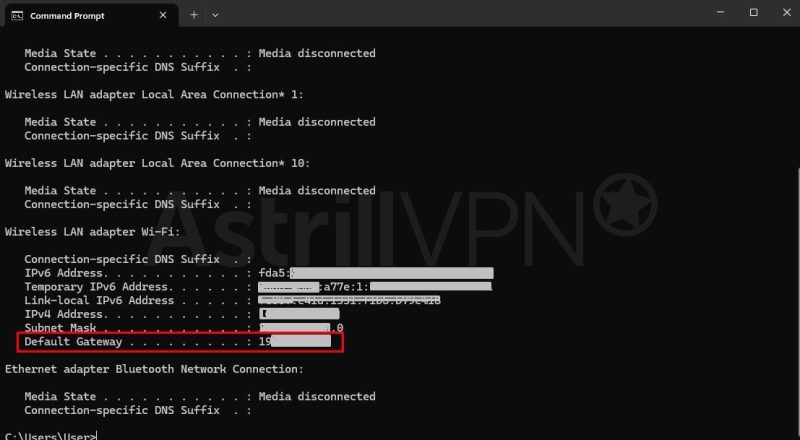
Step #3: Find Default Gateway Address
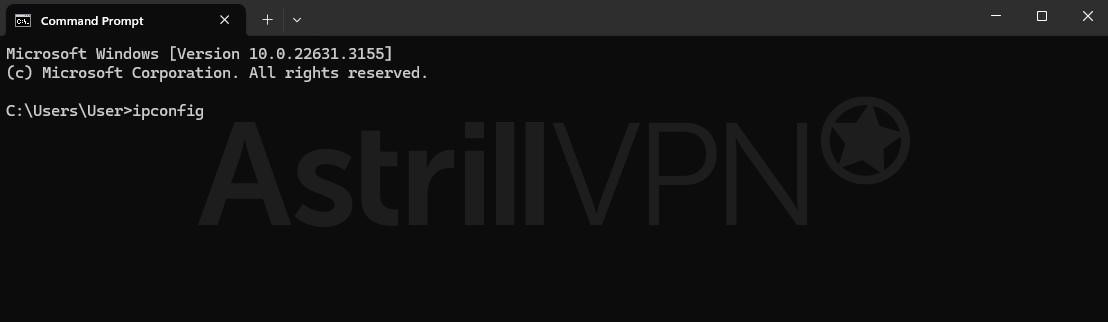
- Type cmd in the start menu search bar and hit enter to open the command prompt.

- Then type: ipconfig in the command line and hit enter.
- Your router’s IP address will appear in front of the Default Gateway row.
Step #4: Set Up a Static IP Address
- Open Command Prompt again by typing CMD and pressing enter.
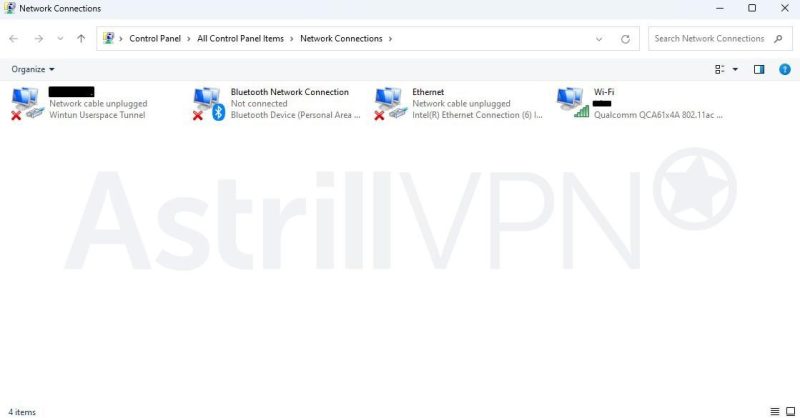
- Type this in the command line: ncpa.cpl and hit enter.
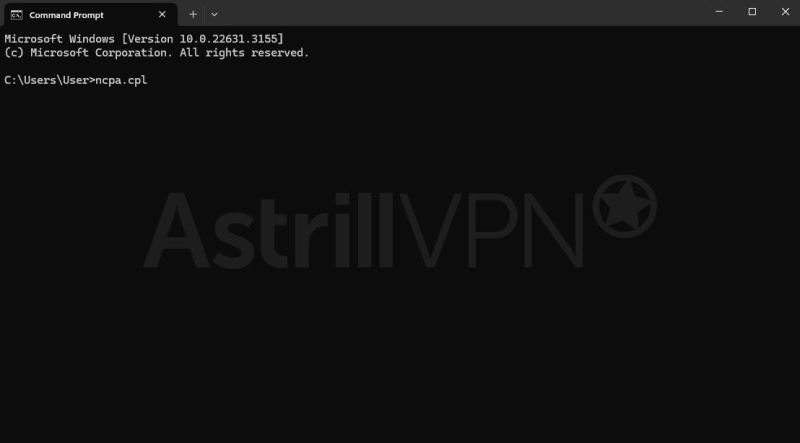
- Network Connections window will open.
- Right-click your network connection, and select Properties.
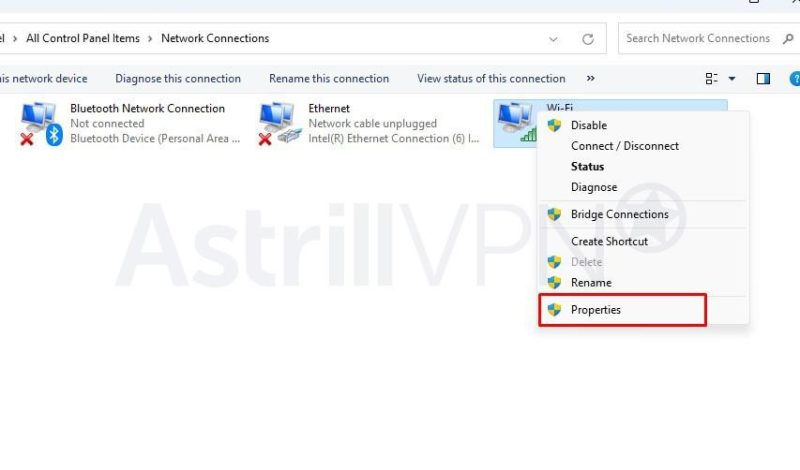
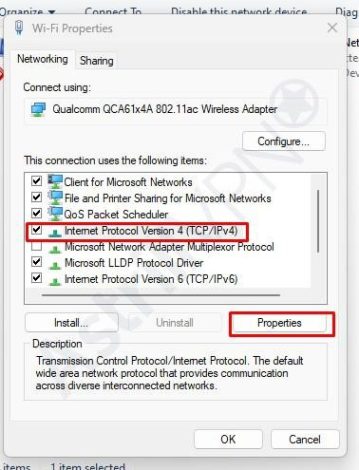
- Now click on Internet Protocol Version 4 (TCP/IP), and hit Properties.
- Choose a static IP address, enter 255.255.255.0 as the subnet mask, and enter the router’s IP address that you obtained before.
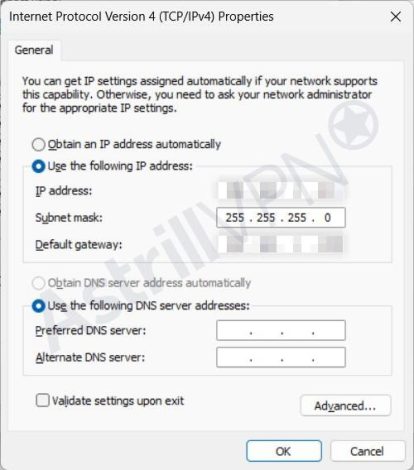
- After adding the Subnet mask, click OK.
Step #5: Forward the Port on Your Router
The port forwarding procedure may be different for every router. The one we’ve discussed below is for the TP-Link router.
- Open Chrome, paste your default gateway address bar and hit enter.
- Now log in to your router’s dashboard.
- Go to the Advanced tab.
- Select NAR Forwarding from the sidebar and then go to Virtual Servers.
- Click on the Add icon and enter these details:
- Next, enter the details as follows:
- Service Type: Minecraft Server
- External Port: 225565
- Internal IP: Your IPv4 address
- Protocol: ALL (UDP + TCP)
That’s it, you’re all set!
Step #6: Connect to the Minecraft server
- Run the server again, like we did in the previous heading.
- Now open Minecraft.
- Select the Multiplayer option and click Proceed.
- Click Direct Connection.
- Now go to Google, type “What’s my IP address,” and copy the IP address on your screen.
- Now, enter your IP address in the Minecraft app and tap on Join Server.
Minecraft Port Forwarding for Different Devices
Minecraft Server Ports to Forward on PC – Windows
- TCP: 25565
- UDP: 19132-19133, 25565
Minecraft Ports To Forward On PlayStation 4
- TCP: 1935, 3478-3480
- UDP: 3074, 3478-3479, 19132-19133
Minecraft Ports To Forwarding On Xbox One
- TCP: 3074
- UDP: 88, 500, 3074, 3544, 4500, 1935, 3478-3480
Minecraft Ports To Forward On Xbox 360
- TCP: 3074
- UDP: 88, 3074
Minecraft Ports To Forward On PlayStation 3
- TCP: 3478-3480, 5223, 8080
- UDP: 3074, 3478-3479, 3658
Minecraft Ports To Forward On Switch
- TCP: 6667, 12400, 28910, 29900, 29901, 29920
- UDP: 1-65535
Can I host a Minecraft server with a VPN?

Yes, you can host a Minecraft server using a VPN like AstrillVPN, and doing so has some significant benefits!
Network Stability
AstrillVPN offers stable and reliable connections, which can be beneficial for hosting a Minecraft server. By routing your server’s traffic through VPN servers, you may experience fewer latency issues and smoother gameplay for your players.
Flexibility
With a VPN, you have the flexibility to host your Minecraft server from anywhere with an internet connection. Whether at home, traveling, or using a public Wi-Fi network, you can securely host your server and manage it remotely.
Should I use a VPN for Minecraft?
Yes, it enhances online security by encrypting your internet connection and protecting your personal data and server information from threats and cyberattacks. This added layer of security can give you peace of mind, especially when hosting a Minecraft server, as it reduces the risk of unauthorized access or DDoS attacks.
Additionally, a VPN ideal for gaming, like AstrillVPN, provides privacy by masking your actual IP address, preventing others from tracking your online activities, including gaming sessions. This can be particularly beneficial if you’re concerned about privacy while playing Minecraft or hosting a server from a residential location.
Furthermore, AstrillVPN allows you to bypass certain restrictions imposed by your ISP, such as bandwidth throttling or limitations on hosting servers. By rerouting your server’s traffic through VPN servers, you can overcome these restrictions and ensure a smoother gaming experience for you and your players.
To allow friends to connect to your Minecraft server, you need to provide them with your external IP address. They can use this IP address to connect to your server outside your local network.
You can host a Minecraft server without port forwarding by using a hosting service or a virtual private server (VPS) that provides a public IP address and handles the port forwarding and networking configurations.
Minecraft primarily uses TCP (Transmission Control Protocol) for communication. However, some aspects of the game may also utilize UDP (User Datagram Protocol), especially for features like voice chat or multiplayer interactions.

Secure your privacy instantly. Try AstrillVPN with zero risk.
About The Author
No comments were posted yet