
Have you been wondering how to disable IPv6 on your Mac? You’re not alone. While IPv6 was designed to replace IPv4 and provide more IP addresses, many people find it can cause connectivity or other unintended network problems. If you’ve tried various network troubleshooting steps but still suspect IPv6 might be the culprit, disabling it on your Mac is worth a shot.
The good news is, it’s a straightforward process that only takes a few minutes. In this article, we’ll walk you through how to turn off IPv6 on your Mac. By the end, your Mac will be using the IPv4 protocol exclusively and your network issues will be a thing of the past.
Table of Contents
Why Would You Want to Disable IPv6 on Mac?
There are a few reasons this can come in handy:
- IPv6 is the newest version of the Internet Protocol, but only some networks and devices support it. Disabling IPv6 ensures you’re using the IPv4 protocol that almost everything understands.
- Certain apps or network equipment may not play nicely with IPv6 enabled. If you’re having connectivity issues, disabling IPv6 is an easy thing to try.
- IPv6 can pose some security risks if not properly configured. Disabling it eliminates that concern altogether.
- You can optimize your network performance. Since not everything utilizes IPv6 yet, disabling it can prevent potential slowdowns from IPv6 traffic.
Method 1: How to turn off IPv6 on Mac?
To turn off IPv6 on Mac, here’s what you need to do:
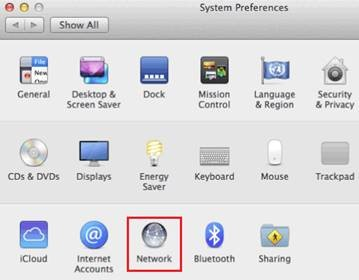
- Open System Preferences and click Network.
- Select Wi-Fi on the left, then click Advanced on the right.
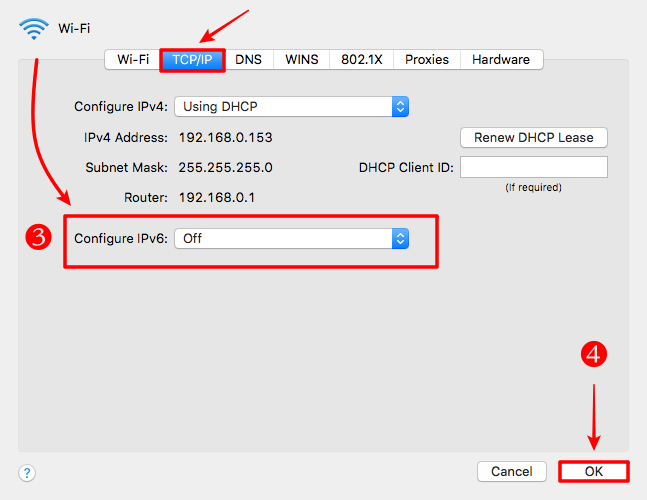
- Go to the TCP/IP tab.
- Next to Configure IPv6, select Off from the drop-down menu.
- Click OK, then Apply to save the changes.
- Repeat the same steps for any other network interfaces you want to disable IPv6 on, like Ethernet.
And that’s it, you’ve now disabled IPv6 on your Mac. If you want to re-enable it at any point, just go back to those network settings and select Automatically or Manually configure IPv6 addresses.
Method 2: Disable IPv6 Using Terminal Commands
For advanced users or those who prefer command-line control, Terminal provides a powerful way to disable IPv6 on your Mac. This method is especially useful when the “Off” option isn’t available in System Settings (common in macOS Ventura, Sonoma, and Sequoia) or when you need to disable IPv6 across multiple interfaces quickly.
Step 1: Open Terminal
Launch the Terminal application on your Mac:
- Press Command + Space to open Spotlight Search
- Type “Terminal” and press Enter
- Alternatively, navigate to Applications > Utilities > Terminal
Step 2: List All Network Interfaces
Before disabling IPv6, you need to identify which network services are active on your Mac. Run the following command:
bashnetworksetup -listallnetworkservices
This command displays all available network interfaces
Step 3: Disable IPv6 for Each Active Interface
Once you’ve identified your active network interfaces, use the following command structure to disable IPv6:
bashsudo networksetup -setv6off "InterfaceName"
After entering each command, you’ll be prompted to enter your Mac administrator password. Type your password (it won’t be visible as you type) and press Enter.
Step 4: Disable IPv6 for All Interfaces at Once (Optional)
If you want to disable IPv6 across all network interfaces simultaneously, you can use this convenient loop command:
bashfor service in $(networksetup -listallnetworkservices | grep -v '*'); do sudo networksetup -setv6off "$service"; done
This command automatically disables IPv6 for every active network service without requiring you to run individual commands.
Step 5: Verify IPv6 is Disabled
After disabling IPv6, it’s essential to verify the changes took effect. Use any of these verification methods:
How to turn IPv6 Back On?
So you disabled IPv6 on your Mac but now want to turn it back on. No problem, it’s an easy fix.
To re-enable IPv6,
- Open up System Preferences and click on Network.
- Select Wi-Fi on the left side, then click Advanced.
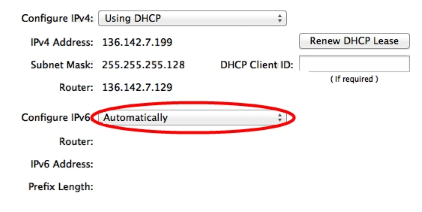
- Under the TCP/IP tab, you’ll see a section for IPv6 with a dropdown menu next to “Configure IPv6.”
- Choose “Automatically” from the options to turn IPv6 back on.
- Your Mac may ask you to enter your network password to make the change. Go ahead and enter your password to confirm the settings.
- Once you’ve selected “Automatically,” your Mac will again use IPv6 to connect to networks and the internet.
How to disable IPv6 in macOS Big Sur Windows?
To disable IPv6 on Mac running macOS Big Sur, you must make a few changes in your Network settings. IPv6 is the next-generation Internet protocol, but some networks and devices still use the older IPv4 protocol. Disabling IPv6 ensures full compatibility.
Open your Network Preferences
Go to the Apple menu > System Preferences and click “Network”. This will open the Network preferences pane where you can view and edit your network settings.
Select your Network Interface
On the left side, select either Wi-Fi, Ethernet or Thunderbolt Ethernet, depending on how your Mac is connected to the network. The options for that network interface will appear on the right side.
Click “Advanced…”
At the bottom of the network interface window, click the “Advanced…” button. This will open advanced options for your network connection.
Uncheck “Enable IPv6”
In the Advanced Network settings, uncheck the box next to “Enable IPv6”. This will disable IPv6 for the selected network interface.
Repeat for Other Network Interfaces
If your Mac uses multiple network interfaces, like Wi-Fi and Ethernet, repeat the steps to disable IPv6 on each interface. This ensures IPv6 is disabled system-wide on your Mac.
networksetup -setv6off Wi-Fi
networksetup -setv6off Ethernet
Check your IPv6 Status
To confirm IPv6 is disabled, open the Terminal app on your Mac and run the command: networksetup -getinfo “Wi-Fi”. Replace “Wi-Fi” with your network interface name. The command should return “IPv6: Off”. If it says “On”, IPv6 is still enabled for that network interface. Repeat the steps to disable it.

Disabling IPv6 may solve network connectivity or compatibility issues with some networks and devices. If you continue to have problems, contact your network administrator or internet service provider for further help. You can also check for IPV6 leakage by performing IPV6 leak test.
How to turn off VPN on Mac?
Turning off your VPN connection on Mac is a straightforward process. Here are the steps to disable your VPN:
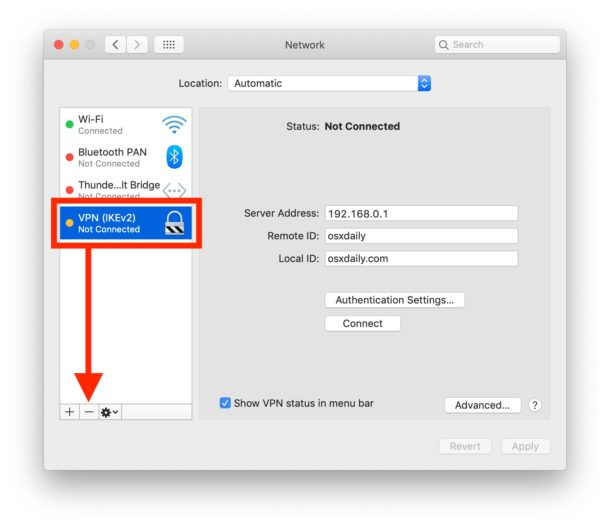
- Go to System Preferences
- Click on Network.
- Select your VPN connection from the left panel.
- Click Disconnect.
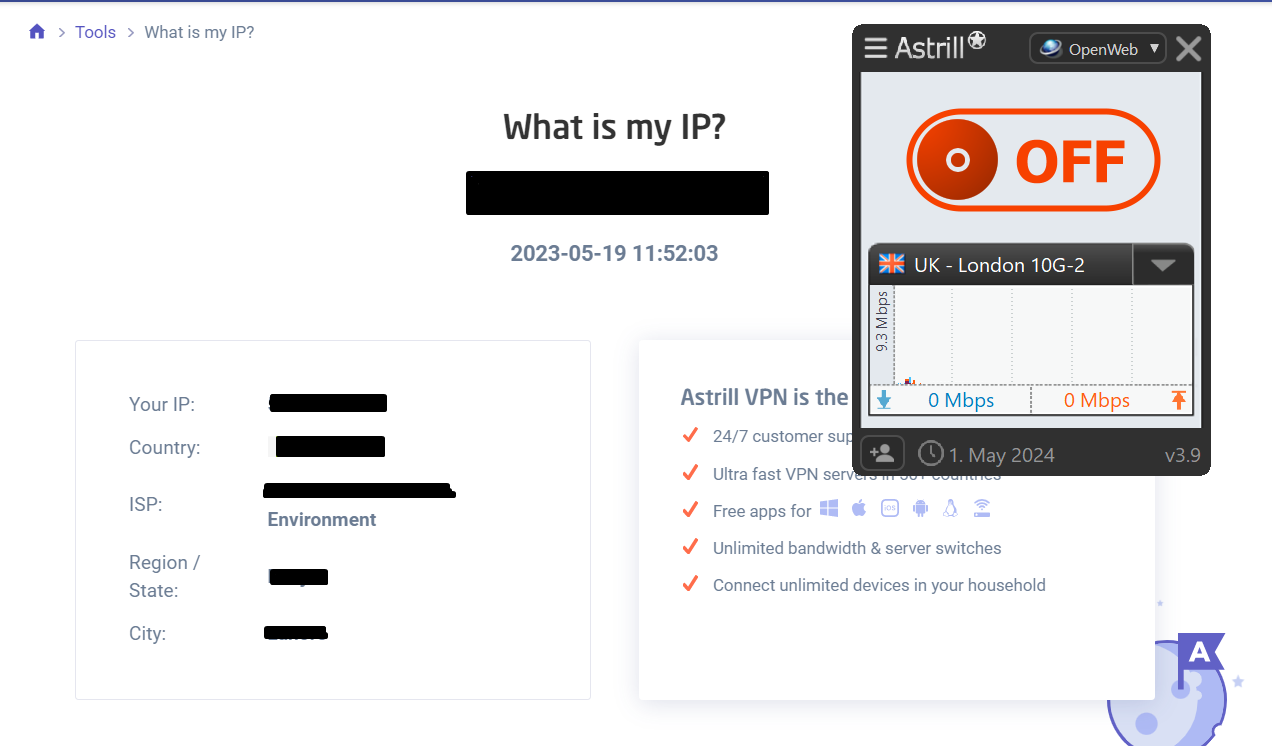
If you have a dedicated AstrillVPN app of MacOS, you can also disable the VPN connection through the app’s interface.
- Open the VPN app and look for a button labeled “Disconnect,” “Turn Off,” or “Disable.
- Click that button to disconnect from the VPN.
Turning off your VPN is a simple process, but following these steps will ensure you have properly disconnected from the VPN server and shut down any VPN apps running on your Mac.
Finding Your Mac’s Network Settings
To disable IPv6 on your Mac, you’ll need to access your network settings. Here’s how to find them:
In System Preferences
The easiest way is to open System Preferences, the hub for all your Mac’s settings.
- Click the Apple menu and select “System Preferences”.
- Select “Network” to open your network settings.
- Alternatively, you can search for “Network” using Spotlight (Cmd+Space) and open the top result.
In Finder
If you prefer, you can also access your network settings through Finder.
- Open a new Finder window.
- Select “Applications” from the sidebar.
- Scroll down to find the “Utilities” folder and open it.
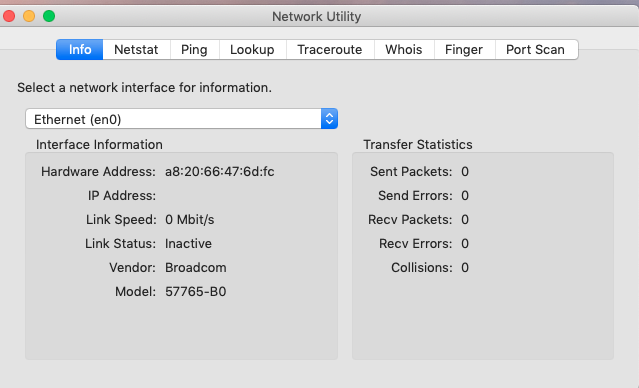
- Inside Utilities, open the “Network Utility” app.
- Select “Network Settings…” from the Window menu to open the same network preference pane.
- The Network Utility app contains additional tools for diagnosing network issues, so this method may be useful if you’re troubleshooting other problems.
Using any of these methods, you’ll gain access to the network settings where you can disable IPv6 and make other changes to your network configuration.
FAQs
No, disabling IPv6 is generally safe. Your Mac will continue functioning normally using IPv4. However, some corporate networks or advanced networking features may require IPv6. You can always re-enable it if needed
Generally no. Research shows IPv6 is actually 40% faster than IPv4 on average. Only disable IPv6 if experiencing specific connectivity issues, not for performance gains
Yes, Mac operating systems support IPv6. In fact, IPv6 is enabled by default on Mac. This means your Mac can connect to networks and websites using either IPv4 or IPv6.
Enabling IPv6 on your Mac will not disable IPv4. Mac supports both IPv4 and IPv6, and will use whichever version is supported by your network and the websites you connect to. Most networks and websites still use IPv4, so your Mac will typically connect using IPv4. However, enabling IPv6 provides additional connectivity options for newer networks and services.
No, a MAC address and an IPv6 address are not the same. A MAC address is a unique identifier, like your Wi-Fi adapter, assigned to a network interface. An IPv6 address is an Internet Protocol address used to identify your device on an IPv6 network. While a device will have the same MAC address no matter what network it joins, its IPv6 address will change based on the network.
Conclusion
While IPv6 is the latest internet protocol and provides some benefits over the older IPv4, it can sometimes cause issues with certain networks and devices. Disabling IPv6 is an easy fix if you’re experiencing connectivity or performance problems. Now you can get back to surfing the web, stream your favorite shows, and do whatever you love online without worries. If you do run into any other network hiccups in the future, you know where to find helpful tips and tricks.

Secure your privacy instantly. Try AstrillVPN with zero risk.
About The Author

No comments were posted yet